Introduction to Drying Sedum
Have you ever considered the timeless charm of dried flowers? Sedums, a spectacular group of succulents, not only offer a range of colors and forms in the garden but also hold a secret—they dry beautifully. It’s like capturing a moment of nature’s splendor, to keep with you throughout the seasons. Whether you’re an adept crafter, seeking new propagation methods, or simply wish to preserve the beauty of your garden, drying sedum can open a window to endless creativity and beauty.
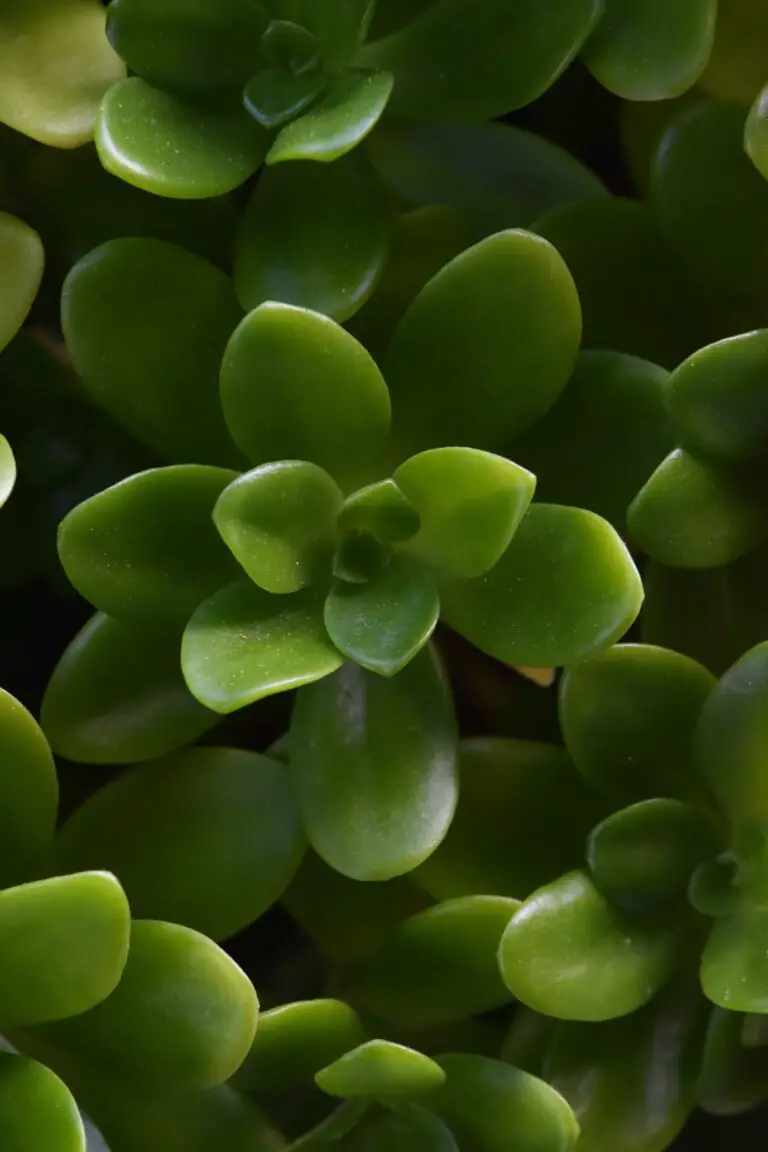
Not all sedums are created equal when it comes to drying. Some species, like the whimsical Sedum spectabile, transition from vibrant living colors to muted tones of vintage charm without losing their structure. Picture this: delicate pink blooms standing strong amidst the winter barrenness, a sort of defiance against the dormant garden around. It’s these real-life manifestations of resilience that make drying sedums so rewarding.
Imagine using these dried treasures in a bouquet, where each carefully preserved bloom tells a story of summer days, buzzing bees, and warm sunshine, now immortalized. Gardeners’ World agrees that sedums are adaptable plants perfect for growing in harsh conditions, which similarly allows them to preserve their form and color when dried.
Engaging in the art of drying sedum isn’t just about holding onto beauty; it’s a practical endeavor too. Many gardeners use dried sedums for propagating new plants. They’re hardy, they’re forgiving, and they can provide new life from their preserved state. Further preserving the magic of these succulents, drying becomes an act of continuation, from one life cycle to the next.
And for those yearning for hands-on adventures, consider this engaging project: cultivating your very own vibrantly hardy sedum tapestry. Enter a world that challenges the conventional notions of gardening, one where beauty thrives in dryness, not despite it.
For anyone who has ever marveled at a sedum’s transformation from a common green facade to a vivid fall display, drying them simply extends that magic. Embrace this sustainable approach to enjoy your favorite succulents year-round. Drying sedum isn’t just an action; it’s an entry into a new realm of botanical appreciation.

Understanding Sedum Varieties
Have you ever wondered if your favorite sedum plants can transition from your garden to take center stage as a dried beauty in your home? Well, you’re in for quite the treat! Let’s explore the diverse world of sedum and figure out which variants are up for the job.
First off, sedum plants come in an array of forms, each with their unique flair. They’re not just a one-size-fits-all; they have personality! From the ground-hugging Sedum acre to the lofty Sedum spectabile, their characteristics profoundly impact how well they handle the drying process. For instance, the thicker-leafed varieties, often nicknamed ‘stonecrop’, have succulent leaves packed with moisture – making them a bit more challenging to dry without turning to mush.
Then we have those delicate-leaved sedums, appearing in clusters like tiny stars, which practically beg to be preserved. Their lightweight structure means faster drying times and a graceful aging process that retains their charming appearance. Imagine having a piece of your autumn garden gracing your shelf all year round! It’s like freezing a moment in time, with your sedum variety maintaining its celestial beauty.
If you want a real-life example of sedum that dries elegantly, turn your gaze to Sedum reflexum, often spotted on the rocky outcrops of garden landscapes. This one’s a proven winner when it comes to withstanding the drying transition. Its needle-like foliage maintains structure, color, and style, even when moisture has left the building.
But what does this all mean for your at-home drying project? While some varieties might give you a tough time and test your patience, others are like faithful friends, making the process effortless. For those thicker-leaved variants, a slower drying method is key to avoiding decomposition. And, make no mistake, there’s a sense of pride that comes with unlocking the preservation potential of each unique type of sedum.
Don’t forget to hop over to our insightful guide on cultivating your own succulent oasis. It’s stuffed with tips that can make even those tricky sedum varieties bend to your preservation will!
Analysing sedum for drying is a delightful challenge, teasing out their secrets is as engaging as it is rewarding. With a bit of know-how and thoughtful selection, drying sedum can be more than just a hobby—it can evolve into an art form. And isn’t that what gardening is all about? Turning our living green companions into timeless tokens of natural beauty; capturing their essence in a way that brings joy, long after the growing season has passed.
Essential Supplies for Drying Sedum
Dying to dry your delightful Sedum but unsure what you need? Fasten your gardening gloves; it’s simpler than you might think! First off, you’ll require a trusty pair of pruning shears. These must be sharp and clean to ensure a clean cut, reducing the risk of damage to your succulent friends. Remember, when cutting stems, aim for a dry day to dodge inviting unwanted moisture to the drying parade. Snip the stems neatly and with confidence, visualizing the dried beauty they’re destined to become.
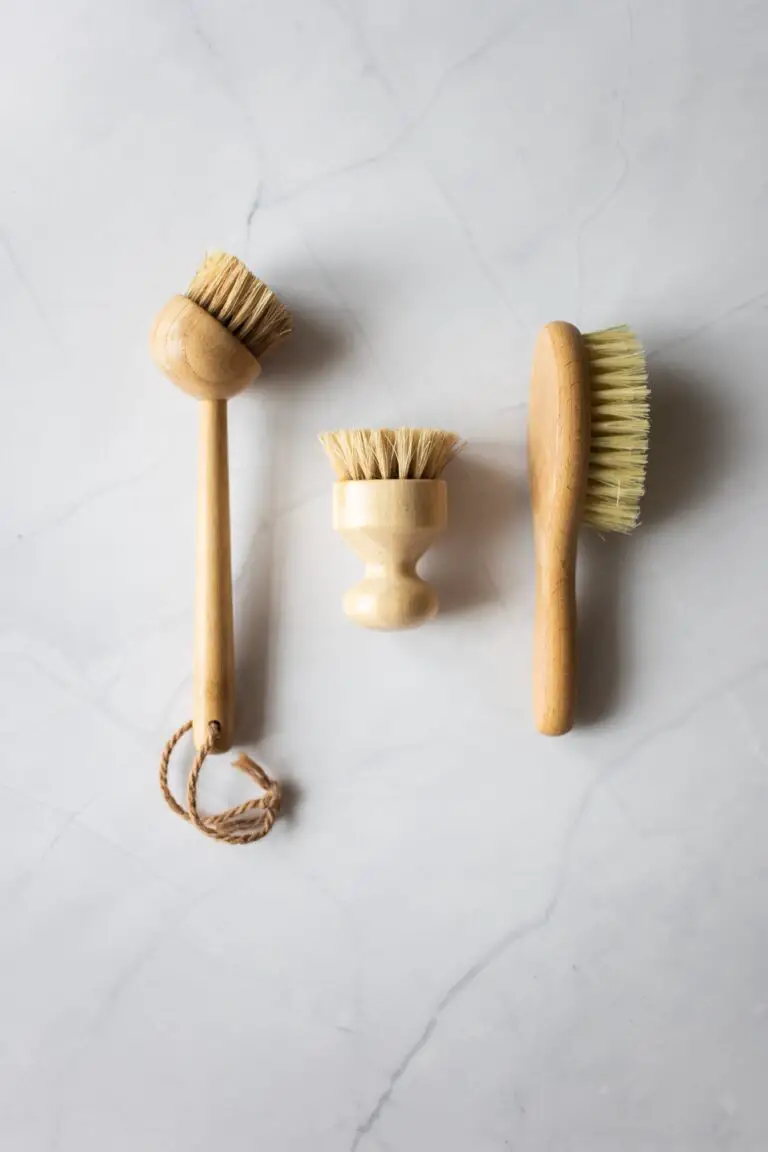
Next up, say hello to mesh racks or screens. Oh, these are not your average kitchen tools; they’re the secret to facilitating good airflow around each sprig of Sedum – crucial for even drying. Arrange the cut stems flat, ensuring none are overlapping, like little sunbathers lined up by a pool, soaking in the dry warmth of your chosen spot.
Where does the magic happen? Ideally, in a dark, dry place away from direct sunlight. Sunshine may seem like your ally, but it’s a deceitful friend that will fade the vibrant hues of your Sedum. A dark room, an attic, or even a closet will serve well as a drying chamber of wonders, following the guidance from experts on Sedum drying techniques.
A touch of whimsy is added with twine. Yes, twine! For those who prefer the hanging method, gather your Sedum stems in small, charming bundles tied off with twine, and suspend them upside down like mystical herbal chandeliers. Allow the air to circulate freely and work its natural magic. While you’re tying knots, think about the joy of having these botanical gems embellishing your space all year round.
For more ideas on keeping your green companions thriving, take a peek at our guide to perfected succulent care routines. And always remember, whether your Sedum sprouts in pots or through cracks in your garden path, preserving their beauty is just a snip and a dry spell away. Happy drying, garden alchemists!
Step-by-Step Guide to Drying Sedum
Are you ready to immortalize the beauty of your sedum with a bit of drying know-how? Perfect, because that’s what I’d love to impart to you today. The dazzling variety of sedums, those resilient succulents, can retain their charm even when dried, making them an exuberant addition to any dried bouquet or craft project. Let’s dive into the different techniques to preserve these succulent wonders!
Technique 1: Air Drying is a Breeze
Arguably the simplest way to dry sedum is to let nature do its thing. Start by cutting sedum in small bunches during a dry, sunny day—this ensures they have less moisture. Tie them at the stems and hang them upside down in a warm, dry place with good air circulation. A dark place is best to prevent fading. Picture hanging your laundry to dry but with a more delightful outcome. It usually takes about 2 to 3 weeks, and voilà, perfectly dry sedum that maintains its shape and color!
Technique 2: Desiccants for the Detail-Oriented
If you’re seeking to preserve more than just the form—say the color and minute details—desiccants like silica gel can be your best friend. Bury your sedum flowers and leaves in a container of silica gel, which will absorb the moisture without distortion. Check periodically, and once you feel they’re crisp and moisture-free, you’ve nailed it. Remember to handle them with care; they become quite fragile after this process.
Technique 3: The Press Method for Flatter Beauties
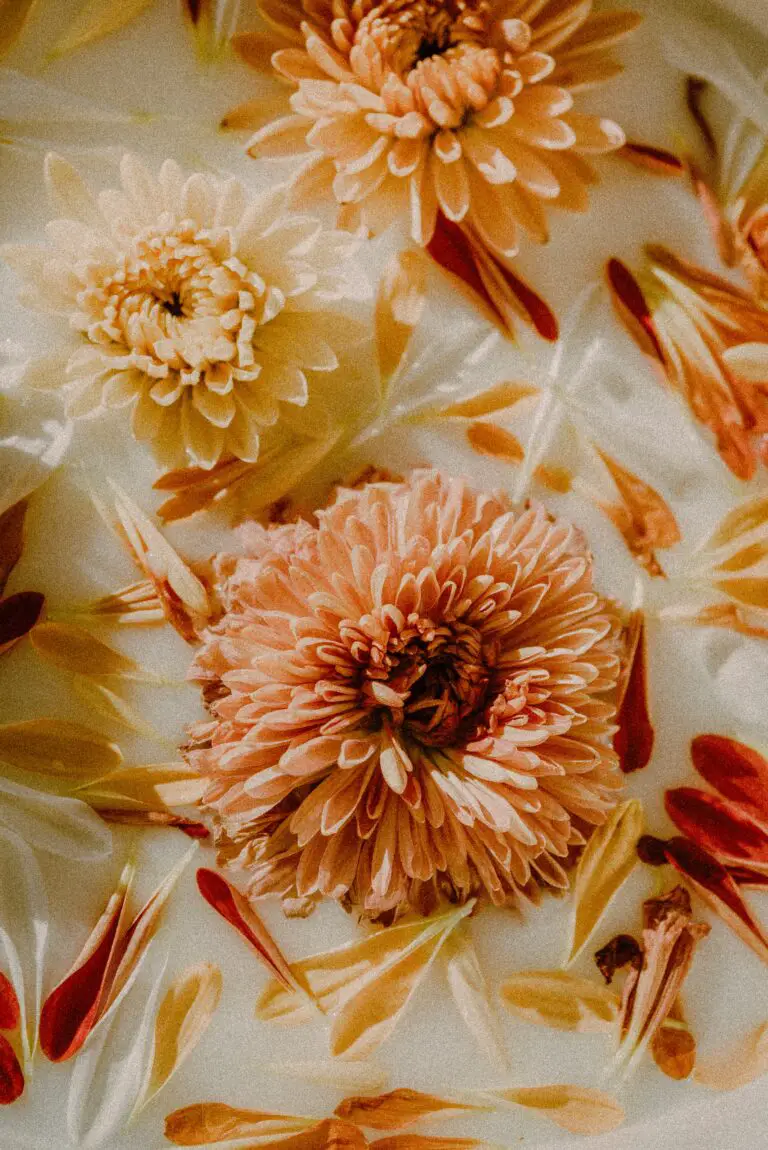
Turning the three-dimensional splendor of sedum into a two-dimensional art form? Pressing is an age-old technique favored by many a plant enthusiast. Position your sedum between two sheets of absorbent paper, and place inside a heavy book or press for several weeks. With this method, the sedum flattens out and creates elegant, papery specimens perfect for framed botanical art or bookmarks.
Throughout all these methods, there’s a common thread: patience. Drying sedum is not a hurried process, so take it slow and savor the satisfaction of creating enduring natural beauty. Each sedum you dry will carry its own story, like the one I placed in my journal, marking a sunny expedition in the hills, now forever preserved in crisp, subtle color.
Whether you choose to air dry, use desiccants, or opt for the press method, remember that each technique can produce uniquely stunning results. By mastering these methods, you’ll be able to transform your sedum collection into a trove of everlasting treasures. Happy drying!
Troubleshooting Common Drying Issues
When you’re enthusiastic about preserving the beauty of sedum, the drying process can throw a few curveballs your way. Fret not! We’re here to tackle some usual suspects: mold, discoloration, and wilting. With our tips, you can nip these issues in the bud and keep your sedum looking spectacular!
Ward Off Wicked Mold
First off, let’s address the mold factor. Imagine you’ve carefully arranged your sedum to dry, only to find it sporting unsightly mold a few days later. This happens when moisture lingers like an unwanted guest. To prevent mold, ensure your sedum is thoroughly dry before the preservation process. A well-ventilated area is your best ally. Think about those breezy, sunny spots in your home where the air just dances around—perfect for banishing dampness!
Fade to Grey? Not Today!
Ever admired the vibrant hues of your sedum, only to watch them fade away to a lackluster grey? Discoloration can be downright disheartening. But guess what? You can maintain that pop of color by drying your sedum in the dark. Yes, sunlight can bleach those gorgeous colors over time. Try tucking them away in a dark, dry place and watch the original colors cling on for dear life!
Wilting Woes
Wilting can take the wind out of your sailing sedum dreams. It’s like watching your perky plants turn into a botanical frown. To curb wilting, it’s all about timing. Harvest your sedum right when it blooms at peak perfection. The sturdier stems will stand up to the drying process like champions, remaining perky and proud!
Remember, achieving that perfect dry sedum might not happen overnight. Keep these tips handy, and if you hit a snag, just refer back to us. With a little TLC and the right know-how, your sedum will be just as stunning as the day you plucked it from the garden. Now, let’s make your succulent dreams a long-lasting reality!
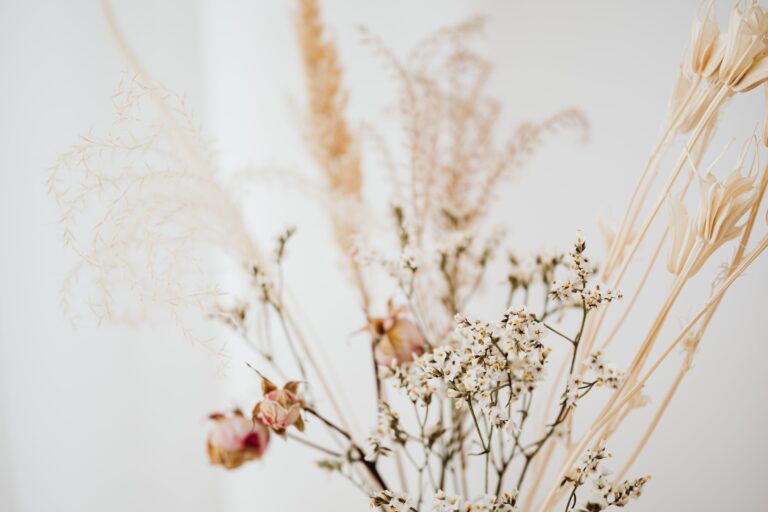
Creative Uses for Dried Sedum
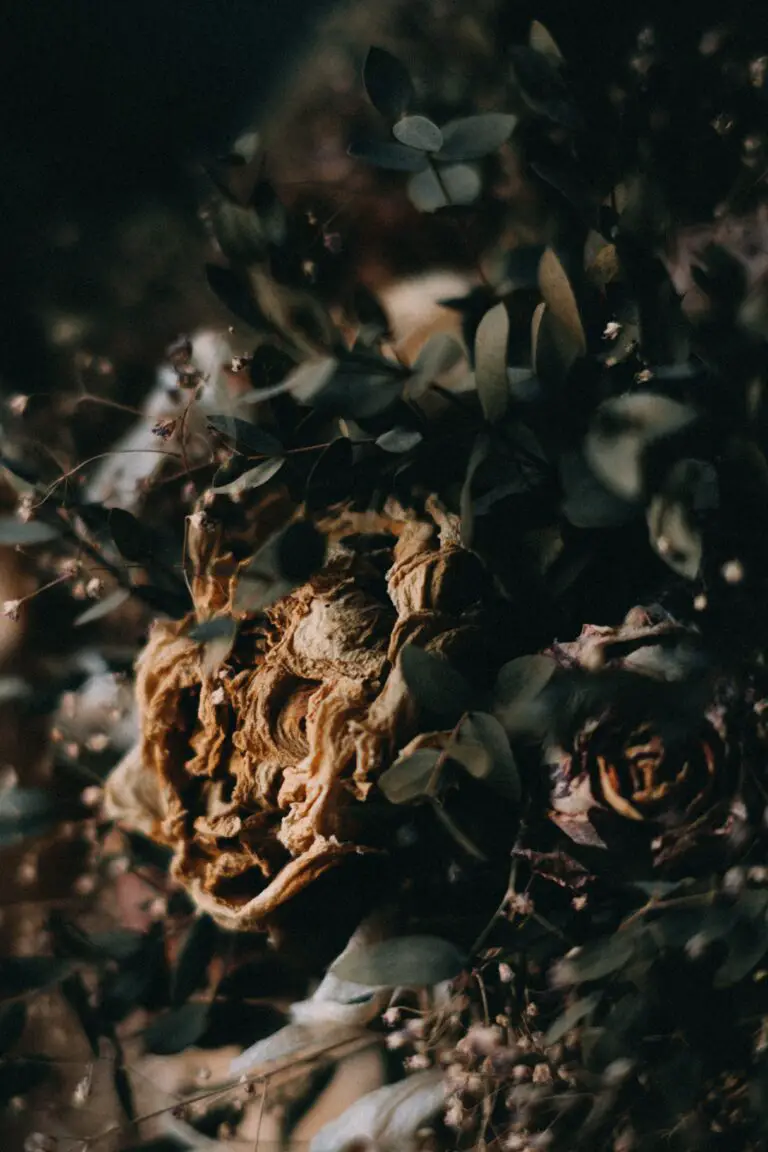
Dried sedum isn’t just a remnant of your summer garden; it’s a versatile, creative element that can be woven into the fabric of your home decor and artistic ventures. Imagine turning those robust succulent clusters into decorative items that capture the simplistic beauty of nature. Here’s how to transform your dried sedum into delightful enhancements for your home.
Start with wall art. Picture a naturalistic mosaic, a collective of dried sedum heads meticulously arranged in a reclaimed wooden frame. It’s not only an eco-chic statement but a testament to the timeless allure of nature’s geometry. Each rosette—with its spiral pattern—is a snapshot of the Fibonacci sequence, turning your DIY project into a conversation starter.
Gifts from the Garden
When it comes to gifting, why not put a piece of your garden in your loved ones’ hands? Craft personal terrariums using glass orbs or vintage lanterns, layering pebbles, sandy soil, and your dried sedum. It’s a mindful, soothing present that brings a touch of greenery to any indoor setting.
Table settings are equally enchanting with sedum. Imagine delicately placing dried sedum sprigs on crisp linen napkins, an elegant nod to Mother Nature at your next dinner party. Or, take your festive decorations to the next level by accenting your holiday wreaths with the dessicated rosettes, blending the traditional with a hint of desert charm.
Reviving Your Living Spaces
Let’s not forget the personal spaces where we unwind and find serenity. A dried sedum bouquet can breathe new life into that ignored corner of the room. Its muted tones and intricate textures provide subtle, yet impactful visual interest without overwhelming the space. For a sweet touch of whimsy, drape a string of sedum across your bedroom headboard or mirror, and watch the space transform.
And for the ultimate artistic collaboration, why not try your hand at creating a sedum mandala? By placing dried sedum pieces in circular patterns on a canvas or tabletop, you engage in a meditative practice that culminates in a stunning, organic masterpiece—perfect for adding a calming element to your home or workspace.
Now that you’re brimming with ideas on how to repurpose your sedum, check out this video for more inspiration and tips on how to dry and use sedum in your decor projects.
Caring for Dried Sedum Arrangements
Transforming your verdant sedum into a lasting piece of floral art is not only about the drying process; it’s equally about the care that goes into preserving their delicate beauty once they’re dried. To keep these succulent treasures looking as fresh as the day you plucked them from your garden, let’s delve into the cradle-to-grave care of your dried sedum arrangements.
Storage Solutions: Keeping Your Sedum Safe
The secret of perpetuating the vibrance of dried sedum lies in storage. Think of your dried sedum like a timeless piece of art, something that requires the right environment to maintain its allure. Keep them in a dry place, away from the harshness of direct sunlight which can bleach out the colors quicker than you can say “perennials.” Humidity is the arch-enemy of your dried botanicals, so consider storing them with silica packets that whisk away any excess moisture from the air.
The Gentle Touch: Handling with Care
When it comes to handling your dried sedum, think of them as the pages of an ancient, treasured manuscript – always with gentleness and reverence. Even though they have transformed into a resilient form, they’re still susceptible to damage. When you’re rearranging or transporting them, support the base of the stem. This is where they hold most of their strength now that the water has been kissed away by the passage of time.
Displaying with Style: Show Off Your Sedum
Your dried sedum isn’t just a keepsake, it’s a showpiece! Place them in an area that invites conversation but dodge spots where they’d have to wrestle against active air vents or frequent passersby. A rustic vase can enhance their charm, giving your room a touch of whimsical reminiscence. Mix them up with other dried florals or let them stand alone, boldly stating their stoic beauty. Occasionally rotate the arrangement to distribute exposure evenly and keep them looking balanced and full from all angles.
Now, imagine your guests marveling at a centerpiece of perfectly preserved sedum. Taking these steps will ensure that your dried sedum arrangements remain evocative and arresting, an echo of summer’s abundance throughout the year.
Expanding Your Garden: Sedum Propagation from Dried Plants
Think dried sedum is at the end of its life cycle? Think again! These resilient succulents have more to offer, even when they seem past their prime. In the world of propagation, dried sedum can be the unexpected hero, providing the means to grow new vibrant plants. Let’s dive into the intriguing process of propagating sedum from dried cuttings or leaves, which can not only expand your garden but also serve as an exciting project for gardening enthusiasts.
The magic begins with a seemingly lifeless dried sedum cutting. But within those parched stems and leaves lie dormant cells, just waiting for the right conditions to spring back to life. By carefully selecting a few dried cuttings from your existing sedum plants, you could be on your way to cultivating new growths. Picture it: one day you’re looking at a dry bundle of sedum, and before you know it, tiny green shoots start to emerge. It’s like a botanical phoenix rising from the ashes!
Now, let’s talk technique. Take your dried sedum cuttings and place them on well-draining soil. Moisture is vital, but too much water is a propagation pitfall you’ll want to avoid—so aim for a ‘Goldilocks’ amount, just enough to keep the soil lightly damp. Position them in a spot where they get plenty of indirect sunlight. With patience and just a bit of nurturing, those brittle fragments will begin to root, unlocking the door to new sedum life.
One of the greatest joys of this process is witnessing the transformation. It’s not uncommon to hear success stories of dried-out sedum leaves that were almost tossed in the compost, only to become lush, full-fledged plants. Real-life examples abound where a single leaf, left to dry on a windowsill, eventually develops roots and sprouts an entirely new sedum. It’s a potent reminder that in the realm of botany, life finds a way—even in the driest of circumstances.
Envision this scene: rows of dried sedum cuttings lined up, like a botanical assembly line, each on the verge of becoming a new creation. This isn’t just horticulture; it’s a life lesson that teaches us about resilience, potential, and the continuous cycle of growth.

As we wrap up this section, remember that the sedum in your garden is more than just a passive beauty—it’s a living repository of potential. With dried sedum, you have the power to propagate an army of plants, ready to beautify your garden and bring you the unparalleled satisfaction of knowing that you’ve fostered new life from the unlikeliest of sources.
Frequently Asked Questions
When it comes to the beautiful and versatile sedum plant, gardeners and hobbyists often wonder about the preservation process. Well, you’re not alone in your curiosity! There’s a treasure trove of knowledge when it comes to drying sedums, and we’re here to unveil those secrets. So, let’s dive into some of the most commonly asked questions about drying sedum and keep those succulent beauties thriving all year round!
Can You Really Dry Sedum?
Indeed you can! Dried sedum can be a stunner in your dried flower collection. Imagine creating a gorgeous, everlasting bouquet that requires zero upkeep. Let’s talk about someone who achieved just that. Take Clara, for instance, an avid DIY craft enthusiast. She picked her sedums at the peak of their bloom and let them dry out naturally in her warm, airy attic. The result? A beautiful, rustically elegant centerpiece that’s still the talk of her dinner parties months later!
What’s the Best Way to Dry Sedum?
The best way to dry sedum is by the air-drying method. This technique preserves the form and color of your plants without too much fuss. Gather your sedums, tie them into small bunches, and hang them upside down in a dry, well-ventilated area away from direct sunlight. Patience is key here, as it may take a few weeks for them to dry completely. Just like when Lucas tried drying his sedum for the first time – he checked on them every day, and on the third week, his patience was rewarded with perfectly dried sprigs perfect for his homemade potpourri!

Will the Color of My Sedum Change After Drying?
Color changes are to be expected in the drying process. While sedum may lose some of its vibrant hues, it takes on an array of warm, earthy tones that have a charm all of their own. Take a leaf out of Maya’s book – she mixed dried sedum with bright dried flowers, creating an array of textures and colors that brightened up her living space even in the dead of winter.
As you can see, drying sedum is not just possible; it’s a delightful project that can add a touch of evergreen charm to your home décor or craft projects. By understanding the process and taking note of the experiences of others, you too can enjoy the rustic beauty of dried succulents. And remember, if you have any more questions, we’re always here to help!
Conclusion: The Endless Possibilities with Dried Sedum
Have you ever wondered, “Can I dry sedum?” The truth is, not only can you dry sedum, but doing so unlocks a world of crafts and decorations that merge effortless natural beauty with creative expression. Drying sedum is a straightforward process, yet it offers an exciting artistic outlet with results that are as practical as they are appealing.
Picture this: vibrant sedum wreaths on doors, dainty sedum bouquets gracing your dining table, or even a collection of rustic sedum arrangements enhancing the ambience of your living space. These real-life examples are a testament to the versatility of dried sedum in home decor. What’s more, by drying these hardy succulents, you extend their life, allowing you to enjoy their beauty long after the growing season has ended.
The benefits of working with dried sedum are numerous. They require no maintenance, they retain their color beautifully, and they add a touch of nature to any environment. So why not start experimenting with sedum today? Grab a few stems from your garden, follow the simple drying techniques, and let your creativity take over. Whether you’re an experienced crafter or new to the world of DIY projects, the simplicity of the process paired with the potential for imaginative designs makes working with dried sedum thoroughly enjoyable.
Incorporate dried sedum into handmade gifts, use them as teaching tools for children’s botany projects, or simply enjoy the pleasure of crafting something beautiful with your own hands. Whatever your interest, drying sedum invites you to explore, innovate, and admire the perennial charm of these succulent treasures.
Start Your Dried Sedum Adventure
Today is the perfect day to begin your journey with dried sedum. All it takes are a few snips, some patience, and a dash of imagination to transform these succulents into everlasting ornaments. Encourage your friends, inspire family members, or set aside some personal time to delve into the endless possibilities that dried sedum affords.