Introduction to Sedum Transplantation
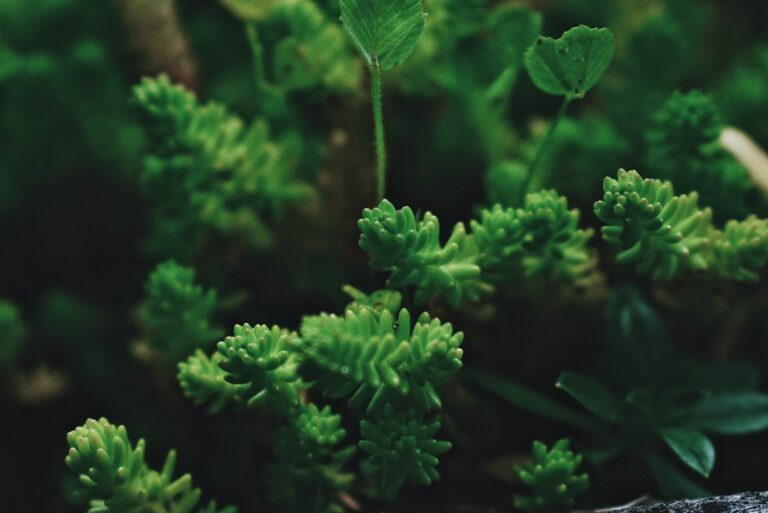
When it comes to the lush world of succulents, sedum stands out with its captivating forms and ease of care. Yet, even these hardy plants can face a challenge when it’s time to change locations, especially during the sizzling days of summer. The key to a successful move lies in the art and science of sedum transplantation, a topic we delve into here with enthusiasm and expertise.
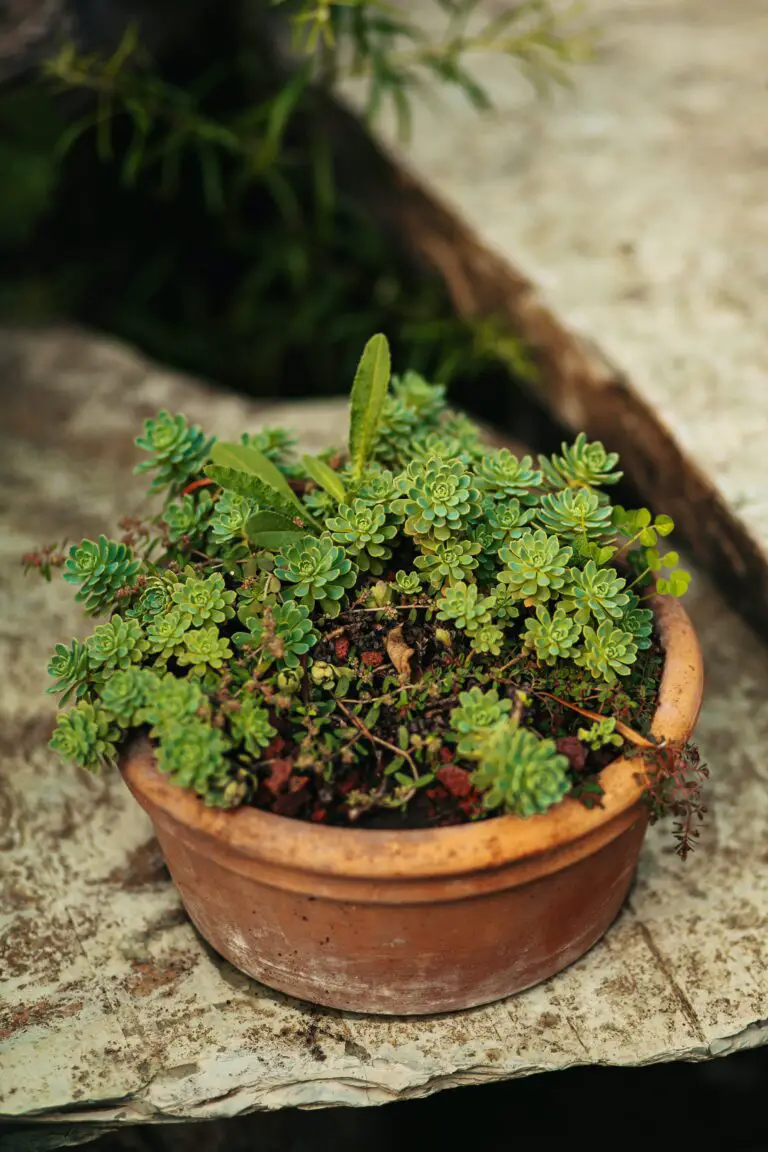
Sedums, with their plump, water-storing leaves, are the perfect candidate for a hot summer’s day project. Picture this: it’s a scorching July afternoon, and you decide that your ‘Autumn Joy’ needs a new home in your garden. With a spade in one hand and a watering can in the other, you ponder the best approach. Fear not, for transplanting sedum in summer can be a thrilling and successful endeavor if done properly!
The stakes are high, yet with a careful touch and the right knowledge, your sedums can thrive. Understanding the nuances of the task—soil preferences, sun exposure, water requirements—is paramount. These resilient beauties are not just about survival; they’re about flourishing in their new territory. Take a peek at this video that demonstrates just how straightforward and rewarding transplanting these succulents can be.
To enhance your sedum’s chances of a triumphant transition, do immerse yourself in the profound insights from our guide on sedum care. This rich resource offers wisdom beyond transplantation, encompassing the full spectrum of nurturing these diverse and delightful plants.
Remember, when summer’s warmth embraces your garden, it’s not just about whether you can move your sedum—it’s about how to do it with finesse. Armed with the right techniques, your sedum won’t just move; it will leap into its new home with zest, ready to capture the essence of summer right where it is planted.
Assessing the Right Time to Move Sedum
Timing is everything, especially when it comes to transplanting your steadfast sedum. It’s like trying to nail the perfect moment to take a dip in the ocean on a sizzling summer day—you want that refreshing plunge without the sunburn. Similarly, your sedum’s successful move depends on hitting the sweet spot in its yearly cycle. Let’s talk dormancy and dive into why that’s the golden ticket for your green buddy.
Imagine your sedum as a bear hibernating through winter or summer heat. During these dormancy periods, it’s conserving energy, which in plant language means “I’m ready for change.” That’s when you step in. However, in this context, we’re scrutinizing summer moves. The sun’s at its zenith, the soil’s like warm butter, and you wonder, can you make the transplant happen? Well, sedum, with its plump foliage and tenacious spirit, might just tough it out.

Your climate zone has got a major role in this drama. If you’re basking under the Mediterranean bliss or nestled in the cool embrace of the north, the rules shift. In peak summer, scorching zones demand a wait-it-out approach, while milder regions might give you the thumbs up. Want hyper-local advice? This article breaks down the nuances like an oracle, tailoring wisdom to your sedum’s doorstep.
It’s not just about when, but how. A good soak the day before, a cloudy forecast, and a quick hand at the helm will see your sedum ship sail smoothly into new seas. For more insights, cast an eye over this in-depth look at sedum varieties. It’s brimming with tips, like checking your calendar twice before you set the transplant date.
Here’s the real-life example you crave—think of your sedum like an athlete preparing for a race. It needs to be in top shape (out of dormancy), hydrated (predrench that soil!), and the weather conditions (cool, overcast is ideal) have to align like stars. Now swap the starting gun for a shovel, and you’re in business. Just don’t rush it; let the plant acclimatize, like a runner catching their breath after the sprint.
Assess, prepare, and execute. The sedum can handle the drama of a summer move if you’re reading the cues and playing director with a keen eye. And remember, while summer’s glow beckons, it’s your call to wait for the encore when the curtain of heat draws back.
Preparing Your Sedum for the Move
So, you’re ready to relocate your precious sedum this summer? Great! But, let’s not jump the gun. To make this a smooth transition for your leafy friend, a bit of preparation is in order. We’re talking about the full VIP treatment: acclimatization, primo soil prep, and the works! After all, we want to minimize the dreaded transplant shock that can make your sedum sulk.
First things first, let’s talk acclimatization. Think of it like this, if you moved from a cushy indoor life to a blistering desert or a rainforest, you’d be in for a shock, right? Your sedum feels the same. You have to ease it into the great outdoors. If you’re scratching your head, wondering how to do that, don’t fret! Check out this helpful guide for tips on getting your sedum used to its new environment.
Next up, soil. It’s not just dirt; it’s the wonderland where your sedum’s roots will spread and soak up all the good stuff. Give it a place it can’t resist by amending the soil with some organic matter — think of it as a nutritious welcome basket for your sedum’s roots. And while you’re doing that, ensure the new site is like Sedum Central – a spot with the perfect mix of sunshine and well-drained soil.
Now, on to the roots. Before you move your sedum, give it a good drink; hydrating those roots is like giving them a protective shield. And when you dig it up, be gentle as a summer breeze. Try to keep as much of the root ball intact as possible to avoid those silent screams of root distress. Imagine relocating with all your belongings packed securely — that’s what your sedum wants too!
Still wondering about the best spots for your other green companions? Our guide on thriving succulent care can usher you into the world of perfect plant placement.
And, because we’re all about that extra mile, here’s a real-life story for you. Picture a friend of mine, let’s call her Green Thumbs Gina. She moved her sprawling sedum from a cramped balcony to her sun-kissed garden. By following these steps, her plant didn’t just survive; it thrived — sprouting faster than a rabbit in a veggie patch!
Remember, moving sedum in summer is not a dash to the finish line. It’s a mindful stroll through the garden of preparation. So, take it step by step, like Gina, and your sedum will be living its best life in its new spot in no time.
Transplanting Techniques for Sedum
Got a green thumb itching to move your sedum to a new locale even though the summer sun is high? You’re in luck! Moving these succulent stunners can be a breeze with a bit of know-how. Let’s roll up our sleeves and dive into the nitty-gritty of sedum shuffling done right.
First, snatch your trusty shovel, and let’s talk technique. Picture this: It’s a bright summer day, and your sedum cluster is thriving, but you’ve got a perfect new spot picked out. Your mission—should you choose to accept it—entails a gentle excavation. You’ll want to dig a comfortable berth around the plant, giving the root ball ample berth. Think of it as drawing a moat around a green-crowned castle, guarding it from the siege of your garden spade.
When you lift your sedum, hold it like the treasure it is—carefully around the root ball. This isn’t the time for a bear hug; it’s more like cradling a delicate heirloom vase. Transport it to its new kingdom – a well-prepped hole that’s just the right fit. Imagine moving a precious gem from one velvet box to another, and you’ve got the idea.

Success in sedum transplanting is all about the aftercare. Think of it as a plant spa moment. Let’s pamper these succulents with a soothing drink of water and a blanket of mulch to help them settle in. No need for a power ballad as they savor their new surroundings, but a gentle pat on the soil and some encouraging words wouldn’t hurt.
Remember, timing is everything when it comes to transplanting. If the summer heat is scorching, choose a cooler moment, perhaps when the sun is less fierce. Just like us, plants appreciate moving day without the added stress of a sweltering heatwave. With a proper good-bye to their old home and a warm welcome to the new, your sedums will be singing your praises all season long!
Post-Transplant Sedum Care
Packed up and replanted, your sedum’s in new ground smack in the summer’s hug. What now? You’ve done the hard part, but this is when your green thumb really gets tested. The first few weeks post-transplant are critical, so let’s give that sedum the spa treatment it deserves to thrive in its new digs!
Let’s talk H2O first. The “soak and dry” method is your best bud here. Shortly after transplanting, give your sedum a hearty gulp of water—think of it like a welcome drink. But hold your horses—don’t water it again until that soil feels dry. Too much love in the form of water and you’ll end up suffocating those roots.
When it comes to sunbathing, sedums are the sun-worshippers of the plant world. But after the big move, they might need a little shade to avoid a sunburn. Think about it like wearing a hat on a beach day—it’s all about protection. Gradually reintroduce them to full sunlight over a week or two to avoid stressing them out.
Fertilizer? Not right away, champ. Your sedum is trying to settle in, and blasting it with nutrients is like forcing it to run a marathon after moving house. Give it a few weeks to catch its breath before you even think about fertilizers. Trust me, patience pays off.
And let’s not forget the watchful eye. Keep an eye out for signs of stress: wilting leaves, discoloration, and check under the leaves too—pests love a plant on the mend. Catching issues early means you can nip them in the bud before they become big woes.
Here’s a snapshot of a sedum enjoying some TLC post-transplant. Remember, this could be your plant thriving with the right care!
So there you have it—water wisely, help it acclimate to the sun, pause on the food, and be a plant detective. Here’s to your sedum flourishing in the summer sun!
Common Pitfalls and How to Avoid Them
Ever experienced that sinking feeling after moving your beloved sedum, just to watch it wither in the scorching summer sun? You’re not alone. Transplanting during the warmest season comes with a unique set of challenges, and succumbing to these common pitfalls can leave your plants wilting, root rotting, and you, well, sweating over the loss. So, let’s dive into the dos and don’ts to ensure your sedum’s story isn’t a sob story.
Mistake #1: Ignoring the Signs of Stress
We’ve all seen it – a sedum that looks more like it’s been on a sunbed than in the soil. It’s the first sign of transplant shock. Often, we move plants based on our schedule, not theirs. Before the big move, check for signs like drooping leaves or dry soil. Tackle these first by watering your plant and waiting for a cooler part of the day. Your sedum will thank you with a perky posture.
Mistake #2: Forgetting to Acclimate
Imagine moving from Iceland to the Bahamas in one day – shocking, right? That’s how your sedum feels if it’s not acclimated. Before relocating it from a shaded spot to full sun, introduce it gradually over a week. Just like your first day on the beach, a little sun goes a long way.
Mistake #3: Overwatering Post-Transplant
Water is life, but too much of it can cause root rot faster than your ice melts on a hot day. The key is watering just right. Ensure your soil drains well and resist the urge to drown your plant in affection. Thirsty? Yes. Flooded? No, thank you.
Now, let’s take a visual break and sink our eyes into some practical demonstrations. Check out this video to see how to lovingly transplant your sedum during the summer months.
Mistake #4: Neglecting the Roots
Roots are the hidden heroes of your sedum. Damage them, and you’re in for a world of hurt. During the transplant, handle the root ball with the gentleness of a butterfly’s landing. Place it in its new home delicately, like tucking in a child. Oh, and make sure the hole is prepped and welcoming – think spa day, not a tough mudder challenge.
Mistake #5: Ignoring the Forecast
Last but not least, who can predict the weather? Well, weather forecasters, but gardeners should too, especially before moving plants. A heatwave post-transplant? That’s like running a marathon after donating blood. Check the forecasts for a cooler spell, giving your sedum a smooth transition to its new digs.
Steering clear of these missteps will turn your gardening tale into one of triumph rather than tragedy. Remember, sedum is resilient, but even the toughest of us need a little TLC, especially when on the move.
Ensuring Sedum Recovery and Growth
Transplanting sedum during the summer can be a bit of a gardening gamble – after all, the sizzling season isn’t always forgiving to relocated plants! But don’t sweat it; with the right care, you can ensure your sedum thrives in its new digs. Let’s dig into the secrets of summer sedum success!
Imagine your sedum as a summertime settler moving to a new homestead. Just like humans, sedum needs a little time to adjust to its surroundings. First things first, ensure your sedum gets a generous sip of water – not too much, just enough to quench its thirst without leaving it waterlogged. Think of it like giving a cool drink to a friend on a hot day: refreshing but not overwhelming.
Now, let’s talk about the sunshine. Sedum loves basking in the sun, but after a move, it might need a little shade to prevent sunburn while it establishes roots. Employ a sunhat for your plant – use a temporary screen or a taller plant to provide some much-needed reprieve. It’s like using an umbrella at the beach, letting it enjoy the summer vibes without turning into a crispy critter.
When the heat is on, mulching is like the air conditioning for your sedum’s roots. A nice layer of organic mulch will help keep the soil temperature stable and retain moisture, creating a cozy environment for your plant to thrive in. It’s akin to lying on a comfy hammock in the shade while the breeze cools you down.
Patiently wait for the magic to happen. Over the next few weeks to months, your sedum will start to show signs of new growth – little green shoots stretching out like arms after a good nap. Don’t rush it; every plant has its own pace. It’s like waiting for your favorite fruit to ripen – oh, the anticipation!
With these nurturing tips, you’ll see your sedum not just survive but flourish, fully embracing its new location as if it’s always been there. So, roll up your sleeves and get ready to provide some TLC to your summertime sedum – your green thumb will be rewarded with a lush, vibrant plant that adds a touch of nature’s beauty to your outdoor space.
Frequently Asked Questions
Is it Safe to Move Sedum During the Summer Months?
While sedum plants are quite resilient and can often withstand a variety of conditions, it’s generally advised to avoid transplanting them in the full swing of summer. The intense heat and strong sunlight can stress the plants, especially as they try to establish themselves in a new location. If you’re absolutely set on moving your sedum in summer, aim for a cloudy day or late afternoon to reduce the shock.
How Can I Ensure My Sedum Survives the Move?
To boost your sedum’s chance of success, make sure to prepare the new site with ample organic matter and ensure that it has good drainage to prevent root rot. Consider a mild root stimulant to encourage growth, but be gentle—sedum roots are hardy yet delicate during the transplanting process.
Can I Cut Back My Sedum Before Transplanting in Summer?
Trimming sedum can be helpful before a summer move, as it reduces the amount of foliage the roots need to support. Just remember to leave enough growth to enable photosynthesis and nourishment to the plant. A rough guideline is to trim no more than one-third of the plant’s total height.
Real-Life Example: Summer Transplant Success
Take the case of Sarah from Maine, who successfully transplanted her ‘Autumn Joy’ sedum one hot July. She made sure to water the plant deeply the day before and moved it during the late afternoon. Her careful preparation and timing allowed her sedum to thrive and bloom spectacularly by fall.
What Are the Signs of Transplant Shock in Sedum?
After moving your sedum, keep an eye out for wilting, discolored, or drooping leaves—common signs of transplant shock. If these symptoms appear, provide shade and keep the soil consistently moist (but not waterlogged) to help the plant recover.
Final Thoughts on Moving Sedum in Summer
In conclusion, while moving sedum in summer is risky, it’s not impossible. Smart preparation, the right timing, and gentle handling are your best friends in this delicate gardening endeavor. Monitor your sedum closely after the move, and with a bit of luck and care, you’ll have a happy, healthy sedum gracing your garden space.