Introduction to Sedum Transplantation
Wondering if the time is right to give your sedum a new home in the garden? Let’s dig into the when, why, and how of transplanting these hardy succulents. Before you grab your gardening gloves, take a moment to assess a few key factors that could mean the difference between a struggling plant and a flourishing one.
Seasonal timing plays a significant role in successfully transplanting sedum. As a rule of thumb, early spring or late summer are the golden windows for sedum transplantation. This timing coincides with mild weather and gives the plants a chance to settle in before extreme temperatures hit—whether it’s the summer’s scorching heat or the winter’s biting cold.
Speaking of weather conditions, it’s not just about the season. You’re looking for that sweet spot of environment – a day that’s not too sunny, and not too windy, which can lead to rapid moisture loss. A cloudy day, gentle on your sedums, will aid in preserving the all-important moisture balance as they acclimate to their new surroundings.
Now, let’s consider the natural growth cycle of sedums. These plants are survivors, known for their ability to thrive in challenging conditions. Yet, even the tough need a gentle touch at times. When transplanting, aim for a time when the sedum is in an active growth phase; this is when the plant can best handle the stress of moving and can quickly establish new roots in its new locale.
As you contemplate the move, it’s helpful to reflect on the resilience and versatility of sedums. Whether you’re using them to adorn a rock garden or to create a vibrant ground cover, understanding their growth habits and preferences is key to a successful transplant.
With careful consideration of these conditions, you can enjoy the dynamism and diversity that sedums bring to your garden space. Are you picturing it yet? Your sedum, happy and flourishing in its new spot, as if it’s always been a part of your garden tableau. Yes, timing is everything, but so is understanding the nature of these robust plants.

Determining the Ideal Time for Transplanting
Feeling uncertain about when to give your sedum a new home? Let’s cut through the confusion and pinpoint the perfect transplanting time! Timing is crucial, and it revolves around a couple of key factors. Firstly, we must respect the plant’s dormancy period. You wouldn’t want to wake a sleeping bear, and similarly, it’s best to let sedum rest during its dormant phase. When new growth whispers the arrival of spring, that’s your cue! This window of opportunity aligns with the plant’s natural cycle, setting the stage for a successful move.
Now, let’s talk climate, because your local weather patterns play a big role too. If you’re nestled in a zone with frosty toes, you’d want to wait until the last ice-kissed mornings fade. However, for those basking in year-round warmth, the cool season is ideal. It’s like choosing the right moment to jump into double dutch — get the timing right and it’s smooth swinging from there!
Imagine you’re a sedum in your crowded pot, roots all bunched up like commuters in rush hour. Transplanting gives you space to stretch, breathe, and flourish — much like when you finally step off that packed train onto a serene platform. Check out this helpful guide to grasp the nuances of sedum’s relocation timeline.
Real-life examples? Gardeners in the Midwest might circle late March on their calendars, just after Saint Patrick’s Day parades clear the streets. Meanwhile, in Southern gardens, Valentine’s Day might see more than just love in the air; it could also herald sedum transplant season. Just picture your sedum collection as a flower bed version of a well-orchestrated ballet, each dancer poised to pirouette at the right beat — that’s what nailing the transplant timing is all about!
Key Takeaway
Ultimately, sedum wants what we all want — to settle in at the right time and place. So, watch for those signals of emerging life in spring or the respite of cooler weather in perpetually warm areas. With these tips in your gardening toolkit, your sedum are sure to thrive in their new digs!
Pros and Cons of Transplanting Sedum Currently
Are you eyeing that lush, sprawling sedum in your garden, wondering if it’s the right time to give it a new home? Well, you’re not alone! The question of whether transplanting sedum now is savvy or risky is on many gardeners’ minds. Let’s dig into the nitty-gritty of moving these resilient, yet sometimes finicky, succulents.
On the sunny side, sedum, known for its hardiness, can typically handle a move if you’ve got that green-thumb finesse. They’re like the stoic, silent types of the plant world—they don’t kick up a fuss if you uproot them with a bit of TLC. I once had a neighbor who whisked her sedum from sun to shade and back like they were on a merry-go-round, and they bloomed as if to say, “Thanks for the adventure!”
However, it’s not all sunbeams and rainbows. Transplanting sedum can be akin to a high-stakes game of Root Roulette. These succulents might be tough, but their roots are the Achilles’ heel. If done haphazardly, without considering the plant’s health or the whims of the weather, you could end up with a sad, droopy sedum—definitely not the garden glory you were hoping for.
So, when is the ideal time? Picture this: a crisp, cool morning, just as the dew kisses the earth, and your garden is in that sweet state between slumber and the hustle and bustle of a new day. This is when your sedum’s in its zen zone, ready for a change without too much shock. And if you’re careful not to damage those all-important roots during the transition, you’ll be greeted with a resilient plant that barely skips a beat. Garden wisdom whispers that late spring and early fall, with their milder temperatures, are the VIP tickets to transplantation success.
Remember, though, evidence of stress in your plants—like yellowing leaves or weak stems—might be waving red flags that now isn’t the time for a move. It’s like trying to relocate during a personal rough patch; it’s usually better to wait until you’re back on your feet. Assess your garden’s conditions, too. Is it too wet? Too dry? Those environmental cues can make or break a transition.

In conclusion, playing the transplanting game with sedum requires both wisdom and a dash of boldness. By tuning into the rhythm of the seasons and your sedum’s vitality, you can make an informed decision that could lead to a garden that’s the envy of the neighborhood. So, what’s it going to be, gardener? Are you ready to roll the dice and perhaps reap the rewards of a perfectly timed transplant?
Steps to Successful Sedum Transplantation
If you’ve been pondering whether now is the right time to transplant your sedum, worry not! This resilient succulent embraces the change of scenery with a little bit of care and the right approach. Follow these steps to ensure your sedum’s roots find happiness in their new home!
Preparing Your Sedum for the Move
Just like a pre-flight checklist, ensuring your sedum is ready for transplant is crucial. Water your plant thoroughly a day or two before transplanting—this helps the roots slide out easier and reduces stress. Think of it as a nice, soothing bath before the big move.
Digging It Out: Gentle and Wise
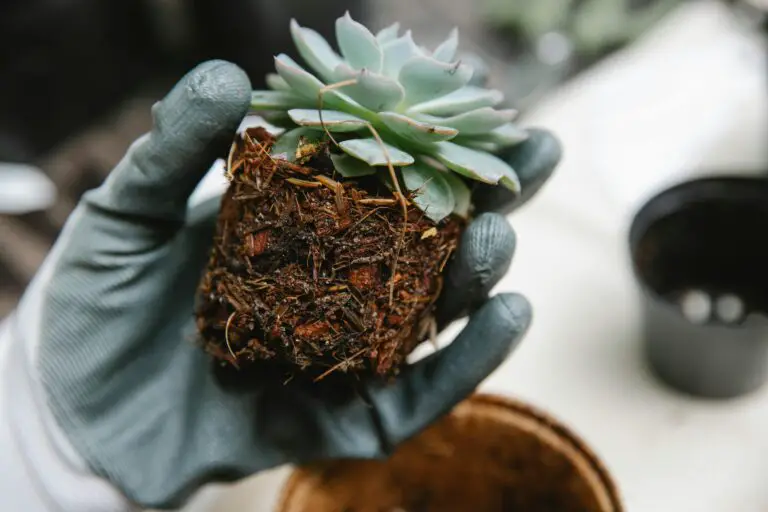
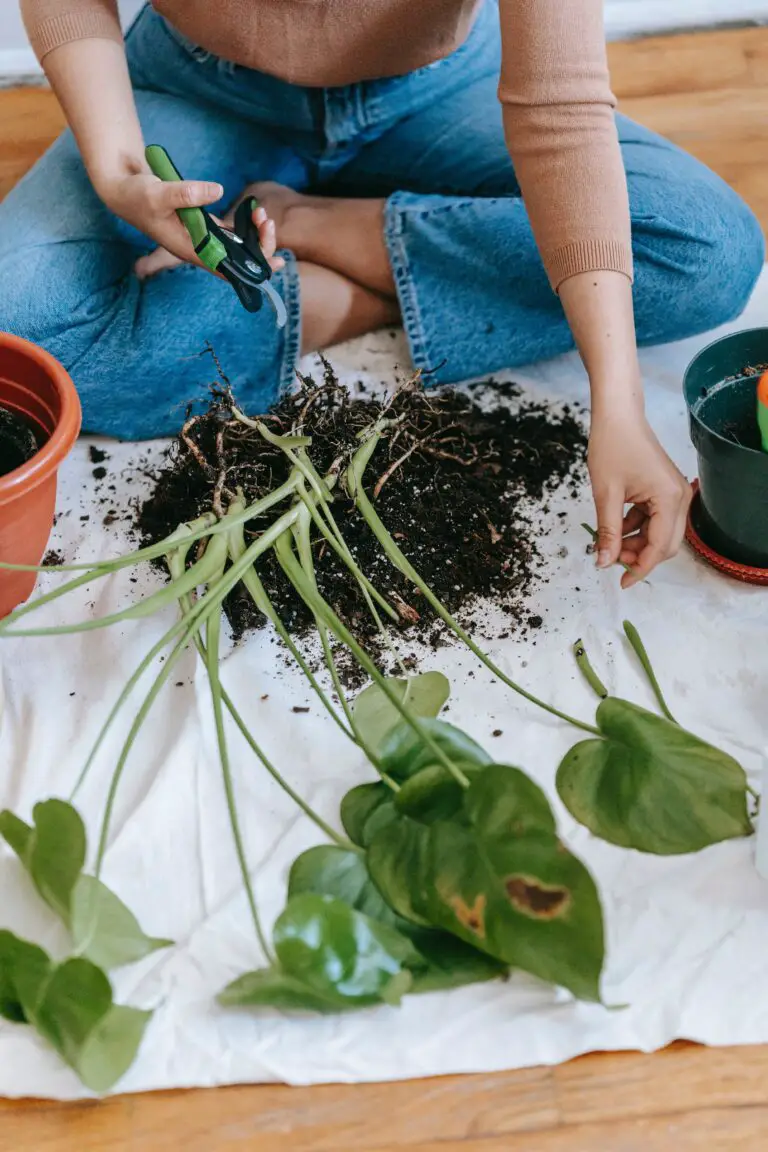
When the day arrives, approach the task with a spa-like gentleness. Using a shovel or garden fork, dig around the sedum, giving a generous berth to avoid amputating crucial roots. Imagine you’re searching for treasure—no one ever found gold with a bulldozer in their backyard, right?
Choosing the Perfect Spot
Now to pick the VIP lounge for your sedum. A sunny location with well-draining soil will make it feel right at home. Remember, sedum loathes wet feet, so avoid areas where water loves to puddle. If you’re looking for more details on post-transplant care, be sure to check that out!
Planting Your Sedum
With the stage set, lower your sedum gently into the ground, maintaining the same depth it enjoyed before. Fill the void with soil and press softly to eliminate air pockets. It’s almost like tucking it into bed—no need for lullabies, though.
Post-Transplant TLC
After the transplant, water it well to settle the soil. As days go by, check the moisture levels, and water as needed. The goal is to keep the soil damp but not waterlogged. A little bit of water goes a long way—think small sips, not a fire hose.
For a visual guide, take a peek at this handy , it’s like a GPS but for your garden tools.
Lastly, be patient as your sedum adjusts to its new surroundings. Within a couple of weeks, you should see signs of new growth, signaling success! If you’re curious about the perfect time to transplant other succulents, make sure to explore these thriving tips for lush succulent gardens.
Post-Transplant Sedum Care
Alright, green thumbs and garden gurus, you’ve just given your sedum a new home in the dirt, and now it’s time for some TLC to help it root, thrive, and become the envy of the plant kingdom! Post-transplant care is like a nurturing hug for your sedum—it’s essential. So, what’s the secret sauce for post-transplant success? Let’s dig in!
First thing’s first—hydration station! Your sedum’s thirsty after its big move. Imagine running a marathon and then being told to settle into a new house without a water break—no thanks! A gentle but generous soaking right after transplanting eases the shock and welcomes those roots to spread out and sip up.
When it comes to sunbathing, your sedum is no different from us at the beach. It loves the glow but can get a sunburn if it’s too harsh, especially after the stress of moving. Aim for a spot that offers a mix of sun and shade—a little like cloud-watching under a nice big oak tree—just enough light without the scorch. A dappled sun scenario lets your sedum acclimate without throwing it into the solar deep end.
Monitoring plant adjustment is crucial. Imagine your sedum wearing a “How am I adjusting?” badge. Keep an eagle eye out for drooping leaves or a sunken demeanor—sedum speak for “Help, I’m not happy!” With some observation (and a little chats, plants love a good pep talk), you’ll notice that it’s settling in well when it starts showing new growth or perkier posture.
Here’s a well-rooted piece of wisdom on how to ensure your garden all-stars, like the sedum, remain vibrant and strong all year round.
Remember, transplanting is a big deal for your green pals. But with these post-transplant care basics, your sedum will soon be living its best plant life! Keep your eyes peeled for those signs of contentment in your plant—it’ll thank you in full bloom!

Troubleshooting Common Sedum Transplant Issues
So, you’ve decided it’s time to give your sedum a new home, but as soon as you do, things start to look a bit wonky. Don’t worry, fellow green-thumb—this is a safe space to dissect those pesky problems that might have your sedums throwing a tantrum post-transplant. Let’s get our hands dirty and solve this together!
First up, let’s talk “limp leaf syndrome.” Imagine this: you’ve just finished transplanting your precious sedum, and the very next day—bam!—the leaves slump over like they’ve just had the longest day ever. Before you write a eulogy for your succulent friend, consider this: it might just be a case of transplant shock. Keep the soil consistently moist (not drenched!) and give it some time. More often than not, your plant will perk up as it adjusts to the new digs.

Another head-scratcher is the dreaded “disappearing roots” act. Picture this: you’ve gently uprooted your sedum, only to find the roots are more brittle than your favorite wafer cookie. Sedums are tough cookies, but they’re not indestructible. To avoid this, make sure the soil is well-draining and aerated before you attempt the big move. A little root stimulator can go a long way in helping those roots bounce back, too.
Here’s one for the storybooks: the case of the “moldy mulch mystery.” Envision this scene: you’ve transplanted your sedum under the perfect canopy of mulch, expecting it to thrive in its cozy new blanket, but instead, you find mold. The plot twist? Too much love (i.e., water and thick mulch) can lead to poor airflow and excess moisture—prime conditions for mold. The solution is simple: go easy on the mulch and keep an eye on the watering can.
Lastly, the curious incident of the “faded foliage”. You’ve done everything by the book, but suddenly your sedum’s vibrant leaves are as dull as dishwater. Sometimes it’s just a matter of too much sun or not enough nutrients. Make sure you’re not giving your plant a sunburn and feed it a balanced diet of nutrients—it’s not picky, a general-purpose fertilizer will do.
Remember, transplanting sedums is a bit like a “Choose Your Own Adventure” book—every decision leads to a new outcome. Stay vigilant, stay informed, and know that every problem has a solution. Happy gardening!
Innovative Ways to Integrate Transplanted Sedum in Your Garden
A freshly transplanted sedum offers endless opportunities to add a unique touch to your garden’s appearance. While the question “Can I transplant sedum now?” might have brought you here, the true excitement begins once those sedum cuttings take root in their new home. Let’s explore some of the imaginative ways you can revitalize your garden with sedum.
Creating a Luscious Living Border
Imagine a soft, living border that offers a textured contrast to your garden beds. Transplanted sedum thrives when positioned as a low-border, perfect for defining walkways or separating diverse garden areas. The hardy nature of sedum means it can withstand foot traffic, making it ideal for edging paths, creating a practical yet picturesque boundary within your outdoor sanctuary.
Accentuating Rock Gardens and Alpine Landscapes
Incorporating sedum into rock gardens or alpine landscapes can create a mesmerizing mosaic of color and form. Sedum, being succulent, naturally complements the rugged aesthetics of stone and gravel. Its varied shapes and vibrant hues stand out against the stony backdrop, bringing life and character to these more minimalistic garden features.
Infuse Vertical Spaces with Greenery
Vertical gardening is on the rise, and sedum is your perfect partner for this trend. The versatility of these plants allows them to adapt to wall planters, hanging baskets, and even green roofs. They require minimal care and offer a cascade of greenery that can transform even the blandest wall into a feature of natural beauty. Real-life examples of sedum-adorned walls in urban environments are a testament to their adaptability and appeal.
By embracing these creative ideas, you can seamlessly integrate transplanted sedum into your garden, making it a dynamic expression of your personal style and love for nature. Whether you’re designing a serene border or an eye-catching vertical display, sedum is a prime choice for gardeners looking to make a statement with minimal effort.
Frequently Asked Questions
Are you standing in your garden, pondering whether it’s the right time to transplant your beloved sedum? Let’s dig into the most pressing questions you have about shifting these hardy succulents to a new spot. We’ll tackle everything from the optimal timing to how to tell if your sedum is thriving post-move.
When is the Best Time to Transplant Sedum?
Timing is everything when it comes to sedum transplantation. Early spring or fall, when the weather is cool, and the plants are not in active growth, is generally the green thumb rule. If you’re looking to shuffle your Autumn Joy or any of its hardy cousins, aim for a day that’s overcast to avoid immediate sun stress.
What are the Best Practices for Transplanting Sedum?
Transplanting sedum is like a strategic game of chess with nature—you want to strategize for the win. Start with water, giving your sedum a good drink a day before the big move. When you transplant, be sure to dig a wide berth around the roots to avoid any unnecessary trim to the roots’ haircut. Once nestled in their new location, water them again to ease their settling in.
From the sprawling spreads of Stonecrop to the delicate domes of Dragon’s Blood, each sedum has its quirk. But they all share the love for well-draining soil and generous space to flourish. Remember to handle them gently during the transplant to keep those succulent leaves intact.
How can I Tell if the Transplant has been Successful?
Sedum will whisper sweet signs of success; you just need to listen (or rather, look). Healthy new growth, vibrant color, and a continued upright posture are all green flags. Your sedum telling you the relocation was to its liking. It might take a few weeks, so patience is the name of the game.
Sedum is as forgiving as an old friend. Even if a leaf or two gets left behind, they might just surprise you by sprouting new life right where they fell. That’s the beauty of these resilient plants. With a little attention and care, you’ll have a garden full of happy, thriving sedums in no time!
Want to watch sedum transplantation in action? Check out this video for step-by-step guidance and to see how it’s done by experts:


