Introduction to Sedum
Embark on a journey into the lush world of sedum, a group of succulents renowned for their ability to adapt to various environments. In this green adventure, we’ll delve into the rich background of these versatile plants, uncover their remarkable diversity, and discover why sedum is a top choice for greening up both indoor oases and outdoor landscapes.
Sedum, often termed “stonecrop,” invites intrigue and curiosity with its eclectic mix, featuring species that range from ground-hugging wonders to lofty, upright sentinels of the garden. But can these typically sun-loving, drought-resistant marvels transition from their natural, open-air abode into the confines of our living rooms and offices?
The answer lies in the cleverness of the grower and the natural resilience of sedum. Take ‘Sedum Morganianum’, for example, more commonly known as the burro’s tail. This hardy specimen brings the beauty of a cascading waterfall to interior spaces with ease when given just the right care—a dash of bright, indirect light and a sip of water as infrequent as messages from an old friend. Picture this vibrant plant, spilling over the edge of a suspended pot, creating an eye-catching feature in a cozy reading nook.
Sedum’s ever-expanding popularity is no fluke; it stems from their remarkable flexibility in design and ease of care, which aligns closely with the tips shared for other succulents. Whether it’s the fiery hues of ‘Sedum Spurium’ transforming a balcony into a radiant escape or the subtle green rosettes of ‘Sedum Reflexum’ brightening up a bathroom shelf, these succulents harmonize with our desire for nature-infused living, no matter where we place them.
Through the kaleidoscope of sedum varieties, every indoor gardener finds their muse. So, if you’ve ever found yourself questioning whether these robust beauties are merely the domain of rockeries and garden borders, prepare to redefine your indoor green space with the enchanting world of sedum—where the blend of form, function, and flair knows no bounds.
Varieties of Sedum Suitable for Indoor Growing
When it comes to adding a touch of verdant charm to your indoor space, not all sedum varieties are created equal. Some are like the versatile actors of the plant world—flourishing under the spotlights of your living room as effortlessly as they would in the grand stage of the outdoors. Let’s unwrap the secrets of these adaptable sedum varieties that are perfect for your inner sanctum.
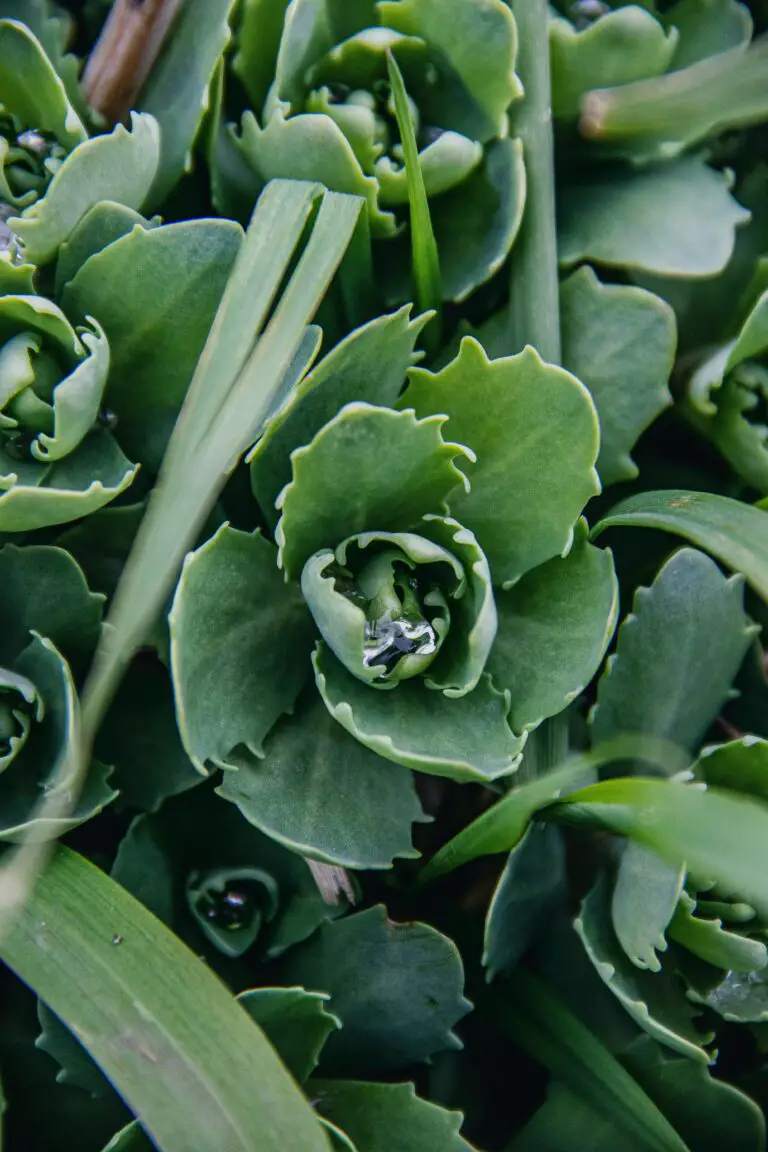
Imagine a compact cluster of Sedum tetractinum, commonly known as “Coral Reef,” nestled in a stylish ceramic pot by your window. Its circular foliage, resembling a sea creature’s haven, brings an oceanic ambience to your urban dwelling. In fact, care for it well and you might just feel the serene vibe of a coral reef sans the salty spray!
Then there’s the Sedum morganianum, or “Burro’s Tail,” with trailing stems that cascade over the edges of a hanging planter, creating a living curtain of jade pearls. Its low maintenance demands make it a favorite among urban gardeners looking for a dash of botanical waterfall.
If you’re eager for more tips on how to keep these succulent friends thriving, be sure to check out some great advice for growing sedum indoors. You’ll be turning your home into a succulent sanctuary in no time!
For those with a penchant for the dramatic, the ‘Purple Emperor’ with its deep purple, almost noir leaves, offers a striking contrast against a backdrop of light interiors. And let’s not forget the delightful Sedum spurium varieties, offering a tapestry of colors from the green ‘Dragon’s Blood’ to the red-hued ‘Ruby Mantle’.
Curious about other laid-back beauties that can spruce up your space? Swing by our guide on succulent care, and discover how you can create an indoor Eden with these resilient plants by your side.
Remember, regardless of your choice, sedums require some sun-savory moments. So place them where they can bask in the warm glow of natural light. Bring these versatile sedum varieties indoors, and watch your abode transform with their enduring splendor. It’s not just about growing plants; it’s about cultivating a snippet of Mother Nature right in the heart of your home.
Determining the Perfect Spot Inside for Your Sedum
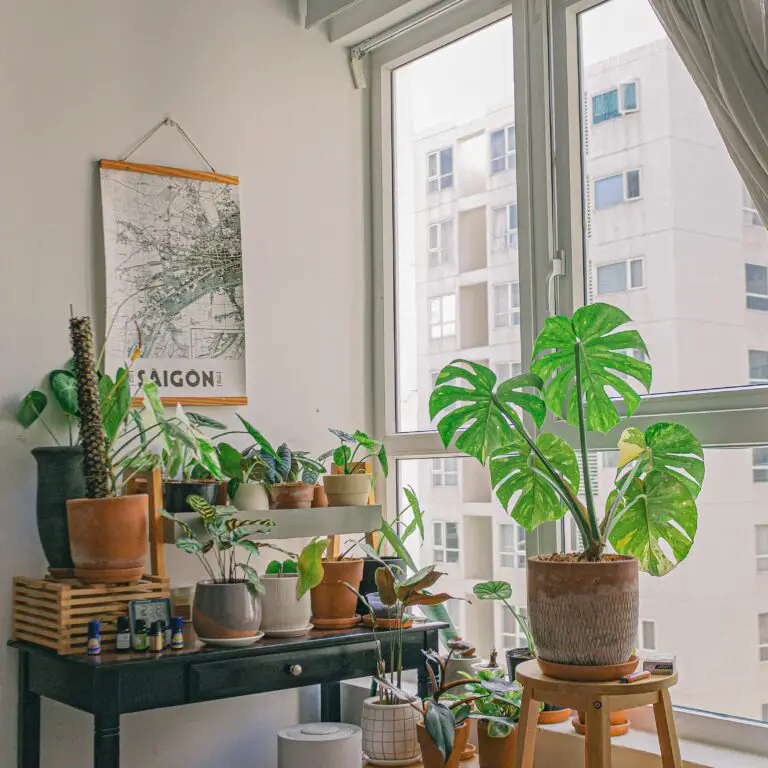
Imagine lounging in your living room, your gaze landing on a delightful display of lush sedum basking in the glow of the afternoon sun. You too can achieve this indoor garden oasis by pinpointing the ideal niche for your greens. But what does that sweet spot look like, you ask? Let’s dig in and sprinkle some green-thumb wisdom on the matter.
Firstly, lighting is your plant’s best friend. These little sun-seekers yearn for bright, indirect light. Think about that cozy nook by the window that bathes in soft sunlight for most of the day – it could be your sedum’s version of a tropical getaway! Just remember too much direct sunlight might turn their retreat into a scorching desert, so aim for a happy medium.
External factors like temperature play a role, too. Sedum is pretty chill when it comes to the occasional temperature fluctuation, but they really thrive in conditions similar to a balmy spring day. When winter whispers frosty tales, keep your sedum away from drafty windows. Too chilly and they’ll don a frosty coat they never wished for! For more detailed tips on indoor succulent care, incorporate pointers from this succulent care guide.
Now, let’s talk humidity – not too much, not too little. While these low-maintenance lovelies don’t demand tropical rainforest vibes, they do appreciate a moderate level of humidity. Your bathroom could be the ultimate spa resort for them, as long as light is aplenty. Still, if the air is drier than a stand-up comedian, consider misting them occasionally or group them with other plants to create a mini oasis.

Ultimately, Your sedum’s happiness is a delicate balance of light, temperature, and humidity. By hitting the right note on each, you’ll transform your indoor space into a green sanctuary where sedum doesn’t just survive – it thrives! Need more inspiration for arranging your space? Dive into our expert care tricks with this guide to nurturing indoor plants.
Soil and Potting Mix: The Foundation of Healthy Indoor Sedum
Imagine a bustling outdoor marketplace, alive with the chatter of dedicated gardeners. Amidst the rows of fresh produce and flowering plants, we uncover the secret soil blends beloved by green thumbs the world over. Now, let’s take that secret and apply it indoors to our resilient friend, the sedum plant. Growing sedum indoors isn’t just possible; it’s a journey into the world of carefully curated soil and potting mixes that ensure these succulent champions reach their full verdant potential.

The crux of cultivating sedum indoors lies in mimicking their natural, rocky habitats. A premium potting mix for your indoor sedum should be as light and airy as a summer’s breeze, while still boasting the unyielding support of a gentle embrace. To begin, one can venture to the local garden center, seeking out a specialized succulent blend, but the true indoor horticulturist knows the satisfaction in concocting their bespoke mix. Equal parts of coarse sand, perlite, and potting soil typically conjure the ideal foundation—ensuring any excess water runs free like a river escaping a mountain, leaving behind just the right amount of moisture to nurture the roots.
In the lives of indoor sedums, drainage is not merely a luxury; it’s a paramount necessity. A well-draining soil mix is like an insurance policy against the dreaded root rot—a menacing specter for any potted plant. Envision a terracotta pot with drainage holes, filled with your expertly prepared mix, and there you have it: a humble abode fit for your sedum, fostering healthy root development and a zealous zest for life.
Real-life examples of the marvels of perfect soil abound. Take, for instance, the infamous “Charlie,” a sedum that thrived in the confines of a Brooklyn apartment, thanks to his owner’s very own mixture of chicken grit and coconut coir—proof that the urban jungle can be a succulent sanctuary, with soil as its stalwart foundation.
By embracing the critical role of soil and potting mix in the indoor cultivation of sedum, we go beyond mere gardening—we create a micro-ecosystem, a slice of rocky outcrop on our windowsills. Crafting the perfect blend is both art and science, a creative endeavor deeply rooted in the understanding of what makes sedum so wondrously adaptable. So roll up your sleeves, and let’s delve into the world of soil mixes, where each grain of sand, each fleck of perlite, and each scoop of potting soil is a step towards a joyful, thriving indoor sedum.
Watering Requirements for Indoor Sedum
Is your indoor oasis yearning for a touch of greenery that’s both attractive and low-maintenance? Enter Sedum, the succulent sweetheart that’s been turning heads in the world of houseplants. But wait, before you deck your indoor gardens with these resilient beauties, let’s dive into the watering wisdom that ensures your sedums don’t just survive but truly thrive indoors.
When it comes to quenching the thirst of your indoor Sedum, precision is key. Overzealous watering is the arch-nemesis of these drought-resistant darlings. Imagine this: you’ve returned from a weekend getaway, and your Sedum, perched on the windowsill, greets you with drooping leaves— a clear SOS signal. Panic sets in—have you loved it a tad too much with water? It’s a common tale in the succulent saga where good intentions lead to soggy situations. But fear not, for the perfect watering balance can be struck with some savvy know-how.

Imagine if watering your indoor Sedum was as intuitive as reading a mood ring—well, it’s almost that simple. Sink your fingers into the soil; if it’s dry a couple of inches deep, it’s time for a drink. If it’s moist, step away from the watering can! Your Sedum’s roots crave oxygen as much as they do water, and being waterlogged doesn’t bode well for their health. Think of a sponge— ideally, it should never be bone dry nor wringing wet. That’s the sweet spot for your Sedum’s soil.
What’s the real-world frequency for this watering waltz? Typically, it’s a relaxed rhythm of every 7 to 10 days during the growing seasons of spring and summer. As the days shorten and your Sedum slips into its winter respite, water infrequently—once a month should suffice. And here’s a nifty nugget of wisdom: use lukewarm water. Cold can shock their roots, and who needs that kind of drama?
Let’s not forget the role of the humble pot. Choosing a container with drainage holes is akin to selecting the right pair of shoes for a marathon—it’s crucial. Nothing dampens the spirit of a Sedum more than soggy feet. Well-drained soil in a breathable terra cotta pot is a combo that can’t be beaten, much like peanut butter and jelly.
The takeaway? Listen to the murmurs of your indoor Sedum’s environment. With thoughtful watering, you won’t just prevent the dreaded root rot; you’ll become the maestro of moisture, orchestrating a haven where your Sedum can bask in all its indoor glory. Happy watering!
Fertilizing and Feeding Your Indoor Sedum
Just like you relish a nutritious meal, your sedum revels in the right mix of fertilizers to flourish indoors. Imagine your sedum is a seasoned athlete, gearing up for a marathon — it needs the right kind of fuel to perform at its peak. That’s where fertilizer steps in, acting as the power-packed superfood for your resilient green companion. But hey, don’t just grab any fertilizer off the shelf! Here’s the scoop on getting it just right.
First things first, let’s talk type. There’s a king’s feast of fertilizer options out there, yet not all are fit for royal consumption. For your indoor sedum, you want to go with a balanced, water-soluble, or liquid fertilizer. This type of fertilizer is like a magic elixir, easily absorbed and whisking vital nutrients straight to your plant’s roots. Now, think of Goldilocks— you’re looking for that ‘just right’ blend. A fertilizer with equal parts nitrogen, phosphorus, and potassium (often labeled as N-P-K 10-10-10) will have your sedum pirouetting with joy.
Remember that timing is everything. Just like you shouldn’t eat a big meal right before bed, your sedum has its no-go times for feeding. The best seasons to fertilize are spring and summer when your sedum is in its growth spurt phase, stretching out like a teenager during puberty. During this time, you’ll want to fertilize every two weeks, which is coincidentally as often as many folks binge-watch their favorite series. When autumn rolls around, and your plant starts to slow down its pace, reducing the frequency to once a month will keep it from overindulging.
Let’s chat quantity. You’ve probably heard the phrase “too much of a good thing,” and when it comes to fertilizing, this couldn’t be more true. More is not better; it’s a one-way ticket to harm city. For your indoor sedum, a diluted half-strength solution is your golden ticket. It’s like a light snack — satisfying without being overbearing. Stick to this lean diet, and you’ll have a robust, chunky sedum without the dreaded bloat of over-fertilization.
Consider this case: Think about your coffee-addicted friend who downs cup after cup but becomes a jittery mess. Sedums can get “jittery” too with too much fertilizer, showing signs like wilted or discolored leaves — a clear SOS signal. By keeping the serving sizes modest, your sedum will stay balanced and vibrant, avoiding any unsightly stress symptoms.
Now, picture your indoor sedum in all its glory, leaves plump and colors vivid. That’s the masterpiece you’re after, right? It’s all within reach with the perfect blend of nourishment and care. And don’t forget, this little green gem is more than just decor — it’s a living, breathing slice of nature that’s counting on you to get its diet just right.

Pruning and Maintenance of Indoor Sedum Plants
If you’re curious whether your indoor sedum can mirror the resplendent beauty of its outdoor cousins, let me share with you some neat tricks that’ll surely put those concerns to bed. Imagine shaping your sedum to showcase a stunning geometry, like crafting a captivating bonsai, while at the same time fending off any pesky diseases that creep in uninvited.
We start with the basics: a pair of clean, sharp scissors or pruning shears. You wouldn’t slice a tomato with a blunt knife, would you? Likewise, we want our cuts on the sedum to be clean and precise to prevent any possible entry points for disease. Begin by snipping away any dead or yellowing leaves from the base. It’s like playing surgeon, but with a plant patient, ensuring the vitality of the entire organism!
Timing is Everything: When to Snip
Pruning is not just a haphazard hack job; it is a dance with timing. Best practiced in late winter or early spring, it sets the stage for vigorous spring growth. It’s a little like setting the stage for an epic performance — only, the stage is soil, and the performers are your plucky little sedums ready to put on a growth spurt show.
For indoor sedum, the approach embraces subtlety. Prune to sculpt an appealing shape, enhance light exposure, and promote fresh growth. Think of it as tailoring a plant suit: methodical snips for a perfect fit!
Remember, each cut is a catalyst for new branches, so envision the future structure of your sedum. It’s like directing a film where each scene should advance the plot; in sedum’s case, each snip can pave the way for an Oscar-worthy silhouette.
And it’s not all about aesthetics, either. Pruning can be a vigilant guardian against disease. By encouraging air circulation and reducing overcrowded growth, you’re playing defense for your indoor garden. It’s like opening windows in a stuffy room; everyone breathes easier, your sedum included.
No pruning guide is complete without an emphasis on cleanliness. Sterilize your tools before and after use. It’s a small step for you but a giant leap for plant health. Think of it as hygiene for horticulture — it keeps the bad bugs away and your sedum smiling.
With these tips, your indoor sedum will not only live, but thrive. Growth, shape, health — it’s all in your hands. Channel your inner green thumb maestro, and let the symphony of snips begin!
Troubleshooting Common Indoor Sedum Issues
Growing sedum indoor can sometimes feel like you’re nurturing a piece of the great outdoors right on your windowsill. But even in this controlled environment, your green companion may run into some bumps along the way. Let’s roll up our sleeves and dive into the common hiccups that indoor sedum might face and how you can put your green thumb to the test!
Combatting Pesky Pests
Imagine, you wake up to the sight of your sedum only to find it hosting a party for uninvited pests! These tiny gate-crashers, such as aphids or mealybugs, love to sap the energy from your plants. If you spot these critters, don’t panic! A simple solution of water and a few drops of mild dish soap sprayed directly on the leaves can do the trick. It’s like sending out a ‘party’s over’ notice to these freeloaders.
Fighting Off Fungal Foes
Next on the list of indoor sedum woes is the dreaded fungal disease. If your plant’s leaves are sporting unsightly spots or a powdery coating, it’s time to become a fungus detective. Increasing air circulation and making sure not to overwater your sedum are your best defenses. Keep in mind, sedum loves a good drink but hates wet feet. So, let the soil dry out between watering, just like a desert after rain.
Environmental Stressors – Finding the Sweet Spot
Too much love, in the form of overzealous watering or feeding, can cause root rot or nutrient burn, leading to a sad, droopy sedum. Conversely, a lack of light can leave your sedum reaching for the sun, resulting in a stretched, leggy plant. Finding that sweet spot for your sedum is like searching for the perfect sunny nook for a catnap. Bright, indirect light and a consistent watering schedule are key to a happy, healthy indoor sedum.
Remember, even the most seasoned indoor gardeners face these issues. The secret is observation and timely action. And to help further your indoor sedum care knowledge, check out this informative video!
With these tips and a bit of patience, you’ll see your indoor sedum not just surviving, but thriving. It’s all about creating a balance and learning to speak the language of your leafy friends. Happy gardening!
Propagation: Expanding Your Indoor Sedum Collection
If you’ve been marveling at the resilience and beauty of your indoor sedum, you might be itching to spread the love. Propagation is not just about multiplying your greens; it’s about sharing the joy of gardening and creating a sustainable indoor oasis. With sedum plants, it’s astonishingly simple to extend your leafy lineage, and I’m here to guide you through the verdant voyage of sprouting new sedum babies!
First things first, let’s talk cuttings. Choose a healthy sedum stem and snip about 2-4 inches from the tip. Now, I know what you’re thinking – “Is it really that easy?” Yes, it is! Let the cutting dry for a couple of days until the cut end forms a callous. This little waiting period is the cutting’s version of packing its bags for a new beginning.
Rooting in Soil
Once your sedum cutting has calloused, prepare a pot with well-draining soil. I like to think of it as prepping a cozy bed for a guest. Nestle the cutting into the soil and gently firm it around the base. Keep the soil slightly moist, and in a few weeks, you’ll notice new roots taking hold. Imagine the tiny roots, like adventurous explorers, claiming their new territory in the pot.
Water Propagation: The Aquatic Route
Not a fan of getting your hands dirty? Water propagation is your friend. Place the cut end into a jar of water, ensuring the leaves remain high and dry. This is like giving your sedum a personal swimming pool where they can lazily stretch out their roots. Keep an eye on the water level and marvel as roots emerge like delicate threads reaching out to embrace life.
Now, let’s chat about leaves. It’s almost magical how a single leaf can birth an entire new plant. Gently twist off a healthy leaf and lay it atop the soil. It’ll feel a bit like a mini beach vacation for your leaf, basking atop the sandy soil. In due time, tiny pink roots and miniature sedum rosettes will emerge, like miniatures scenes from a fantastical garden.
Remember to be patient, whether you’re starting with cuttings or leaves. Propagation is a bit like slow food; it takes time but the results are so worth it. Before you know it, your indoor sedum collection will be thriving, and you’ll have plenty to share with friends and family. Spread the green love!
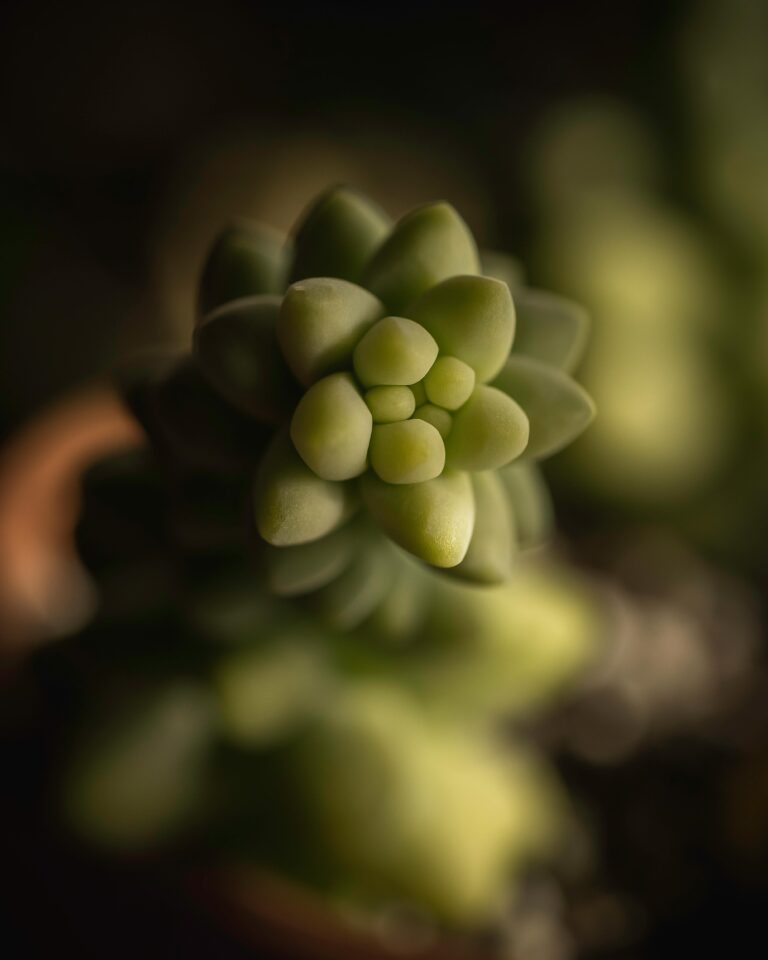
Here’s a snapshot of a potential future family member of your indoor sedum clan:
Frequently Asked Questions
Delving into the world of indoor gardening, there’s always a buzz around can sedum be grown indoors. And we’re here to sift through the soil of doubt with clear, practical answers. Just like you, these resilient succulents have a desire to thrive in the cozy nooks of your home. So, let’s unravel some common inquires that sprout in the minds of green thumbs aiming for succulent success.
Will My Sedum Get Enough Light Indoors?
Picture this: a sedum basking by a sun-drenched window, soaking up rays like a beachgoer on a summer day. Sedums love light, and indoors, a south-facing window could be your plant’s new best friend. Your sedum doesn’t need to sunbathe outdoors to flaunt its radiant beauty, it can get a tan just fine from the comfort of your living room!
Can I Keep My Sedum Happy in My Busy Schedule?
Managing a tight schedule and keeping a sedum? Absolutely possible! Imagine a plant that’s more self-sufficient than a teenager. With sedums, you could go on a weekend getaway and return to find your green buddy just as perky. These succulents don’t thirst for your constant attention – a sip of water now and then keeps them more than satisfied.
Do I Need Special Soil or Pots for Indoor Sedums?
Think of sedums as the free spirits of the plant world. No need for fancy footwear; a simple pot with drainage holes and breathable, gritty soil is like a pair of comfy sneakers for them. It’s the no-fuss, easy-breezy attitude that makes growing sedums indoors a breeze.
Whether you’re a seasoned gardener or a budding enthusiast, pressing questions about caretaking shouldn’t leave you feeling pricked like a cactus. Indoor sedums are not just plants; they’re a testament to the joys of gardening, even within the confines of city living. By treating them right, you’re on your way to cultivating a lush, verdant oasis right where you are.
Could My Indoor Sedum Ever Bloom?
Can you throw a party that gets talked about for weeks? Then you can definitely get your indoor sedum to show off its flowers! It’s all about setting the scene – the right lighting, a cozy spot, and a little patience, and your sedum will dazzle you with blooms that allure like twinkling party lights.
There’s no need to shy away from planting these delightful succulents inside your home. With the right knowledge and a sprinkle of care, sedums can thrive and amplify the charm of any indoor space. Now, it’s your turn to turn those seeds of thought into a flourishing reality. Happy indoor gardening!