Introduction to Crassula Propagation
Imagine the sheer delight of watching a tiny leaf unfold into a luscious, full-grown succulent. That’s the magic of Crassula propagation, a process as rewarding as it is straightforward. As enthusiasts of the succulent world, we often marvel at the rugged beauty of plants like the Jade, a member of the Crassula family. Yet, few experiences compare to the hands-on joy of propagating these hardy plants ourselves.
In this green-thumbed adventure, we delve into the various methods you can use to increase your collection. Whether you’re a seasoned botanist or a curious novice, the propagation of Crassula offers a world of benefits and possibilities. And the best part? It’s easier than you might think. With a little guidance, you can transform a single plant into an abundant oasis, ensuring that your love for these succulents continues to grow—literally.

As you learn about the propagation methods, consider the environment these succulents thrive in. The care they receive after propagation is crucial. Our complete guide on cultivating and caring for your Crassula Pagoda unveils practices to keep your new succulents healthy and vibrant. From the right soil mix to the perfect watering schedule, every detail counts in bringing out the best in your Crassula.
Stay tuned as we venture further into the intricate world of succulent propagation. You’ll find that with each new sprout and root, your Crassula not only grows in size but also in character, telling a story of resilience and beauty that’s unique to your personal plant journey.
The Right Time to Propagate Crassula
Timing is key when propagating Crassula. Knowing when to snip and plant can mean the difference between a thriving mini-forest of succulents and a withering dream. But fear not, dear plant enthusiast – unlocking the secret schedule for succulent success is as simple as tuning into nature’s rhythm.
Spring rolls in with warm breezes and a promise of growth – it’s the plant world’s starting pistol. This is when your Crassula is raring to go, with its energy reserves brimming from a winter’s rest. Roots shoot out faster, and the mild weather conditions create a safety net for your delicate baby plants. It’s a time of rejuvenation and the perfect season to embark on your propagation journey.
Summer, with its longer days of sunshine, tempts many to propagate, but beware – the intense heat can stress both parent and pup. Nonetheless, if you’re attentive to shade and hydration, summer can also be a successful propagation partner.
Autumn whispers a gentle reminder that plants are preparing to wind down. If you live in milder climes, this season still offers a window for propagation. However, as winter’s chill approaches, your Crassula’s growth slows down. It’s a gamble – but for those craving the thrill of plant parenting, with proper indoors setup, success is still on the table.
Encircle your calendar around the health of your plant too. A Crassula oozing vitality, sporting plump, hydrated leaves, is a green light. If it’s struggling, hold off on the cuttings; let it regain strength first.
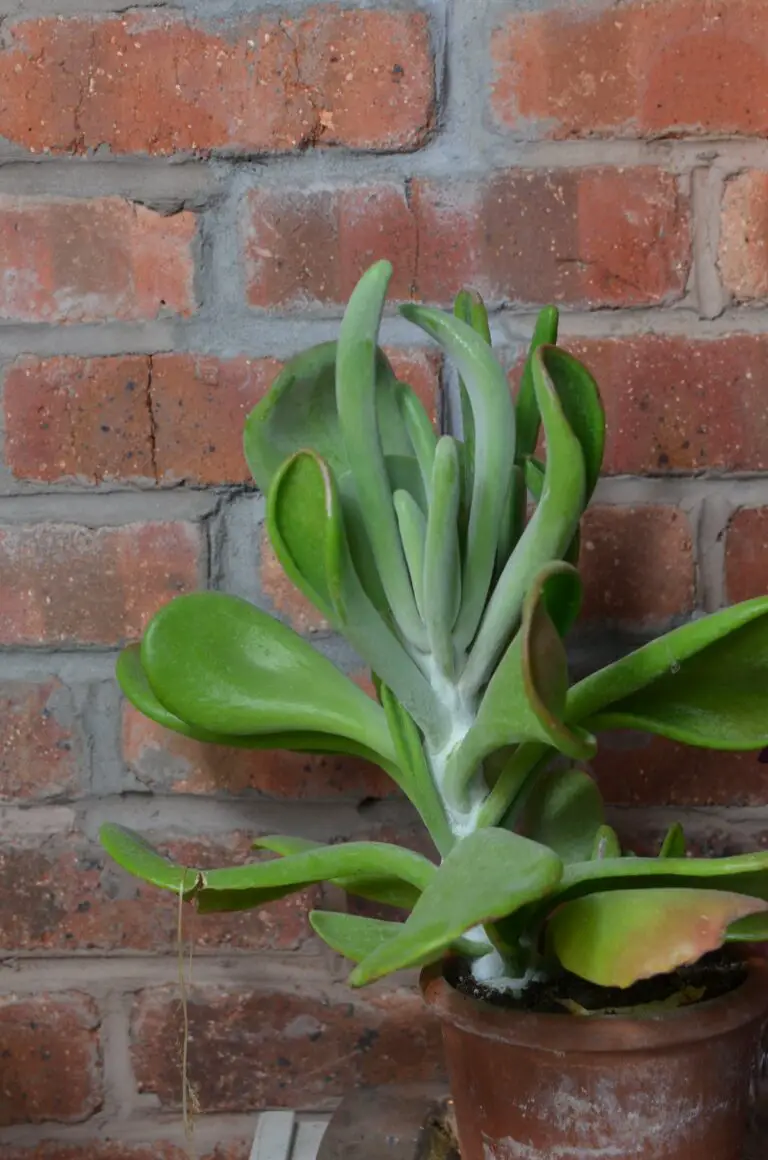
Are you ready to ride the wave of seasons and turn your green thumb golden? Eye your Crassula, watch for those plump leaves, and begin with spring’s first bloom. Here’s a visual guide to the kind of healthy specimen you should propagate:

Remember, nature doesn’t clock in and out; she offers gentle hints. Notice the signs, seize the season, and your Crassula cuttings will soon be the envy of succulent lovers everywhere.
Selecting Your Propagation Method
When it comes to propagating Crassula, you’re embarking on a delightful garden adventure. Imagine taking a single leaf from your favorite Crassula, and with a bit of patience, watching it bloom into its very own plant. There are several routes to generating new succulent life from your existing plant, each with its own charm and set of instructions.
Leaf cuttings, for instance, dive deep into the wonder of nature’s capacity for regeneration. You gently pluck a healthy, plump leaf from your plant, let it callous over, and place it atop a bed of well-draining soil. In the realm of stem cuttings, envision snipping a portion of the stem, brimming with leaf nodes, ready to sprout roots and leaves as if proclaiming, “Give me soil, and I shall thrive!” Lastly, division—a technique as simple as separating a crowded pot into individual plants, each with room to flourish.
Deciding which method is right for you might depend on your specific Crassula species, how quickly you’d like to see results, and the resources at your disposal. Certainly, it’s a personal choice that should echo your connection with these resilient survivors of the plant kingdom. 
To get a sense of the magic, think about the last time you admired a robust Crassula in a friend’s home or local nursery. Each of those plants could have begun as a tiny offshoot or a leaf languidly lying atop the soil, dreaming of roots. If you’re nurturing a propagating Crassula at home, imagine the satisfaction when you spot those first tentative roots or the sprouting of a new leaf. It’s a rewarding process that’s steeped in simplicity and wonder.
For detailed advice on caring for your full-grown Crassula, make sure to visit our in-depth guide on Crassula Jade care. Delve into the essentials to ensure your propagated babies will mature into hardy, stunning succulents that’ll be the envy of your plant-loving circle!
Step-by-Step Guide to Leaf Cuttings
Ready to embark on an adventure in succulent gardening? Let’s unravel the secrets of propagating Crassula through the wonder of leaf cuttings! This method isn’t just an amazing party trick for your green-thumbed friends; it’s also an excellent way to expand your plant family on a budget. So roll up your sleeves, and let’s dig in!
Selecting the Perfect Leaf
First and foremost, choose a robust, healthy leaf from your beloved crassula plant. This leaf is about to become the proud parent of your new succulent, so pick wisely! Aim for a plump leaf, full of life, ideally one that whispers, “I’m ready to grow!” when you give it an encouraging nod.
Snipping with Precision
When separating the leaf from the mother plant, think of it as a precision “green surgery.” A clean cut will prevent any unwanted damage and promote better healing. Use a sterilized, sharp pair of scissors or a knife. A clean cut is essential – it’s the difference between a successful propagation and a leaf that simply wilts away.
Callousing: A Critical Step
Next, lay the leaf on a dry surface and let it callous over for a few days. Callousing is the succulent version of forming a protective scab—it prevents rot and allows for a strong foundation for new roots. No rush here; patience is your best ally in the journey of leaf propagation.
Let There Be Roots
Once your leaf has formed a callous, place it atop a well-draining soil mix and wait for the magic to happen. It may seem like you’re just watching the potting mix dry, but beneath the surface, roots are getting ready to break through. Think of it as the backstage before the grand performance—the roots are rehearsing for their big debut.
Caring for Your New Growth
Your leaf will eventually show signs of new life, with tiny roots reaching into the soil and a miniature succulent beginning to form. This is when your nurturing instincts kick in. Provide indirect sunlight—enough to encourage growth but not so much that it favors a sunburnt look.
Water sparingly, my friends; these are desert descendants, after all. They crave neglect over attention when it comes to their watering schedule. With time and a tad bit of care, you’ll witness a heartwarming sight: a baby crassula emerging from a single, once unassuming leaf.
And here’s a nifty visual aid to support your propagation endeavors:
While you’re tending to your new leaf cuttings, don’t forget the rest of your succulent collection. It’s worthwhile to brush up on your overall succulent care insights to ensure that all your green buddies are thriving. Proper knowledge can turn a succulent caretaker into a succulent whisperer in no time!
Remember, leaf propagation is a test of perseverance and care. But the payoff? Unparalleled satisfaction when you see that tiny shoot poking out, ready to grow into a symphony of succulent beauty. Let’s propagate some joy, one crassula leaf at a time!
Mastering Stem Cutting Propagation
If you’re gazing at your resplendent Crassula and contemplating its multiplication, congratulations! You’re about to unlock the secrets of stem cutting propagation that can work wonders. Taking your green-thumbed talents to the next level, you can transform one plant into a whole family affair. Intrigued? Let’s dive into the process that will let you propagate your cherished Crassula with ease.
Snip with Precision: The Art of the Cut
Initiating your propagation pursuit begins with a crucial cut. Like a master sculptor, you need to select a healthy stem that boasts robust leaves—a true emblem of Crassula vitality. Aim for a section that is 3 to 4 inches long to ensure that it has enough room to soar in its new soil home. The cut should be precise and clean, as if it were a tailored suit—use sharp, sterile scissors or pruning shears to avoid any jagged edges that could spell disaster.
Real-life example alert: Picture Ellen, a seasoned plant enthusiast, who carefully snips her favorite Crassula ‘Gollum’ with practiced ease. She selects a stem that has recently blossomed, its robustness indicating a readiness for independence; a prime candidate for propagation. With an artist’s touch and a gardener’s knowledge, Ellen’s stem-cutting prowess leads to thriving new plants, exemplifying the magic of proper technique.
Let it Breathe: Pre-Planting Protocol
After you’ve successfully secured your stem cutting, patience takes the spotlight. Your freshly cut botanical wand needs time to form a callus—a protective barrier over the wound. This can take a few days to a week, depending on your climate conditions. Ellen, for instance, places her cuttings on a sunny windowsill and watches as the ends dry and harden, a signal that they’re ready for the next act in the propagation play.
Roots to Success: Planting Your Stem Cutting
With callused cuttings at the ready, it’s time for their soil debut. Picking the perfect potting mix is like choosing the best stage for a performer. A well-draining mix specific for succulents is your Crassula’s co-star, ensuring your plant’s roots won’t be wading through soggy soil. Insert the cut end into the mix, just deep enough to support the stem’s stance. Give it a gentle pat—think of tucking a child into bed—and voilà, your Crassula’s new journey has begun.
Ellen observes her propagation project and notes that while some of her friends struggle with overwatering, her measured approach allows her Crassula cuttings to thrive. A weekly check-in suffices, ensuring the soil’s moisture is just right—like Goldilocks finding her perfect bowl of porridge.
Caring for Your Propagated Protégé
Care for stem cutting starts with moderation. Too much water is the nemesis of succulents; the Crassula family prefers a ‘less is more’ mantra. Water when the soil feels dry to the touch, providing just enough to quench the roots’ thirst. Remember, your propagated Crassula is adapting to its new home, so be vigilant about changes in leaf color or texture—they’re telling you a story about their needs.
As Ellen imparts her Crassula wisdom to other burgeoning horticulturists, she emphasizes the importance of observation. Witnessing her stem cuttings develop their own roots and leaves offers not just a botanical bounty, but a garden of lessons learned through patience and attention.
And now, for a visual treat, watch this video on successful Crassula propagation through stem cuttings. It’s like having a front-row seat to the metamorphosis of a plant, right before your eyes:
Armed with these insights, you’re now ready to propagate your Crassula plants through stem cutting, reveling in the joy of watching them flourish. It’s a journey of growth, not just for your plants, but for you as a cultivator of living art.
Caring for New Crassula Plantlets
With a fresh batch of Crassula cuttings beginning their journey, you’ve unlocked the next level of your green-thumb adventure! Let’s dive into the essential tactics to nurture your newborn succulents with aplomb. A heads-up: it’s not just about sticking them in some dirt and hoping for the best. It’s about crafting the perfect micro-environment for your tiny green babies to flourish.
Watering Wisdom: The Lifeline of Your Young Crassula
Imagine your typical Crassula—stoic, plump leaves, a personality that screams “I got this!”. But beneath that succulent swagger, they need a delicate balancing act when it comes to moisture. Overwhelm them with water, and they’re heading for a mushy demise. Neglect them, and they’ll wrinkle faster than a prune in the sun. It’s about finding that sweet spot—think “Goldilocks Zone”—where the soil stays barely humble, not bone dry, but never soggy. A few drops to quench their thirst are often enough to keep that pep in their step!
Let There Be Light (But Not Too Much!)
When it comes to light, our Crassula kiddos are like aspiring actors; they love the spotlight, but too much exposure and they fizzle out. They crave that bright, indirect light—the sort that’s akin to a filter-splashed selfie on a sunny day. Direct sunlight? That’s reserved for the seasoned adults with a few sunbaths under their belt. So give them a taste of the limelight, but in doses that won’t scorch their delicate aspirations. Side note: if your plantlets start reaching for the stars, they’re not just dreaming big—they need more light!
Soil Composition: The Crassula Crib
Building a home for your Crassula plantlets is much like creating a cozy nest; it’s all about using the right materials. What they covet is a bed of well-draining soil, a mix that whispers sweet nothings of airflow and moisture balance to their roots. Forget those dense, clay-based soils that hold water like a sponge—your Crassula champions want none of that. They’re after the crumbly stuff, the kind that’s chunky, loose, and drains faster than a bathtub with a leak. Mix in some perlite or pumice, and you’ve got the equivalent of a five-star hotel for these tiny aristocrats.
Why not see these tips in action? Here’s a video that will take you step by step through the nuances of proper Crassula care. Watch, learn, and grow alongside your plantlets!
Troubleshooting Common Propagation Issues
Entering the world of crassula propagation can be much like a tale of plant alchemy, where you are the maestro of multiplying your succulent treasures. But sometimes, even the most careful green-thumbed gardener encounters stumbling blocks along the way. Can you propagate crassula without a hitch? Ideally, yes—but let’s tackle those times when things don’t follow the script.

Imagine this: you’ve followed all the instructions to a T. You’ve carefully selected a healthy leaf or stem cutting, allowed it to callous appropriately, and positioned it in the right soil mix only to find that weeks go by without a single root insight. Or even worse, the hopeful beginnings of your crassula progeny become mushy, succumbing to the dreaded rot. Not the kind of ‘growth’ you were anticipating, right?
Roots That Never Show
First things first—don’t cast away your cuttings at the first sign of delay. Patience is a paramount virtue in the propagation process. If your cuttings are taking their sweet time to root, consider the environment. Are they too cold, too warm, or possibly drowning in moisture? Crassulas crave a just-right ‘Goldilocks zone’ that’s not too harsh nor too pampering. Adjust the temperature and dial back on watering to nudge those roots out of hiding.
When Rot Sets In
Rot is the nemesis of propagation, often creeping in unnoticed until it’s too late. If your cutting starts looking more like a candidate for a zombie plant movie, it’s time for some root cause analysis. Overwatering is often the culprit, so a shift to a more well-draining soil mix and a less-is-more watering regime may be your lifeline. Also, consider the cleanliness of your tools—have they been the unintended carriers of plant pathogens?
Remember, even the most expert botanists have faced the plight of problematic propagation. But with careful observation and a nimble response to the needs of your crassula cuttings, you can turn the tides on these common issues. Keep your eyes on the prize, and with time and tender care, you will likely see your crassula collection flourish.
Frequently Asked Questions
Got a burning question about Crassula propagation? Well, you’re in luck! Let’s delve into some real talk about multiplying your succulent friends.
Can you really propagate Crassula from just a leaf?
Believe it or not, you can! Just like that superhero who regenerates, a fallen Crassula leaf can become a whole new plant. It’s not fantasy; it’s nature’s magic at its finest. Place a leaf on some soil, and with patience and a little care, watch a miniature succulent emerge.
How long does it take for Crassula cuttings to root?
If you’re waiting for roots, don’t fret. Crassula doesn’t sprint to the finish line; they’re more like a casual jogger. Give it a few weeks to a couple of months, and you’ll see those tiny roots sprouting. It’s a lesson in patience and the joy of slow growth.
What’s the best soil for propagating Crassula?
Think of soil like a bespoke suit—it needs to fit just right. For Crassula, that means well-draining and gritty. Imagine a desert landscape; that’s the vibe your soil should channel. It’ll be the best home your Crassula cuttings could ask for.
Is water propagation an option for Crassula?
Water propagation isn’t just for those leafy tropicals; Crassula can join the pool party, too. Just make sure the leaf or stem cutting doesn’t get soggy. A cocktail of water and air around the base will give you the best results. Think of it as giving your Crassula a spa day, every day!
Why is my propagated Crassula not growing?
If your Crassula is playing hard to grow, it might just be throwing a bit of a tantrum—perhaps it’s not getting the right light or water balance. Make sure it’s not too wet, not too dry, and getting plenty of indirect sunshine. It’s all about that Goldilocks zone!

Can Crassula propagation fail, and why?
Let’s face it, even with the greenest of thumbs, sometimes propagation is a dud. It could be due to rot, poor lighting, or just a grumpy leaf. But don’t throw in the trowel! Each failure is a lesson that brings you one step closer to becoming a Crassula whisperer. Learn, adapt, and try again. Success might just take root next time!
Do different species of Crassula propagate in the same way?
Just like people, each Crassula species has its quirks. Some might root faster, others might prefer a different touch to their soil. The key is to get to know them, understand their likes and dislikes, and tailor your propagation technique accordingly. It’s a bit like matchmaking for plants!


