Introduction to Sedum Spreading
Welcome to the world of Sedum, the hardy, low-maintenance groundcover that’s about to transform your garden into an emerald tapestry of delight! Often regarded as the plant equivalent of a utility player, sedum is not just a pretty face; it’s a full-fledged landscape workhorse. Poised to become your new botanical best friend, let’s discover the benefits of employing sedum and why mastering its spreading techniques is as crucial as the plant itself.
Picturing a lush carpet of green roofing a rockery or elegantly cascading down a terraced hill is no daydream—it’s sedum at work. But for sedum to work its magic, it needs more than a simple toss into the soil. Imagine your friend attempting to flourish in a sea of weeds or struggling in soil as inhospitable as a desert to a penguin—it’s a sad image, isn’t it? That’s why we’re all about teaching you how to roll out the green carpet for your sedum, ensuring it takes root and spreads like wildfire (the good kind).
Think of sedum as your garden’s cheerleader, pumping vibrancy and life into otherwise mundane spaces. Not only does it bring a pop of color and texture, but it’s also the low-key MVP in the fight against erosion. Like a tiny superhero, it holds the earth with its roots, making sure your lovely soil stays exactly where it is—talk about landscaping with a purpose!
Before we delve into the sedum spreading symphony, take a moment to watch this insightful video, which will set the stage for your upcoming gardening exploits:
Now, are you ready to add some sedum pizzazz to other areas of your garden? Perfect, because spreading this versatile ground cover is like creating botanical brush strokes on the canvas of your garden. And if you’re intrigued by the versatility of these plants, you’re in luck. Explore our insights on Sedum Plants Unearthed: Growing Tips and Varieties, and equip yourself with knowledge that’ll turn your thumb even greener.
Let’s roll up our sleeves and get ready to dive into the nitty-gritty of spreading sedum effectively. Remember, giving your plants the right start is a toast to their health and the lush ground cover you aspire to cultivate. So, stick with me as we embark on this green journey together!
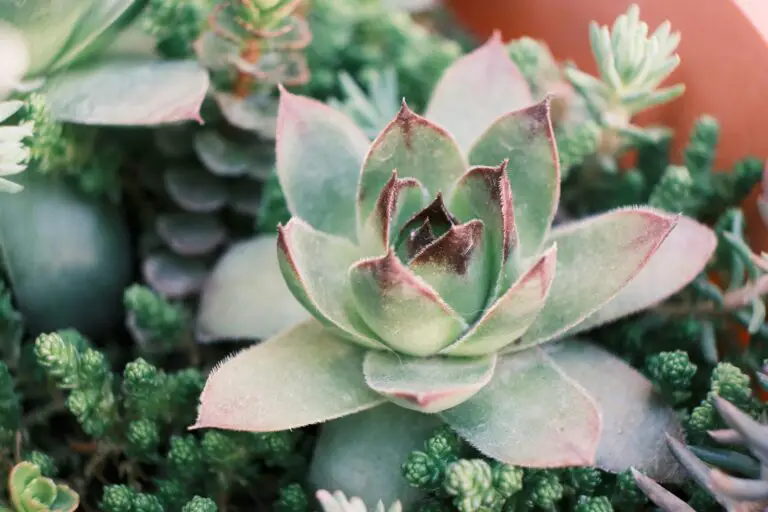
Understanding Sedum Varieties
When diving into the world of sedums, or stonecrops, it’s impossible not to marvel at their diversity. With over 400 species, sedums are the chameleons of the succulent world, each with a character of its own. Some sedums stand tall and upright, commanding attention in your garden beds. Others, like the whimsical Sedum rubrotinctum, are just too playful to resist, cascading merrily from pots and hanging baskets with jelly-bean-shaped leaves.

One moment, you think you’ve got the hang of their spreading habits, and the next, they throw a curveball at you. You might envision The Pride of Texas, a Sedum palmeri, unfolding its golden blooms with the swagger of a cowboy, while just a stone’s throw away, a Sedum acre tucks itself in between rocks, modest and unassuming.
Now, why does this matter? Because understanding these varied personalities is key to spreading sedum successfully in your landscape. For those ground-hugging sedums, you want a plant that’s going to cozy up to your walkways and patios like it’s been there forever. Then again, if it’s vertical elegance you’re after, aim high with the regal Sedum spectabile. Exploring the various types of sedums is not just about personal preference—it’s strategic gardening!
So let’s take a seat in mother nature’s classroom. Whether it’s a sedum that thrives in the scorching sun of an arid terrain or one that prefers the dappled shade of a woodland retreat, these succulent scholars teach us something crucial with every spread—adaptability. By emulating their resilience, we guarantee our gardens remain dynamic, vibrant tapestries that captivate with every view.
Optimal Conditions for Spreading Sedum
Imagine a carpet of lush, low-maintenance sedum cascading across your garden, transforming it into a vibrant tapestry of greens and reds. To achieve this, providing the right conditions for sedum to flourish is essential. So let’s delve into the ideal soil, light, and climate that will serve as the canvas for your sedum masterpiece.

Sedum, with its plump, water-storing leaves and a reputation for toughness, craves a spot in your garden where the sun drenches the Earth. Consider a well-lit location bathed in sunlight for at least six hours a day. The light ignites sedum’s growth, enhancing its vibrant hues and overall health. But don’t fret if your garden dances in the shade; sedum is versatile and can still spread its joy in partial sun.
Soil is the cornerstone of any sedum sanctuary. These steadfast plants can endure poor, rocky grounds, but they revel in well-draining land. Imagine the soil as a fluffy bed—a soft texture with uncompacted generosity allows for quick drainage, preventing the dreaded wet feet that sedum abhors.
Climate-wise, sedum is as hardy as they come. It can bask in scorching heat without wilting or dwell in cooler climates with a quiet resilience. Sedum’s ideal environment is one where it can soak in the sun while its roots remain in soil that resists retaining excess water. In areas where humidity lurks and looms, an elevated planting space or raised beds can provide the perfect escape.
Embrace these optimal conditions, and you’ll witness your sedum spreading with graceful ease, weaving a living blanket that’s both enchanting and enduring. With just a bit of knowledge and care, your garden will soon become a testament to the simple yet profound beauty of spreading sedum.
Propagation Methods for Spreading Sedum
Want a secret for creating a gorgeous carpet of sedum? It’s all about mastering the propagation game! These hardy succulents are perfect candidates for various propagation techniques, enabling you to transform sparse spaces into lush greenery. Let’s dive into the propagation playbook and get your sedum spreading like wildfire!
Cuttings: The Quick Fix
Gardeners, grab your shears! Cuttings are the express lane to a verdant ground cover. Simply snip a 2-5 inch piece from a healthy sedum stem, remove any leaves from the lower half, and allow it to callous over for a couple of days. Then, poke it into well-draining soil or a potting mix. Keep it at a bright spot out of direct sunlight and watch magic happen! In earnest, these cuttings quickly take root – giving new life to otherwise vacant patches of garden.
Division: The Gift that Keeps on Giving
Imagine you’ve got this flourishing sedum that’s outgrown its welcome. It’s time to divide and conquer! Early spring or fall is the perfect time for this operation. Gently lift the sedum plant, ensuring to keep a good portion of the roots intact. Now, with your hands or a clean knife, partition the plant into smaller sections – each with their own root system. Replant these sections at the same depth they were growing at previously, and ensure they’re watered in to establish themselves. Voila! You’ve multiplied your sedum with zero fuss.
Seeds: Patience is a Virtue
For those who revel in the anticipation, growing sedum from seeds might just be your horticultural calling. Sow your sedum seeds in early spring in trays filled with a pre-moistened growing medium. Sprinkle them on top and press them gently into the soil, as these guys need light to germinate. Keep them in a warm, bright place and maintain slight moisture. The waiting may test your patience, but once those tiny green shoots appear, the gratification is unparalleled.
Remember gardeners, each method mentioned is just another step towards creating that dreamy sea of sedum. So don’t hesitate to experiment and watch your garden turn into a page from a fairy tale!

Preparing the Planting Area
Embarking on the journey to spread sedum begins with preparing the planting area—a step that’s as thrilling as setting the stage for a grand performance. Imagine painting a canvas with green and vibrant strokes! That’s your garden bed or landscape area, waiting to come alive with a lush cover of sedum. Let’s get our hands dirty—or rather, let’s get them green—and dive into prep work that promises a stunning result.
First up, choosing the right spot. Sedum thrives in a place that’s like a beach vacation—lots of sun and well-drained soil. So, scout for a location where the sun loves to linger. Once you’ve found that sunny slice of heaven, it’s time to assess the soil. The aim is to achieve a loose and crumbly texture, like a perfect, moist brownie (yum!), but not too rich—sedum prefers a lean diet. To get there, turn the soil over using a spade or a tiller, introducing air and making it friable. This stage is like fluffing a pillow—it seems simple, but it’s essential for comfort, or in this case, for the roots to easily spread and breathe.
Next, consider the weeds—not as rivals, but more like unwanted party crashers. It’s essential to remove them, roots and all, to prevent them from competing with your sedum for resources. A top tip from seasoned gardeners is to water the area a day before clearing weeds. It’s the equivalent of a spa treatment for the soil, making it easier to uproot those nuisances. Now, with a clear area, you’re setting the stage for an uninterrupted sedum show.
As for fertilizers, sedum is not a greedy feeder. At most, a modest sprinkle of a balanced, slow-release fertilizer will do, acting like a quiet backstage assistant that subtly enhances the plant’s performance without stealing the limelight. Now, with the ground work done, your planting area is primed for the arrival of the sedum stars.
Lastly, remember that spacing is key. The sedum adage goes, “Give them room to bloom.” Position the sprigs or clumps about 6 to 12 inches apart, depending on the variety, to allow them to spread their wings gracefully. It’s like sitting comfortably in your own space at a concert—not too cramped, with plenty of room to move.
Every masterpiece starts with a clean slate, and ‘clean’ in garden terms means ensuring proper drainage. This might mean raised beds or incorporating gritty material, like perlite or coarse sand, to prevent water from pooling—a sedum’s nightmare. Just imagine your favorite book’s pages getting soggy; that’s how sedum feels with wet feet.
And now, for a visual aid, this handpicked video beautifully complements our discussion, showing the hands-on approach to preparing for a flourishing sedum spectacle in your garden:
Embrace this preparation phase. It’s filled with anticipation and promises a bounty of vibrant sedum bliss. Your garden is about to be transformed into an oasis teeming with life and color, with every clump of sedum adding to the visual symphony. And with the planting area now set, you’re ready for the next act: introducing your sedum to its new home.
Planting and Aftercare
Imagine a sea of lush, succulent ground cover, with its tapestry of vibrant colors and versatile hardiness that wins the day, year after year. The hero of this visual? Sedum, or stonecrop. But achieving this living carpet doesn’t require a stroke of luck; it’s all about planting with precision and providing the proper aftercare. So roll up your sleeves, it’s time to get up close and personal with the nitty-gritty of how to spread sedum.
Kickoff your green-thumb adventure by selecting healthy sedum cuttings or divisions. These plump, little plantlets are the building blocks of your soon-to-be sedum sanctuary. Aiming to plant in the spring? That’s perfect for giving your sedum a full season to establish and flaunt its splendor. Now, let’s clear the stage – ensure your planting site is free of weeds, and the soil is well-draining – sedum despises soggy feet! While you’re at it, mix in some compost to give your plant a nutrient-packed welcome to its new home.
It’s planting time, and this is where your sedum takes the first step towards stardom. Space your cuttings or divisions about 6 to 12 inches apart; they’ll appreciate the elbow room to spread out and show their full potential. Gently nestle them into the soil, so they’re just cozy enough, and give them a good watering to settle in. Now here’s a pro-tip: lay down a breathable landscape fabric around your plants, to give them a competitive edge against weeds, allowing them to reign supreme.
For the aftercare performance, remember, sedum is a trouper and fairly low-maintenance. They require minimal watering – over-watering is the main villain here. Be a sidekick to your sedum by monitoring the soil moisture and only watering when the soil feels dry. And, if you’re playing the long game, a yearly spring trim encourages a dense, fresh regrowth, catapulting your sedum cover to a fuller and more robust existence.
Don’t forget, the first year is a dress rehearsal! It’s all about establishing roots and gaining strength. Patience is key, as your sedum’s encore in the following seasons will be worth the wait. Year two and beyond showcase the true, unabated vigor of your sedum – a lush, self-sufficient spread that demands little more than your admiration.
Troubleshooting Common Sedum Spreading Issues
So, you’ve decided to create a tapestry of lush sedum ground covers, but instead of a verdant carpet, you’re faced with a smattering of lackluster plants that refuse to thrive. Fret not! Most problems with sedum spreading boil down to a few solvable issues.
Poor Rooting: The Anchor of Success
Imagine laying a plush carpet only to find it wrinkled and loose the next day. That’s what happens when sedum doesn’t root well. If you’ve spotted patches of your ground cover looking as if they’re about to take flight, it’s time to reassess the rooting situation. Sedum typically roots with enthusiasm, but if your plants are loitering above the soil like a guest overstaying their welcome, it might be due to compact soil or inadequate planting techniques. Loosen things up! Break up the soil and nestle your sedums in snugly, ensuring they have direct contact with the earth to encourage those roots to anchor down.

Pesky Pests: Uninvited Guests at the Sedum Soiree
No party is complete without a couple of gatecrashers, and in the world of sedum, these uninvited guests come in the form of pests. Aphids, mealybugs, and other sap-suckers see your sedum as an all-you-can-eat buffet. Left unchecked, they’ll turn your spread into a spread-out mess. Regular inspections are key. Keep an eye out for telltale signs like sticky residue or distorted growth. If you find these critters, invite them to leave with a blast of water or introduce beneficial insects like ladybugs who are all too happy to help clear out the freeloaders.
Overwatering: A Tidal Wave of Trouble
Overenthusiastic watering is the equivalent of smothering your plants with too much love. Sedums are drought-tolerant succulents that thrive in well-drained soil; they don’t take kindly to soggy conditions. Overwatering can lead to root rot, a stealthy assassin that creeps up and claims your sedum silently. The solution? Water wisely. Let the soil dry out between watering sessions, and make sure your garden beds provide adequate drainage. It’s about striking the right balance between hydration and breathability for the soil.
Understanding these common problems and their straightforward solutions can turn your sedum spreading woes into a success story. A well-rooted, pest-free, and perfectly watered sedum ground cover can be the low-maintenance, high-impact element your garden has been craving. Now go forth and foster your foliage with confidence!
Design Ideas with Spreading Sedum
In the quest for a low-maintenance yet aesthetically pleasing landscape, the versatility of spreading sedum can bring a vibrant transformation to any garden. Imagine a lush carpet of foliage, teeming with life and color, just waiting to complement your outdoor living space. The adaptability of spreading sedum makes it a prime candidate for innovative and eye-catching garden designs.
We’re talking about a ground cover that isn’t just about filling space; it’s about creating a living tapestry that thrives with minimal fuss. One of the most enchanting real-life examples is that of an urban rooftop garden where various species of spreading sedum paint a verdant mosaic, bringing life and beauty to otherwise overlooked spaces. This not only enriches the urban scenery but also contributes to environmental sustainability by creating habitats and improving air quality.

Ideally, strategic placement of spreading sedum can highlight the contours of your land, guide the eye along winding garden paths, and accentuate the features of your outdoor environment. For instance, place a variety of sedums along a stone walkway, each variety spilling over the edges in a cascade of different textures and hues, offering a visual and tactile feast for the senses. These durable plants can endure foot traffic and will bounce back, unphased, making them the perfect companion for high-tread areas.
And let’s not overlook the creative potential for using spreading sedum in areas where other plants might struggle. That sloping section of your garden that’s been bare because it’s just too hard to mow? Sedum is the solution, creating a seamless green slope that’s as carefree as it is captivating. Moreover, you can mix and match sedum with other drought-tolerant plants, such as lavender or Russian sage, for a variety of textures and colors that thrive with minimal water, making your garden not only a work of art but a model for water-wise horticulture.
By embracing the natural flow of the landscape and the robust nature of spreading sedum, your garden design can be a dynamic expression of form and function. So, whether you’re crafting a secluded nook enveloped in greenery or a grandiose entrance that wows visitors, let spreading sedum be your canvas for an outdoor masterpiece that’s as effortless as it is enchanting.
Sustainability and Eco-Friendly Benefits of Sedum
When you envision a lush, green expanse of garden, what often comes to mind are the usual grassy lawns. But let’s pivot to an eco-hero of the plant world—the humble sedum. Known for their hardy disposition and resilience, sedums are not just about curb appeal. They are the unsung champions of sustainable gardening, a real game-changer in the world of eco-friendly landscapes.
Let’s dig into the dirt of how spreading sedum can be a boon to your garden and the ecosystem. For starters, sedum varieties are pros at establishing extensive root systems. This means they’re exceptional at erosion control, steadfastly holding soil in place and preventing runoff that can wreak havoc on local waterways. Plus, these root systems create a subterranean network that’s all about supporting nutrient cycling—something synthetic turf could never match!
Consider this real-life scenario: a community park replaces sections of turf with sedum ground covers. What you witness over time is a transformation—reduced water usage thanks to the drought tolerance of sedum, which effortlessly endures dry spells that would brown regular grass. The result is a prime example of water conservation and a reduction in maintenance resources. You’ve got a sustainable slice of green that throws a lifeline to dwindling water supplies.
But there’s more! Sedums are like the neighborhood diners for pollinators. They supply a platform for bees, butterflies, and other beneficial insects to feast on nectar and pollen. In the process, they support biodiversity and enhance the survival of these crucial pollinator populations. Imagine the kaleidoscope of winged visitors that could turn your sedum-laced garden into a pollinator paradise—buzzing bees, flitting butterflies, all contributing to a thriving local ecosystem.
The sustainability story of sedum doesn’t end with soil and pollinators. These plants are like the low-maintenance friends you love to have around—thriving with minimal fuss, no fertilizer dramas, and saying no to pesticides. In essence, they promote a chemical-free environment, contributing to cleaner air and a healthier ecosystem.
Here’s a visual nudge to illustrate what we’re talking about. Get inspired by the resilience and environmental perks of sedum with this video, showcasing its role in creating eco-friendly spaces.
Embracing sedum isn’t just about hopping on the sustainability bandwagon; it represents a practical, life-affirming choice. Whether you’re an individual gardener or a community leader looking at the big ecological picture, spreading sedum is a powerful stride toward greener tomorrows. You see, cultivating sedum isn’t just planting—it’s an investment in the natural legacy we leave behind.
Frequently Asked Questions
Embarking on a venture to enhance your garden with sedum’s sprawling lushness? You’ve likely got a bevy of questions swirling in your mind. Well, consider this your Sedum 101—a class where no question is too small, and every gardener’s curiosity is nurtured!
When is the Prime Time to Spread Sedum?
Imagine your garden as a stage, and sedum as the headlining act—you want to set the stage when the audience, or in this case, the weather and soil, are prepared to welcome them. Aim for the sweet spot between late spring and early summer when the soil is warm and inviting, but the heat of the summer sun hasn’t reached its peak. It’s like baking a pie; you wouldn’t toss it into a cold oven, right? The warm soil invites sedum roots to anchor and flourish.
Must-Know Care Tips
Now, don’t take this the wrong way—sedum isn’t needy, but it does enjoy a little TLC. Think of it as the friend who treasures quality time over gifts. Regular watering in the early days post-planting helps your sedum make itself at home. But don’t fuss too much; overwatering is like giving them too much attention—not always appreciated. Once they’re settled, these sturdy plants crave independence. They’re the kind of friends who thrive with sporadic coffee dates, not daily hangouts.
Handling Pests and Diseases: A Garden Drama
Imagine you’ve thrown a garden party, and uninvited guests show up—pests and diseases, the party crashers. Stay vigilant and ensure good air circulation around your plants; dense growth is the VIP area, and you want to keep it exclusive. Spot a sneaky aphid or powdery mildew? Extend them a firm ‘no thank you’ with appropriate organic pest control. It’s like checking the guest list at the door—keeping the riff-raff out ensures the pleasure of the company you’ve intended. And remember, the best defense is a good offense, so keep your sedum strong with proper care—they’ll be less enticing to those unwanted visitors.
Incorporating how to spread sedum into the narrative of your garden is easy once you’ve got the insider info—and now, you’re well-equipped to cultivate a cover that rivals the rich tapestries of the finest grounds. Just picture your outdoor space transformed into a lush, welcoming oasis, with sedum as the soft carpet beneath your feet, painting your garden with a stroke of emerald brilliance.