Introduction to Haworthia Propagation
Welcome to the intriguing world of Haworthia propagation, where every enthusiast can partake in the delight of creating new life from these resilient and attractive plants. If you’re drawn to the robust charm of succulents, you’ll find Haworthia to be a standout candidate in the propagation game. With a reputation for being easygoing and stylish, it’s no wonder that Haworthia has cemented itself as a favorite within the succulent community.
Why are so many succulent lovers entranced by Haworthia? One peek at their plump, pearlescent leaves, sometimes artfully translucent at the tips, and the answer is as clear as the Aloes window’s own fleshy panes. Not only is Haworthia aesthetically versatile, but it’s also a forgiving friend to newbie propagators and seasoned green thumbs alike. Whether you’ve inadvertently stumbled upon propagation through a disregarded leaf or you’ve meticulously planned your succulent offspring, Haworthia is there to ensure your success with a smile.
Through the alchemy of propagation, these sturdy little plants can multiply in various ways, promising fresh batches of miniature wonders. Leaf cuttings, offsets, and seeds present a trifecta of opportunities for anyone willing to dip their toes—or rather, their fingers—into the soil of creation. Discover more about the nurturing care they require, transcending mere survival to truly thrive. And while one might assume this process is a silent affair, any Haworthia whisperer will tell you of the faint rustle of new growth, an audible testament to life’s persistence.
As we embark on this journey through Haworthia propagation, let’s visualize the zenith of our labor—a constellation of freshly potted offspring, catching the diffused morning sunlight on a well-loved sill. From the exuberant overachiever bursting with clusters of new growth to the solemn, solitary leaf steadily sending out tender roots, each triumph fosters admiration and an indescribable sense of accomplishment.
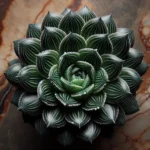
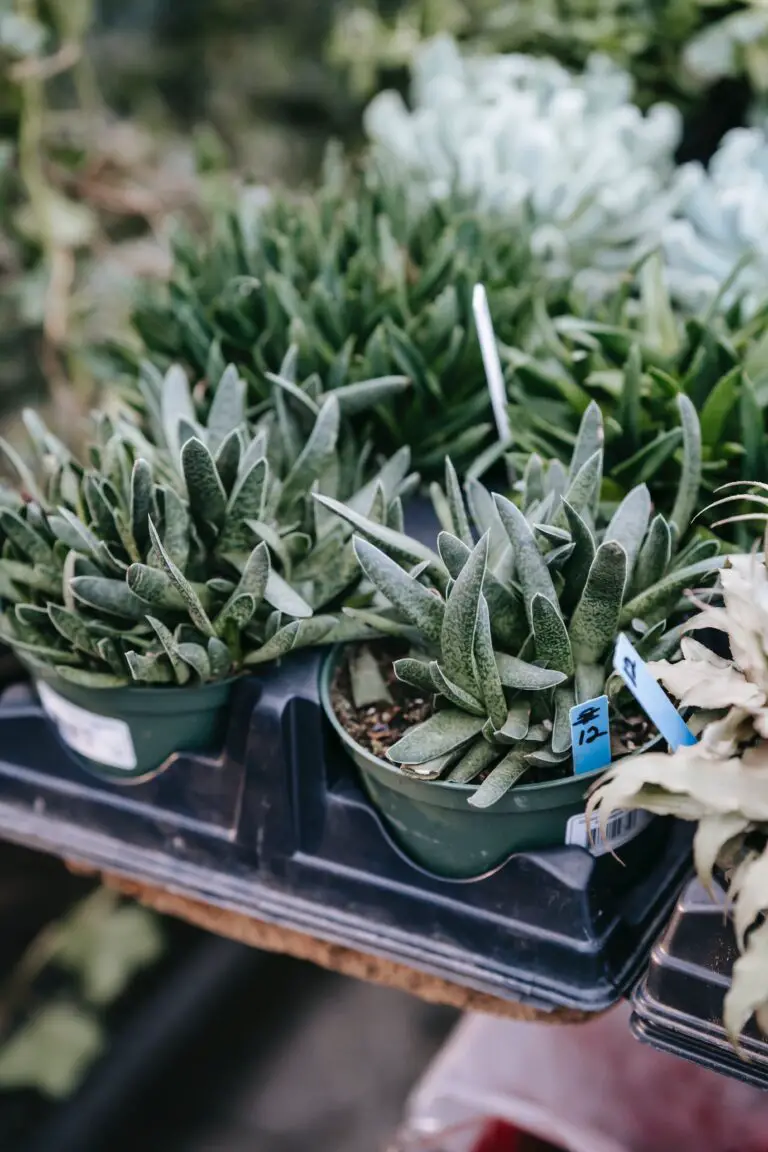
Take a moment to admire a  picture-perfect example of Haworthia propagation. It’s set against a tranquil background, each rosette a testament to the simplicity and beauty of nature’s intent. Imagine a similar scene unfolding in your own home, where the daily hustle fades into the background, and all that remains is the serene connection between you and your thriving plantlets.
Envision yourself with us, shears in hand, a magnifying glass perhaps comically poised as you delve into the miniature world of Haworthia propagation. Together, we’ll uncover the secrets nestled within their fleshy leaves, ripe with potential and the silent promise of growth. No fanfare, no complicated techniques—just you, the earth, and a living gem poised to multiply beneath your attentive care.
Understanding Your Haworthia Plant
Welcome to the enchanting world of Haworthia, a succulent that has captured the hearts of plant enthusiasts worldwide. These little wonders aren’t just a pretty face; they’re a botanical marvel, perfectly designed for thriving with minimal fuss. Let’s delve into what makes them tick, and set the stage for successful propagation.
Haworthias are the sunbathers of the plant world, reveling in bright, indirect light. Imagine them lounging under the dappled shade of a tree in their native South African habitat, soaking up the golden rays without breaking a sweat. That’s the sweet spot for these guys in your home too—a spot near a window where sunbeams can gently kiss their plump leaves without causing a sunburn.
Now, let’s talk about the perfect pedicure for your plant’s roots—well-draining soil. Haworthias loathe wet feet; think of them like that friend who hops around puddles, not wanting to soak their stylish shoes. A mix that allows water to quickly pass through, mimicking the dry, rocky regions they hail from, will keep those roots happy and healthy.
Speaking of water, these succulents are like camels, storing water in their thick leaves, ready for the driest of dry spells. Overwatering is a big no-no; it’s like offering them a water bottle when they’ve just had a full-course meal—they simply don’t need it. Water sparingly, only when the soil feels like a dry desert, and you’ll see them thrive.
In the spirit of truly understanding these fascinating plants, why not dive deeper into the world of Haworthia care to appreciate the full extent of their resilience and grace? It’s the perfect primer for anyone looking to embark on propagation adventures.
Getting to know your Haworthia is the first step to propagation success. They’re not fussy residents; they’re hardy survivors, champions of the easy-care plant squad. Keep them content with the right light, soil, and water, and you’ll be well on your way to a propagation triumph. Stay tuned as we take this journey from understanding to multiplying your delightful Haworthia collection.
Propagation Methods Explained
If you’re aiming for Haworthia propagation success, you’ve got to understand the various ways these succulent wizards can multiply. Let’s break down the methods: division of offsets, leaf cuttings, and seed germination. Each has its charms and challenges, so buckle up, grab a root, and let’s dive in!
Division of Offsets: The Budding Beginnings
Imagine a tiny replica of your beloved haworthia, sprouting at the base like a mini-me. That’s an offset. These little plantlets are a cinch to separate from the mother plant. Gently tease them apart, give them soil of their own, and voilà, your haworthia family expands. It’s easy-peasy with the bonus of almost instant gratification. Check out this succulent care video for a hands-on guide on nurturing these baby offsets into adulthood.
Leaf Cuttings: Slow and Steady Wins the Race
Patience is the name of the game when propagating haworthia from leaf cuttings. You’ll need a keen eye to select the healthiest leaves, a sharp snip to separate them, and a whole lot of time. Lay the leaves on well-draining soil, mist occasionally, and wait for the magic to happen. Leaf cuttings take their sweet time to produce roots and baby plants, but the anticipation and eventual triumph are worth the wait!
Seed Germination: A Test of Patience and Virtue
If you’ve got seeds, you’ve got potential. Sowing haworthia seeds can turn into a meditative horticultural practice. It’s slow, definitely more complicated than the other methods, but there’s something incredibly rewarding about watching life unfold from a speck. You’ll need the right temperatures, consistent moisture, and a no-rush attitude. The germination journey can be long, but it offers a fascinating glimpse into the tenacious spirit of these plants. If that’s your jam, dive into this haworthia propagation guide to get the full seed-sprouting scoop!
Each haworthia propagation method has its perks and quirks—don’t shy away from trying them all. Who knows, your propagation prowess might just see your green thumb crowned in glory in your own indoor Eden.
Division of Offsets
Have you ever marveled at a thriving haworthia and wondered how to multiply that spiky beauty? Well, the secret is as simple as pie, and it lies in the plant’s own offsets. Also known as “pups,” these little clones sprout up at the base of the mother plant, begging to be given a life of their own. Let’s dive right into the green world of haworthia propagation through the division of offsets!
The first step is to identify a healthy haworthia that has produced offsets. You’ll know they’re ready for independence when they’ve formed their own little rosettes. Now, get ready for some fun: it’s time to gently coax those offsets from their parent plant. It’s a bit like untangling a knot of necklaces; patience is key!
When separating, carefully remove the offsets with a clean, sharp knife or by gently twisting them away from the parent. Be sure to include roots if they have any—think of them as the offset’s packed lunch for their big journey ahead. Once you have your offsets, it’s time to let them sit in a dry, shaded place for a few days. This waiting period allows the cut area to callous over, which is akin to putting on a suit of armor against potential soil pathogens.
Next, you’ll prepare pots with well-draining soil. A mix of potting soil and sand or perlite ensures that your haworthia’s roots won’t get waterlogged. Think of it as creating the perfect bed after a long day: comfortable, but not too soft. Plant your offsets in their new homes, and then—this is crucial—resist the urge to water them immediately. Instead, allow the offsets to settle in and find their bearings for a few days, like guests getting accustomed to hotel surroundings before hitting the pool.
Once your pups have had a chance to acclimate, you can give them their first gentle watering, careful not to drown the newbies. Water sparingly, as you would nurse a fine whiskey, and let the soil dry between waterings. A little tip: haworthia are like camels in the desert; they prefer drought over deluge.
After planting, it’s all about patience and tender observation. Keep an eye on the light and temperature, as haworthias enjoy a spot where they can bask in bright, indirect sunlight—think of it as their personal spa day. Slowly but surely, with the right care, your offsets will start to establish themselves and soon begin their journey toward becoming strong, independent plants.
Remember, each plant has unique needs, so don’t hesitate to adjust your care routine slightly based on how your offsets respond. And don’t worry if you experience a couple of setbacks; it’s all part of the learning process. For more in-depth guidance on this topic, why not explore some outside resources like The Spruce’s guide on haworthia care?
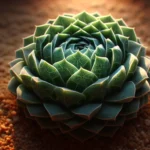
So why not embark on this rewarding horticultural adventure? Like a botanical treasure hunt, each offset holds the promise of a full-grown haworthia, ready to add texture and tranquility to your space. And here’s a visual aid to inspire you:
There’s nothing like the pride that comes from cultivating your own garden, and with haworthia offsets, the start of your green oasis is right at your fingertips. It’s a natural cycle of growth and renewal, ready to be sparked by the touch of your hand. Happy planting!
Haworthia Propagation Success: Tips and Techniques
Leaf Cuttings Technique
Imagine you have a close friend in the plant world, a friend who’s resilient, low-maintenance, and always ready to multiply and bring joy to other garden enthusiasts. That’s your haworthia, a succulent that’s as generous as it is stunning. Today, you’re going to learn how to propagate this beaut through the leaf cuttings technique. Get ready to dive into a world where a single leaf can spark a whole new generation of succulents!
First up, it’s all about the selection. The right leaf can make all the difference between a thriving baby haworthia and a propagation attempt that falls flat. Look for a leaf that’s healthy, plump, and full of life—this will be your golden ticket. A good rule of thumb is to choose a leaf from the lower sections of the plant, as they are often the most mature and ready to root.

Once you’ve got your perfect leaf, it’s prep time. Carefully detach it from the mother plant with a clean cut, making sure not to damage its base. Think of it as a surgeon performing a delicate procedure; precision is key. After the separation, let the leaf dry out for a few days to callous over the wound. This natural ‘band-aid’ is crucial—it safeguards against rot when your leaf begins its subterranean journey.
Next up, rooting. Nudge your little green trooper into a pot filled with well-draining succulent mix soil. The contact with the soil should be gentle, almost like tucking in a child at bedtime. You’re not planting it deep—just a slight touch is enough to encourage roots to explore and claim their new home.
Watering is the final but pivotal step. While haworthias are drought-tolerant, the early stages of propagation require a delicate balance; think moist but not soggy, like a wrung-out sponge. Your leaf cutting doesn’t want to swim, it just needs enough water to whisper, ‘Grow, little one, grow!’ misting the soil occasionally should do the trick.
Over the weeks, magic happens. Beneath the soil’s surface, your leaf cutting begins to put down roots. All that tender love and care pays off as you witness the emergence of tiny pups, the mini-me’s of your haworthia. With sunlight as their ally and your nurturing hand, these little fighters will fashion a sprawling family from a single leaf.
Remember, patience is the silent ingredient in haworthia propagation. The process might not be quick, but it sure is rewarding. So, go ahead—select, prep, root, and water your way into a lush and multiplying haworthia collection. Your green-thumb tribe will definitely want to hear the tale of how a single leaf sparked a succulent revolution!
Growing Haworthia from Seed
Sowing the seeds of success with haworthia starts with understanding the patient art of propagation from seed. Just imagine: your tiny, glossy seeds could one day unfold into stunning, full-grown succulents. So, how do we begin this exciting journey?
First, you’ll need to gather your haworthia seeds, ensuring they’re fresh for the best shot at germination. Picture setting up a miniature nursery: a shallow tray or container filled with a well-draining soil mixture is your starting point. Now for the critical part – the conditions. Think steady moisture (but not soggy), warmth, and bright, but indirect, sunlight. These are the VIP guests at your germination party.

Meticulously sprinkle the seeds over the surface of the soil, as fine as dusting confectioner’s sugar on a cake. Then, cover them with a fine layer of sand or vermiculite, like tucking them in for a long nap. This phase is a true exercise in patience, for haworthia seeds can leisurely take anywhere from a few weeks to a couple of months to wake up.
Anecdotes abound of succulent enthusiasts who have waited with bated breath, eyes wide in anticipation each morning, to spy that first sprout piercing through the soil. And when that moment arrives, when those first green shoots triumphantly break through, the reward is sheer botanical bliss – an experience that binds haworthia growers in a unique camaraderie.
So, are you ready to embark on this horticultural adventure? With a sprinkle of seeds, a dash of care, and a whole lot of patience, you’re well on your way to propagating your very own haworthia garden.
Aftercare for Propagated Haworthia
Bravo! You’ve entered the ranks of successful propagators with your baby Haworthias thriving. But don’t hang up your gloves just yet; the journey’s only begun. The real test of your green thumb prowess is in ensuring your succulent sprouts transition into strong, resilient plants. Let’s talk shop about aftercare—the VIP treatment your propagation prodigies deserve.
Watering Wisely
Think of watering as an art form with Haworthias, where less is often more. After propagation, your delicate ‘Haws’ need moisture but despise waterlogged soils. So here’s the insider tip: wait for the soil to dry out completely before giving them a drink. It’s a dance—a two-step of drying and drenching. Visualize this: you’re parched and reaching for a glass of water. That’s your Haworthia’s roots as the soil dries. Thoroughly quench its thirst, then repeat the cycle. An easy rule of thumb is to water every few weeks, but keep your senses sharp: leaves will shrivel when your plant is thirsty and become supple post-watering.
Upsizing with Care
Your Haworthia’s graduation from the ‘tiny pot’ academy to a roomier home needs a celebration—a gentle repotting ceremony. Start with a container one size up and a fresh mix of succulent-friendly soil. Imagine you’re tucking in a child beneath a cozy blanket—that’s how tenderly you should nestle those roots into the new pot. And remember to provide drainage fit for a king because Haworthias hold a strong dislike for wet feet.
Battling the Green Foes: Rot and Pests
When discussing Haworthia care, we can’t sidestep the dark drama of rot and pests. Rot’s a sneaky adversary, often stemming from overwatering. Stay vigilant, watch for saddening blackening at the base, and act swiftly if you spot trouble. For pest infiltrations, it’s akin to playing superhero—an eco-friendly insecticide is your heroic tool. Aphids, mealybugs, and spider mites quake in fear at such defenses. Regular checks will help you catch these intruders early, keeping your Haworthia safe and sound.
Here’s a visual guide that’ll make you an aftercare aficionado for your cherished Haworthias. Take a look at this insightful video, and you’ll be equipped to handle all the curveballs Haworthia care can throw at you:
Keep these tidbits of wisdom in your gardening playbook, and your Haworthias will be the envy of the neighborhood. Remember, proper aftercare is what separates the fly-by-night gardeners from the true cultivators of lush, living beauty. Water with care, transition gracefully, and stand guard against rot and pests to cultivate robust haworthia plants that stand the test of time!
Troubleshooting Common Propagation Problems
So, you’ve decided to delve into the world of haworthia propagation, a rewarding endeavor with the promise of creating mini succulent clones. But sometimes, even the most diligent plant parents can hit a snag. Let’s untangle some common propagation puzzles, shall we?
Picture this: you’ve followed all the instructions, cut your haworthia pup with precision, and waited patiently. Yet, the roots seem to be on an endless coffee break. Unsuccessful root development is like waiting for a pot to boil—only that the pot is your plant, and it just won’t simmer into action.
The Root of the Problem
First up, root riddles. If your haworthia cuttings are as stubborn as a cat avoiding bath time, it’s possible they’re just not ready to take the plunge into soilhood. Before you start to panic, check that the cut end has properly calloused over. If not, give it a bit more time to toughen up, and remember to keep it in a warm, bright place, but out of direct sunlight, which can be as welcoming as a snowstorm at a picnic.
If you’re already past that and still no roots, consider your watering habits. These succulent kiddos dislike soggy feet more than we dislike wet socks. Ensure you’re not overwatering and that the soil drains faster than a water slide on a hot summer day.
When Sickness Strikes
Encountering diseases during propagation can feel like spotting rain clouds on parade day. Fungal issues often arise due to excessive moisture—an understandable oversight since we’re often taught that plants crave water like we crave chocolate. However, watch for signs of rot or mold, which can traverse through a haworthia faster than rumors in a high school hallway.
The fix? Think of the soil as a dry desert, not a tropical rainforest. Water sparsely, and only when the soil is as dry as a comedian’s wit. And if the problem persists, it might be time to break out the fungi-fighting gear—fungicide, to the rescue!
While these tribulations might seem as daunting as a crossword puzzle in another language, they’re simply part of the haworthia propagation journey. Arm yourself with these solutions, and you’ll be more prepared than a squirrel with a stockpile of nuts come winter.

Maximizing Propagation Success
So you’re into Haworthias, those small, rosette-shaped succulents with fleshy, often translucent leaves, and you’re keen to grow more of these fascinating plants through propagation. Great choice! Now, roll up your sleeves because we’re diving into some additional tips and best practices for bolstering your haworthia propagation prowess. Let’s turn those tiny pups into thriving adults with some insider knowledge!
Timing Is Everything: Best Time of Year
Timing can make or break your propagation efforts. Haworthias, by their nature, sulk in the overly hot summer months and shiver in frosty winters. However, there’s a sweet spot when they’re primed for multiplying – early spring and late summer. That’s when the temperatures are mild and the plants are coming out of their dormancy, ready for a season of growth. It’s like catching them on their morning coffee run – they just can’t say no to a fresh start!
Soil Mix: The Perfect Propagation Brew
Getting the soil mix right is as essential as your morning coffee is to you. Think of a light, breathable, and well-draining mix that’s like a five-star hotel for those tiny roots to spread out. Here’s a recipe you can try at home: mix one part potting soil, one part perlite, and one part coarse sand. It’s like a balanced diet for your haworthia pups; it holds moisture without being clingy and offers enough room for air to circulate.
The Virtue of Patience in Propagation
Ok, here’s the deal—propagation is not a sprint; it’s a marathon. Remember the saying, “good things come to those who wait”? Well, it’s like it was made for propagating Haworthias. These plants grow at a leisurely pace, so it’s a waiting game. But, just like that slow-cooked stew that’s all the richer for the extra time on the stove, your patience will be rewarded with strong, healthy plants.
Now, how about a visual to get all these tips in action? Check out this video for an up-close and personal look at haworthia propagation.
With these added tips under your belt, you’re all set to maximize your haworthia propagation success. Imagine the sense of achievement when you see those little pups take root and start to flourish. You’ll be a Haworthia hero before you know it! Just remember, it’s all about timing, the perfect soil mix, and a good dose of patience—a winning trio for your propagation venture.
Frequently Asked Questions
Embarking on your haworthia propagation journey? You must have a heap of questions teeming in your mind! Let’s dive in and un-pot some of the most common queries that fellow enthusiasts, like you, often wonder about.
When is the Best Time to Propagate Haworthia?
Timing is everything when it comes to propagation! You’ll want to do this in the spring or early summer when your haworthia is in its active growth phase. That way, the little pups are much more eager to strike roots and grow into full-fledged, independent plants.
Can You Propagate Haworthia from a Leaf?
While some succulents are champs at leaf propagation, haworthias can be a bit shy. It’s not impossible, though! If you’re patient, a leaf can produce a new plant, but why wait? Offsets, or ‘pups’, give you a faster and much more reliable route to propagation success.
How Do You Separate Haworthia Offsets?
Ah, the joy of division! Wait for the offsets to reach a reasonable size, then gently tease them apart from the mother plant. Make sure they have some roots attached. Think of it as giving them a little packed lunch for the journey to their own pot!
What Kind of Soil is Perfect for Haworthia Propagation?
Imagine creating the ideal bed for your newborn pups—airy, well-draining, and cozy. A mix of potting soil and gritty materials like perlite or coarse sand is just the ticket for those tender haworthia roots.
How Often Should You Water Propagated Haworthia?
Watering is like a first date; it’s best not to come on too strong. Overwatering is the fast track to root rot. Let the soil dry out completely between waterings, and remember, these little succulents know how to handle a drought—they’re tough cookies!
When Can You Expect Roots and New Growth?
Patience is a virtue, especially with haworthia propagation. Roots may start to show in a few weeks, but it can take longer. Just keep the faith and maintain proper care, and soon you’ll see those tiny green tips emerging like little victories!
Any Tips to Boost Haworthia Propagation Success?
Oh yes! First, make sure you’re not baking your baby haworthias in direct sun. Bright, indirect light is the way to go. Next, avoid cozying them up too much—good air circulation is key. And finally, sing to them… Just kidding! But honestly, a little TLC goes a long way. Stay attentive but not overbearing, and you’ll be a haworthia propagation hero in no time.