Introduction to Crassula Propagation
An overview of propagating Crassula plants, including why it’s a rewarding project for succulent enthusiasts, and the promising results it can lead to. Briefly mention the various species of Crassula like Crassula ovata, commonly known as the Jade plant.
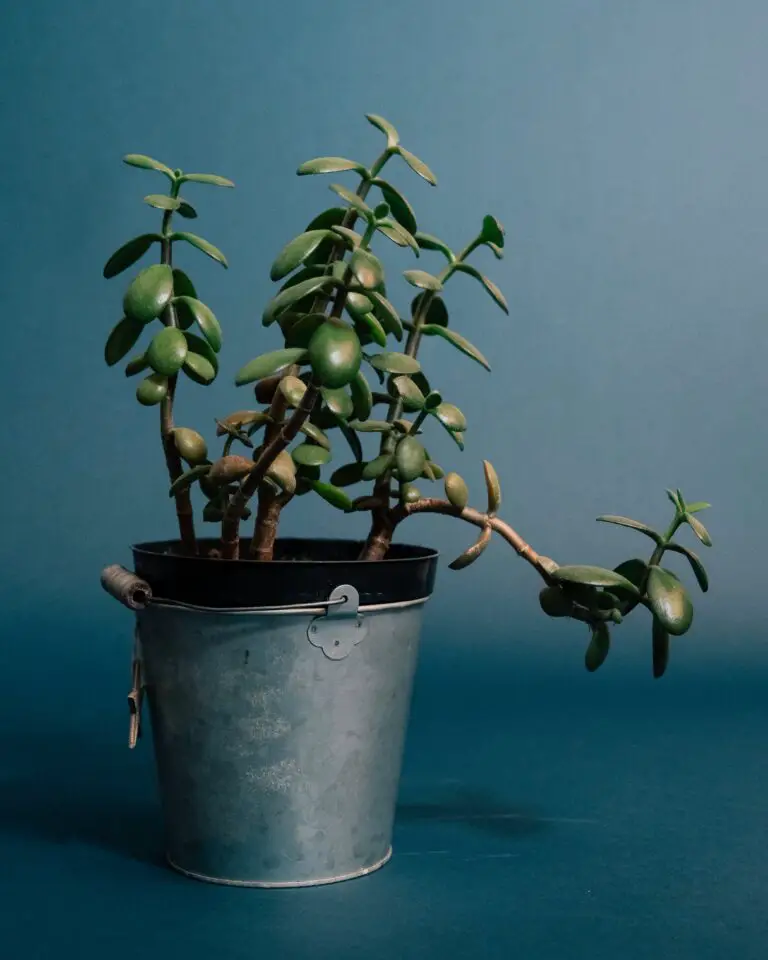
Think of Crassula propagation as a magical journey—a journey where each tiny leaf holds the promise of a new life. It’s like a mini adventure where you, the plant enthusiast, get to play the all-important role of Mother Nature. There’s a particular thrill in watching a fresh cluster of tiny, vibrant leaves sprout from what used to be a simple, unassuming leaf or stem cutting. The best part? There’s a Crassula species for everyone. Whether you’re beguiled by the classical charm of Crassula ovata or dazzled by the intricate patterns of Crassula rupestris, there’s a delightful experience in store for you.
Every time you propagate a Crassula, you’re not only increasing the green footprint in your living space but also continuing the legacy of some truly remarkable species. Imagine a world where your coffee table, bookshelf, or window sill is adorned with these succulent gems—each one telling its own story of growth and resilience. And who wouldn’t revel in the enchanting sight of their sculptural Jade plant developing clusters of starry flowers? Truly, it’s a testament to the wonders of nature—and your nurturing! Now, to embark on this delightful propagation escapade, you don’t need complex tools or arcane knowledge; just some simple techniques and a dash of patience.
When you’ve successfully propagated your Crassula, and it starts to thrive, you don’t just gain an attractive plant— you gain a living story. Each new plant is a narration of your plant-care journey, your attentiveness to the subtle needs of your green companions, and your dedication to nurturing life. For a real-life example, let’s consider Sarah, a plant enthusiast from Oregon. She started with a single Jade plant leaf and now prides herself on a sprawling collection of Crassula that brings a touch of the exotic to her urban abode. It’s a testament to the joy and satisfaction that comes with the simple act of propagation—a confirmation that often, the smallest efforts sprout the most remarkable rewards.
Choosing Your Method: Leaf Vs. Stem Cuttings
When it comes to propagating your Crassula, you’re faced with a decision that’s akin to choosing between chocolate and vanilla ice cream – both are delightful, but they offer different experiences. You can start your succulent journey either with leaf cuttings or stem cuttings. Each technique comes with its unique set of benefits and drawbacks, sort of like picking between a slow, mellow Sunday drive or an exhilarating race down the freeway.
Leaf Cuttings: The Delicate Art
Propagating Crassula with leaf cuttings is a method akin to nurturing a bonsai from a seed – it requires patience and gentle care. Imagine taking a single leaf, plucked gently from your robust succulent, and watching it embark on a journey to become a whole new plant. It’s a sustainable and minimalistic approach, where even fallen leaves have the potential to rise, phoenix-like, into new life.
However, this method isn’t without its challenges. It tests your patience, as it takes longer for a leaf to develop roots and eventually sprout a new plant. The success rate can be a gamble – not every leaf decides to take the plunge into plant parenthood. Despite this, the magic of watching a tiny Crassula emerging from a solitary leaf is nothing short of enchanting.
Stem Cuttings: Speedy Growth, Reliable Results
On the flip side, stem cuttings offer a fast-track to Crassula propagation. It’s the express train, cutting straight through to results. By snipping a portion of the stem with a few leaves, you’re giving the cutting a head start with multiple growth points. It’s a more reliable method with a higher success rate – akin to planting a young sapling instead of a seed.
Yet, speed can come with a trade-off. With stem cuttings, you might miss out on that awe-induced period of anticipation as you would with leaf cuttings. And let’s be real – there’s something magical about the simplicity of starting from a single leaf.
Whatever method you choose, the voyage from cutting to a full-fledged succulent is a rewarding one. If you’re curious about other ways succulents can surprise you with their resilience and beauty, there’s a world of exploration waiting for you. Whether you pick leaf or stem cuttings, you’re participating in the cycle of life, giving rise to a new generation of Crassulas that carry the legacy of their parent plants.
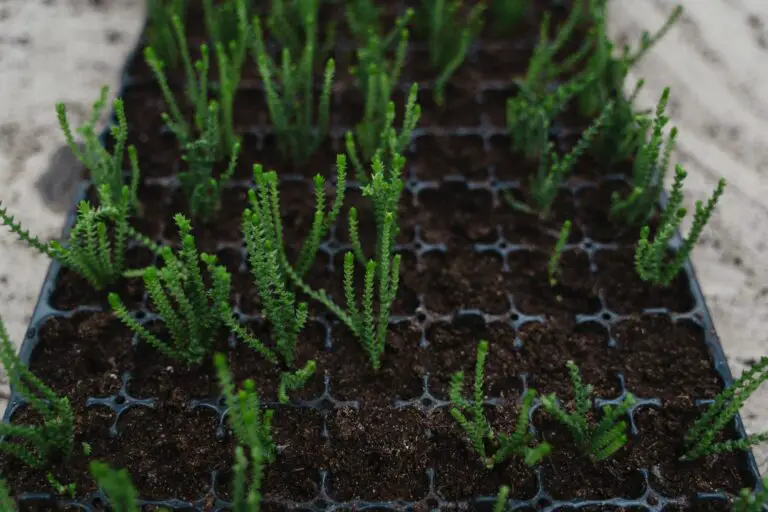
Step-by-Step Guide to Leaf Propagation
Imagine you’re on a crafting mission, but instead of paper and glue, your materials are succulent leaves and patience. That’s right, we’re going to dive into the magical world of propagating Crassula, turning single leaves into full-grown, potted treasures. So, grab your gardening gloves, and let’s get started on this green-thumbed adventure.
Selecting the Perfect Leaf
First off, you want to be a leaf-picker extraordinaire. Look for healthy, plump leaves that show no signs of stress, such as yellowing or wilting. They should feel firm, like a ripe avocado, and be free from any scrapes or bruises. Think of it like choosing the best parachute—you want it intact before you leap!
Preparing for Take Off
Once you’ve selected your MVP leaves, it’s time to twist and shout—well, less of the shouting. Gently twist the leaf from the stem; a clean snap is what you’re after. No jagged edges, please! Then, let these leafy cuttings sit on a dry surface away from direct sunlight. You’re giving them a chance to callous over, which takes about a few days to a week. It’s like they’re developing a protective scab before being planted—nature’s Band-Aid!
Rooting Renaissance
Post-callowing period, arrange your leaves atop a well-draining soil mix, typically one formulated for succulents. Moisten the soil slightly—a spray bottle works wonders here—and then play the waiting game. In no time, you’ll see tiny roots searching for soil and miniature Crassula plants emerging like curious groundhogs. These tiny starters are a clear sign your propagation is on point. Unleash your inner cheerleader; those little guys deserve it!
During this delicate phase, indirect sunlight is your best friend. Too harsh, and your baby plants might throw in the towel; too little, and they’ll stretch like they’re trying to grab the remote from across the room.
And remember, even in the plant world, tough love is sometimes necessary. Allow the soil to dry out completely between waterings to encourage strong root growth. Overwatering can lead to root rot, turning your propagation dream into a swampy nightmare.
Be aware of your surroundings when creating the ideal rooting conditions for your Crassula cuttings. If you’re looking for inspiration or advice on keeping your succulents in tip-top shape, this comprehensive care guide might just be your horticultural holy grail.
For a visual walk-through of the process, check out this enlightening video on Crassula leaf propagation:
If you’re further interested in refining your succulent prowess, consider browsing our internal resources, such as “Haworthia Plant Enthusiast’s Handbook: Mesmerizing Succulent Care.” It’s a treasure trove of tips that’ll equip you to handle all the curveballs your leafy companions might throw your way.
In the game of leaf propagation, patience is indeed a virtue. So, sit back and enjoy the slow, satisfying beauty of growing your own Crassula army—one leaf at a time!
Mastering Stem Cutting Propagation
So you’ve got your Crassula (also fondly referred to as ‘Jade Plant’) looking lush and you’re thinking, “How about making more of these beauties?” Absolutely, my friend! Let’s roll up our sleeves and dive into the nitty-gritty of multiplying your succulent stash by mastering stem cutting propagation.
Preparation of the Stem: Snip Snip, Here We Go
Starting off, you’ll want to select a healthy, smiling stem from your Crassula—a stem that looks like it can take on the world. Now, grab some sharp scissors or a knife that’s cleaner than a whistle. We’re not just making a cut; we’re setting the stage for a new plant’s life. Aim for a cut about 3-5 inches long, and make it a clean, diagonal swipe just below a leaf node. Think of it like you’re giving your plant a fresh new haircut that’s going to turn heads.
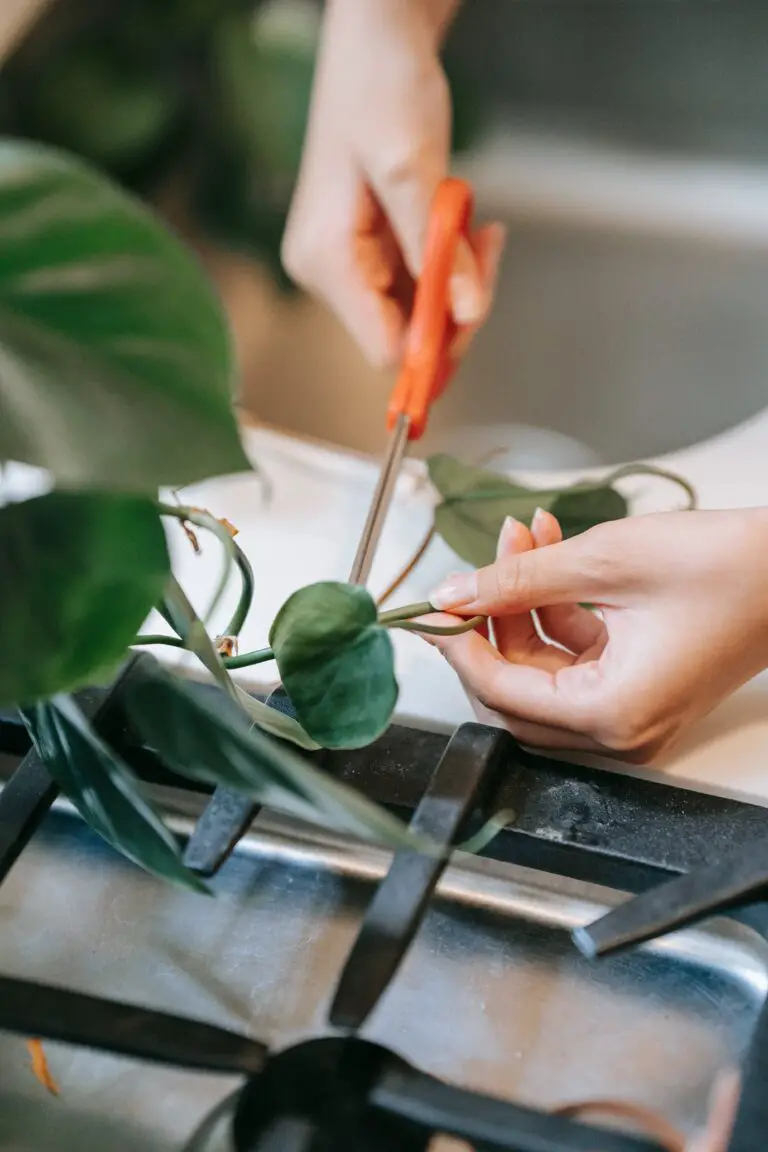
Planting the Cutting: A New Home
Once you have your cutting, let it dry out for a bit, just a few days, until the cut end callouses over. This step is like a mini holiday for the cutting—time to kick back and relax before settling into its new home. When you’re ready to plant, grab a pot with a good drainage game and fill it with well-draining soil that’s as light and airy as a cloud. Bury the calloused end gently into the soil, just deep enough so the cutting stands tall and proud, and whisper some encouraging words. Water it sparingly, just enough to dampen the soil—like a light drizzle in the desert.
Aftercare for Your New Plant Baby
Here’s where patience is key. Let the pot be in bright but indirect sunlight, like a sunny vacation spot but without the burn. Resist the urge to water too often; treat your baby cutting like a camel storing water for long treks—it doesn’t need much. Over time, you’ll notice new roots grasping the soil and fresh leaves budding, a true testament to your propagation prowess. It’s a waiting game, but soon enough, your new Crassula will be flourishing, all thanks to your magical green fingers.
Remember, whether you’re a seasoned succulent guru or a rookie getting your thumbs green, stem cutting propagation is like preparing a gourmet dish—it’s all about the right ingredients, timing, and a dash of love. Your Crassula babies will thank you for it!
Caring for Your Crassula Cuttings
So, you’ve got your freshly snipped Crassula cuttings, and you’re eager to see them flourish into mini, jade-like wonders. Whether you’re a succulent newbie or a seasoned green thumb, caring for these little guys can trip you up if you’re not clued in. Let’s change that. Here’s how to nurture those cuttings into thriving, robust plants.
Choosing the Right Soil
First thing’s first: the soil. Crassula cuttings are like hipsters; they need that trendy, well-draining soil mix to avoid dreaded root rot. Think of a cactus mix that you’d buy online or at your local garden center, or, for the DIY enthusiast, create your own with equal parts potting soil, coarse sand, and perlite. Imagine your cuttings chilling in their new pad, sipping just the right amount of water without the swampy feet.
Just Enough Water
Speaking of water, let’s talk about hydration. Too much love in the form of water can be a death sentence for our Crassula friends. We’re aiming for damp, not drenched. Water sparingly and when the soil feels dry to the touch. A weekly check-in is usually enough to make sure they don’t thirst to death or drown in your affection. A water meter can take the guesswork out of this if you’re unsure.
Lighting Up Their World
Now, onto the spotlight: lighting. These cuttings enjoy bright, indirect light, as direct sunlight can be too intense and cause sunburn. Picture them in a spot with morning sun and afternoon shade, or by a window that catches the less intense sun of the day. If your home is more of a cave, artificial grow lights can work wonders.
Let’s not forget the typical rookie mistakes to evade. Overwatering is the usual suspect, but also keep an eye out for pests, which love to feast on new cuttings. Quarantine new additions if you’re introducing them to your plant family to avoid an undesired infestation.
While the mindfulness of these tips, your Crassula cuttings are set to thrive. Keep in mind: they’re slow growers. Patience is key. As they mature, you’ll be rewarded with sturdy, charming plants that echo the resilience and beauty of their natural, rocky habitats. So, roll up your sleeves and get ready to immerse yourself in the rewarding journey of succulent care!
Troubleshooting Common Propagation Issues
So you’ve decided to enter the world of Crassula propagation – kudos to your green thumb ambitions! But let’s be real, not all green ventures are smooth sailing. Sometimes you’re hit with scenarios that could make even a seasoned gardener scratch their head.
Ponder the perplexing case of the non-rooting cuttings. You’ve followed the rule book, snipping at just the right angle, yet weeks go by and that hopeful cutting is as rootless as a tumbleweed in a Western flick. Frustrating, right? Before you throw in the towel, consider the cut’s environment. Are you treating it to the right amount of light and moisture? It’s a balancing act, after all. A bit like tightrope walking – it takes some skill to not fall off.
And then there’s the cursed black mold, an unwelcome guest at the Crassula ball. It creeps up when conditions are more tropical rainforest than arid desert. The key here is to not let water linger. Think of it as your succulent’s ‘no-stagnant water’ policy.
Let’s not forget the dreaded shriveled leaf. We’ve all seen a leaf or two throw a wrinkly tantrum, crying out for attention. Is it begging for water or protesting against too much sun? Your Crassula is a sun worshipper, indeed, but too much of a good thing can lead to a leafy weep-fest. Moderation is your mantra.
Need help navigating these choppy waters? Check out this thorough guide on Crassula propagation – it’s like a compass for your Crassula’s journey. Each quirky issue has a solution, and with a little detective work, you’ll become the Sherlock Holmes of plant care.
Remember, every Crassula whisperer once stood where you are now. With patience and perseverance, your tiny cuttings can grow into statuesque beauties. Now, go forth and propagate with confidence – your Crassula is counting on you!
When to Transplant Your Crassula Babies
Do you know the thrill of seeing your Crassula cuttings start to sprout tiny roots? It’s like watching your favorite series and finally getting to that cliffhanger resolution – gratifying! Now, the question pops up: when do these little ones graduate to their own space? Let’s dive into the signs that scream “I’m ready for my own pot!” and guide you through a no-stress transplant process.
First things first, you’ll notice your Crassula babies begin to exude confidence when they flaunt a robust root system. It’s their way of saying, “I’m sturdy enough to handle new surroundings!” Typically, this means you’ve been a fantastic plant parent for about 4-6 weeks post-cutting. But it’s not just the roots; watch for new leaves. These tiny green flags indicate that it’s time to upgrade their living arrangements.
Here comes the transplanting ceremony! Picture this: you’re holding a healthy Crassula cutting with roots that have taken their time to meander and gather strength. It feels like preparing a youngster for the first day of school. Always handle the roots with immense care, as they are delicate storytellers of your plant’s journey. Gently remove the cuttings from the mothering soil, offering words of encouragement (trust me, talking to your plants is a thing!), and introduce them to a well-sized pot that echoes their growth ambitions.
Imagine the pot as a cozy new home that says, “Welcome, little Crassula!” Fill it with the right succulent mix—a combination that ensures a well-drained, breathable environment. Transplanting is more than just a move; it’s an upgrade of lifestyle for your Crassula babies. So, place the cuttings at the proper depth to allow seamless transition and help them stand tall with proper support if needed.
Now, let’s take a quick visual tour on transplanting Crassula cuttings that might help cement these tips in your green-thumb mind:
Remember, success in transplanting is not just a one-time triumph. Continual care, such as not overwatering and providing adequate sunlight, ensures that your Crassula offspring will thrive in their new home. With patience and attention, soon, you’ll witness your green babies growing up to become spectacular succulents, exhibiting the full circle of life right on your window sill.
Precautions to Keep in Mind
While your heart swells with pride at the sight of your propagated Crassula ready for the big move, take note of these cautions. Refrain from watering immediately after the transplant; give it a week, maybe. This pause allows the roots to recover from any unintentional stress sustained during the move. Moreover, be wary of sunlight exposure. Think of it as introducing your plant to the sun gradually after a cozy indoor stay—it needs time to acclimate. And lastly, during the first few weeks, just like you would with a new pet, monitor your Crassula often, watching for signs of discomfort or sheer contentment in its new space.
While transplanting your Crassula cuttings, consider each step a meaningful stride towards a lush, thriving succulent garden. With this knowledge, when you next gaze at your propagating Crassula, you’ll know exactly how to steer them towards that next big leap in their botanical journey. Remember, in the dance of propagation, timing and tenderness are key.
Ensuring Long-Term Health and Prosperity
So, you’ve successfully propagated your Crassula and are now the proud parent of a vibrant, baby succulent. But the journey doesn’t end here! Ensuring the future well-being of your new green companion requires a good game plan, steady care, and attention to its needs. Let’s dive into making sure your Crassula thrives long-term, providing a lush green touch to your living space for years to come.
Consistency is key when caring for Crassula plants. Imagine your succulent as a tiny yet tenacious rockstar, thriving on routine and specific needs. Watering needs to be just right – enough to keep the soil slightly moist but not so much that your plant ends up with wet feet. It’s a delicate balance, akin to a baker perfectly mixing ingredients to achieve that golden-brown crust.
Just like us basking in the sun on a bright day, Crassula plants love a good dose of sunlight. However, too much direct light can lead to a sunburnt succulent, quite the opposite of the healthy green look we’re going for! Aim for that sweet spot, an area with bright, indirect light where your Crassula can soak up the energy without the risk of an uncomfortable sunburn. It’s like finding that perfect sunny nook in the park – not directly under the blistering sun but still warm and cozy.
Let’s not forget about the pot and soil; your Crassula’s housing situation needs an upgrade as it grows. Think of it as a hermit crab seeking a new shell; as the plant expands, it’ll need more space to stretch its roots. A well-draining soil mix and a pot with drainage holes will mimic the natural arid environment these succulents love; this creates a personal oasis for your Crassula, free from the dangers of root rot.
Nutrition is another cornerstone of long-term health for your Crassula. You don’t need a full-on buffet, but a little fertilizer during the growing season will go a long way. It’s just like adding a dash of spice to your favorite dish; the right amount will enhance the flavors and bring out the best in your succulent’s performance.
And let’s be real, pests can be a real party crasher in your Crassula’s life. Keep an eye out for the uninvited guests like mealybugs or spider mites that may want to take advantage of your succulent’s chill vibe. Early detection and treatment can avoid an infestation that can turn your little patch of green into a pest party gone wild.
Remember, raising a Crassula is a bit like nurturing a friendship; it takes patience, understanding, and a sprinkle of love. And just as you would celebrate milestones with a friend, watch for your Crassula’s growth spurts and new leaf buds – each one is a reason to do a happy dance!
Frequently Asked Questions
When it comes to nurturing Crassula, especially those charming little succulents that brighten up our spaces, there’s a plethora of questions that plant enthusiasts like you might have. Let’s dive into the world of propagating these green buddies, unpacking the know-how in a way that’s not only informative but downright delightful.
What’s the Best Time of Year to Propagate Crassula?
You might be wondering if there’s an ideal season to get those Crassula cuttings to take root. Well, late spring through early summer is your golden ticket! This is when your plants are in their active growth phase, making them more likely to flourish. Imagine them stretching their little green arms out, eager to grow!
Do I Need Special Tools for Crassula Propagation?
Think of it like a mini surgery for your plants—cleanliness is key! A sharp, sterile pair of scissors or a knife is all you need to snip off a piece of your Crassula. Sterilize your tool with rubbing alcohol to ensure a clean cut and prevent any “germy” intruders.
What’s the Secret to Getting Cuttings to Root?
Patience is the friend of propagation! After cutting, let your Crassula cuttings dry out for a few days to callous over. This tough little barrier is like a natural band-aid, protecting the cutting from rot when you plant it. Stick it in well-draining soil and keep it someplace with indirect sunlight, much like finding a comfy spot with just the right amount of light for reading your favorite book.
Can I Propagate Crassula in Water?
Absolutely! Water propagation can feel like a magic show—watching those roots appear out of nowhere is nothing short of a spectacle. Just pop the cutting in a glass of water, making sure only the bottom is submerged. Change the water every few days, and soon you’ll have a rooting success on your hands. It’s like cheering on a tiny diver learning to swim!
Why Are My Cuttings Not Rooting?
It’s disheartening when your botanical efforts aren’t taking root—literally. If your Crassula cuttings are being stubborn, consider the light and moisture conditions. Think of them as plant “toddlers” that need the right amount of attention—not too much and not too little. Adjusting their environment to provide what they crave might just be the nudge they need.
Now that we’ve tackled some of the burning questions in the Crassula propagation chapter, remember, each plant is unique. So, take these tips as your starting blocks and feel free to tweak your approach as you learn the quirks of your specific Crassula. Happy propagating!