Introduction to Sempervivum Propagation
Embark on a journey to master the art of multiplying your ‘Hens and Chicks’ with an ease that might just surprise you. The Sempervivum genus, with its rosette charm, offers a world where green thumbs are optional, and success in propagation feels almost guaranteed. Taking a lesson from nature itself, these succulents spread their joy effortlessly, earning them affectionate nicknames rooted in their ability to proliferate. Dive with us into the fascinating realm of succulents, starting with the very basics of creating a thriving succulent garden.
Why ‘Hens and Chicks’? This picturesque moniker paints a vivid image of the plant’s reproductive prowess. Picture a robust mother hen, the central rosette, surrounded by a brood of tiny chicks, the offsets. These chicks cluster around their parent, basking in her shadow before ultimately striding out on their own. The analogy perfectly encapsulates the sempervivum’s propagation strategy: producing generous clusters of offsets that can be gently coaxed into becoming independent plants.
Propagate Sempervivum Successfully: Tips for Thriving ‘Hens and Chicks'” isn’t just a clever article title; it’s a promise of the simplicity and joy wrapped up in these hardy plants. Envision your collection expanding as each rosette births a bounty of baby chicks, ready to take root wherever they land. Whether you’re an urban gardener or have acres to spare, these succulents ask for so little and give so much, flourishing in spots where others might falter.
Understanding Sempervivum Reproduction
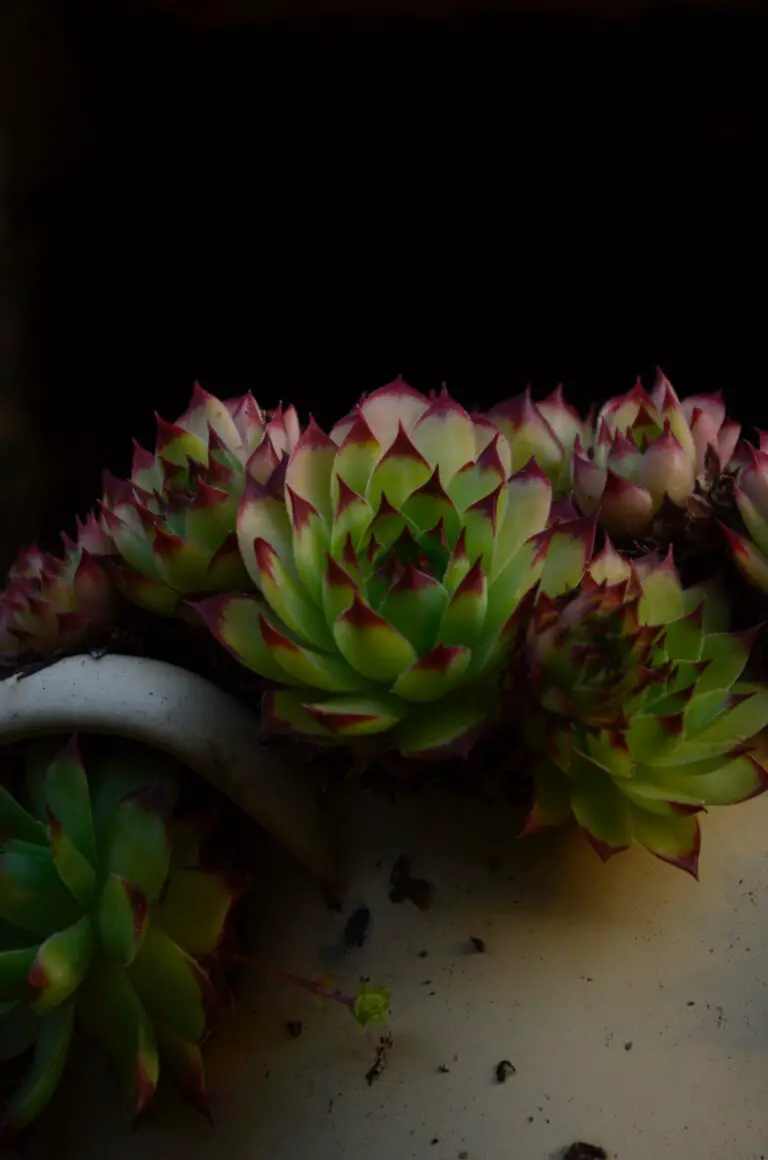
Did you know that the ‘Hens and Chicks’ you’re so fond of in your rock garden are some of the most self-reliant plants in the botanical world? Sempervivum, with their captivating rosettes, have evolved a propagation strategy that’s as efficient as it is fascinating. Dive into the world of these resilient succulents and discover how they master the art of self-replication.
Let’s start with the life cycle. Picture this: a Sempervivum stands proud, soaking up the sunshine, when it decides it’s time to multiply. But instead of relying on seeds, it sends out offsets or “chicks.” These little clones form at the base of the “hen,” the mother plant, and quickly strike out on their own, putting down roots wherever they land. This process, my friends, is a botanical marvel that allows for rapid expansion of their kind, ensuring survival even in the harshest conditions.
While wandering in your local nursery or perusing online guides, you might have noticed Sempervivum proudly displaying their offsets. These baby chicks are nature’s way of saying, “I’ve got this covered.” Indeed, whether you’re a seasoned gardener or a succulent newbie, there’s something utterly rewarding about observing these offsets take root and establish themselves with little to no help.
One can’t help but admire the low-maintenance and self-propagating nature of these plants. If you’re looking to get your hands dirty and learn more about caring for these remarkable plants, check out The Ultimate Guide to Succulent Care, which offers essential tips and tricks that apply not just to Sempervivum but to the succulent family at large.
In essence, Sempervivum’s knack for propagation through offsets is a testament to their resilience and self-sufficiency, making them the perfect choice for gardeners who value both beauty and ease of care. So, as you admire your flourishing ‘Hens and Chicks,’ remember that their very presence is a product of nature’s ingenuity—an ingenuity that we as gardeners have the pleasure of witnessing.
Preparing for Propagation
Embarking on the adventure of propagating your own Sempervivum isn’t just about planting new shoots; it’s also about tapping into the rhythm of nature. Picture this: it’s early spring or late summer — the ideal times of year to nudge your beloved ‘Hens and Chicks’ into multiplying. Why these seasons, you ask? Well, much like gardeners who feel rejuvenated by the milder temperatures, sempervivums are raring to root when the extreme heat of summer or the frosty bite of winter isn’t nipping at their heels.
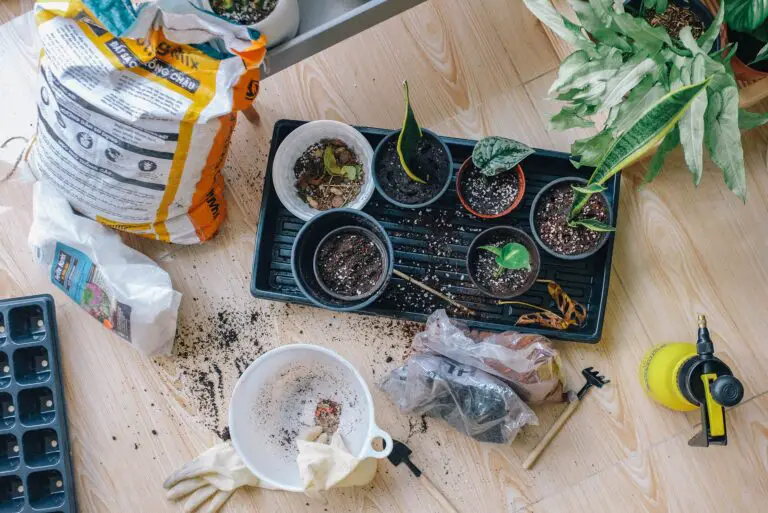
Gather round, gardeners; first off, you’ll need a few tools to ensure successful propagation. Arm yourself with a pair of sharp, sterilised scissors or a knife — your precision instruments for making clean cuts. A good pair of gloves can’t hurt, either; after all, even the most experienced green thumbs need protection sometimes.
One secret to a thriving brood of sempervivums is selecting robust parent plants. Look for those that display plump, colorful leaves, an indication of good health. These are the champion champs that will give rise to sturdy and vibrant offspring.
Creating an optimal environment for your new chicks involves the right soil mix and containers. Aim for a well-draining succulent mix and shallow, wide pots that echo the natural spreading habitat of these succulent wonders. Or, if you fancy a challenge, why not experiment with creative planting options? You could be the talk of the town with sempervivums spilling artfully from an old boot or cheerfully colonizing a repurposed birdbath!
As you embark on this growth journey, wouldn’t you prefer a demonstration? Behold — here’s a visual component that complements the read. It’s a video with real-life examples of how not to propagate sempervivum, providing valuable do’s and don’ts that can steer you right:
Remember, propagating sempervivum is not just about following steps; it’s an art form that bonds you with the pulse of your garden. Each little rosette, with your guidance, can flourish into a galaxy of green crowns, crafting a lush universe in your own backyard. It’s this intricate dance, this beautiful balance of knowledge and nurture, that makes the journey of propagation a gardener’s joy and pride.
Propagating from Offsets: A Step-by-Step Guide
Ever wondered how you could multiply your beloved ‘Hens and Chicks’ without a trip to the garden center? Propagating Sempervivum through offsets is like turning one plant into many, and it’s easier than you might think! Let’s dive into the world of propagation and transform your garden into a Sempervivum sanctuary.
Gearing Up for Propagation
First things first: you’ll need a mature ‘Hen’ that’s sprouted some ‘Chicks.’ Offsets are the little rosettes that seem to cling to the mother plant’s side for dear life. These are your golden tickets to propagate Sempervivum. It’s best to choose offsets that are large enough to handle, signaling they’re ready to venture out on their own.
Separating the Offsets
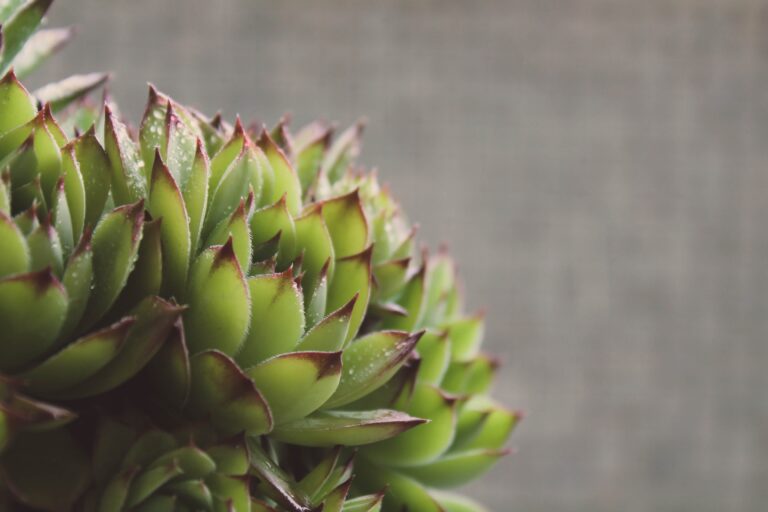
When separating offsets, think of it as gently encouraging your ‘Chicks’ to leave the nest. Grasp the offset at the base and twist it away from the mother plant. A small tug is all it should take for the offset to come free, roots and all. Don’t worry if it feels a bit like plant surgery; nature designed them for this moment.
Handling the Roots with Care
The roots of your offsets may be small, but they’re mighty. That being said, they deserve VIP treatment. After all, they’ll be steering the ship from here on out. Keep the roots moist and intact as much as possible. If you encounter an offset with overly long roots, trim them back with a clean cut. This will encourage new root growth and a quicker establishment.
Planting Your Offsets
Now for the fun part: giving your offsets a new home. Choose a well-draining soil mix that mimics the gritty, rocky environments Sempervivum loves. Nestle the offsets into the soil, letting the roots make contact. But don’t bury these babies—they enjoy a bit of sun on their backs!
Ensuring Successful Rooting
The secret to successful rooting is patience and a dash of TLC. Water your newly planted offsets sparingly. Think of it more like a misting than a downpour. Overwatering is the nemesis of Sempervivum propagation; these succulents prefer to stay on the dry side. With time, your offsets will stretch their roots deep into the soil and flourish into independent plants.
Remember, propagating from offsets is more than just a gardening technique; it’s an adventure. Each offset has the potential to blossom into a full-fledged ‘Hen’ with ‘Chicks’ of its own. So gather your offsets, roll up your sleeves, and spread the joy of Sempervivum—you’re on your way to becoming a propagation pro!
Growing Sempervivum from Seed
If you’re looking to dive a bit deeper into the world of ‘Hens and Chicks’, then growing Sempervivum from seed might just be your next exciting project. Starting these succulent beauties from seed is an adventure that requires patience but offers rewarding results. Unlike the typical offset propagation method, nurturing Sempervivum from its infant seed stage can be both challenging and exhilarating. Let’s walk through this advanced propagation technique together!
To commence your journey, you’ll need to collect Sempervivum seeds. These tiny, potential-packed wonders are usually obtained after the flowering process when the mother plant—aptly named the ‘Hen’—completes her life cycle. You’ll notice her offshoots—or ‘Chicks’—clustering around, but it’s the seed capsules that will be your focus here. You can collect them by gently tapping the dried flower stalks over a clean container.
Once you’ve gathered your seeds, the next stage is to prep your planting medium. Sempervivum isn’t too fussy, but they do prefer well-drained soil that mimics their natural rocky habitats. A mix of potting soil with added perlite or coarse sand will ensure your seeds don’t get waterlogged. Spread your seeds thinly across the surface of the moistened mix, covering them lightly with more soil or sand. Remember, they need light to germinate, so don’t bury them too deep!
Germination time can vary but typically, you’ll start to see signs of life within three to four weeks. During this time, patience is key. Keep the soil consistently moist and provide plenty of light, but not direct sunlight which can scorch the delicate seedlings. A warm, stable environment will encourage your seeds to wake up from their slumber.
After the euphoria of germination, post-germination care involves maintaining that good old balance of moisture and light. As your tiny Sempervivum begin to grow, be mindful not to overwater. Succulent seedlings are susceptible to rot, so less is more when it comes to water. Gradually acclimate them to the sun and before you know it, you’ll have a robust collection of Sempervivum ready to thrive.
We’ve talked the talk about the wonders of seed propagation for Sempervivum, but seeing is believing. Feast your eyes on this example of Sempervivum seedlings taking their first steps into the world:
Remember, growing ‘Hens and Chicks’ from seeds is a process—a delightful story of anticipation, care, and eventual success. Each sprout is a triumph, a tiny echo of the resilience and beauty embodied by the Sempervivum. So, why not give it a go? Who knows, with these tips and a bit of that green thumb magic, your seedlings might just be the beginning of a verdant Sempervivum saga in your own home or garden.
Aftercare for Propagated Sempervivums
Congratulations on mastering the art of propagation! Your ‘Hens and Chicks’ (Sempervivum) are now proudly standing as testimony to your green thumb. But what comes next is crucial—the aftercare. Let’s ensure your propagated sempervivums are set up for success and that thriving is on their horizon.
Watering your ‘Hens and Chicks’ is a bit like making a great espresso—timing is everything. These succulent beauties are drought-tolerant, yet young ones need a tad more attention. A good rule of thumb (or should we say green thumb?) is to water when the top inch of soil feels dry to the touch. Be like the wise old tortoise: slow and steady—avoiding overwatering is key.
When it comes to sunlight, sempervivums crave the golden rays like a cat in a sunny window. Place them in a location where they can bask in at least six hours of sunlight. However, in the blistering heat of summer’s peak, they’ll appreciate a little afternoon shade. Imagine them with tiny sunglasses, if you will.
Even the most self-reliant ‘Hens and Chicks’ appreciate a snack now and then. Feeding your propagated plants starts with well-draining soil mixed with a sprinkle of low-nitrogen fertilizer. It’s like giving them a little pep talk to encourage robust growth without pushing them too hard.
Knowing when to transplant is like recognizing when it’s time to let the kids move out: when they’re big enough and the roots have filled their current space. A good sign is when the chicks begin to outgrow their nursery and the roots peek through drainage holes, signaling it’s time for a new abode.
While sempervivums are tough cookies, they can face common issues like root rot or pests. Vigilance is your ally here—keep an eye for any signs of discontent and be ready to take action. Root rot appears as soft, discolored areas, while unwanted critters are usually visible upon close inspection. Swift intervention can turn the tides back to thriving.

Incorporate these tips into your aftercare routine, and watch as your propagated sempervivums grow with gusto, turning your garden into a lush display of resilience and beauty—proof that with a little knowledge and care, even the smallest “chicks” can grow into splendid “hens.”
Increasing Propagation Success
So you’ve decided to delve into the world of Sempervivum propagation, and you’re eager to transform your thumb from green to greener. Propagating ‘Hens and Chicks’ can be just as enjoyable as it is rewarding, but it’s not without its challenges. Consider this your toolbox of advanced tips and tricks, ready to guide you through the common pitfalls and bring you one step closer to a verdant victory!
First off, let’s talk about timing. The best time to propagate these succulent sensations is during their active growing season—typically spring and early summer. Here’s where patience meets strategy: wait for the ‘Chicks’ to reach a sizeable portion of their mother ‘Hen’ before you think about severing those apron strings. It’s like waiting for a fine cheese to mature; timing is everything.
Preventing Disease and Pests
Disease and pests can turn propagation into a game of survival. The secret to keeping your sempervivums thriving is cleanliness and observation. Always use sterilized tools when cutting and ensure the mother plant and offsets are healthy before you begin. It’s akin to performing surgery; sterility is non-negotiable!
Keep a keen eye peeled for tiny, uninvited guests. Pests like aphids and mealybugs adore the juicy leaves of your plants. Deploy natural predators, such as ladybugs, or use neem oil for an organic solution. Remember, the early bird catches the worm—or in this case, the early gardener eradicates the pest!
Troubleshooting Common Problems
What if propagation isn’t going according to plan? If your offsets are wilting or looking miserable, it’s time to play plant detective. Check the soil moisture; these succulents prefer a ‘less is more’ approach to watering. Make sure the soil is well-draining and gritty, imitating their natural rocky habitats. If you’re overwatering, it’s akin to giving a fish a sweater—completely unnecessary and ultimately harmful.
Another tip is to consider the light. Sempervivum loves sunbathing, but they need to do it responsibly. Too much direct light and they might get ‘sunburned’, too little and they’ll stretch out, reaching for the sun like a kid for candy. Aim for that Goldilocks zone of lighting conditions: just right.
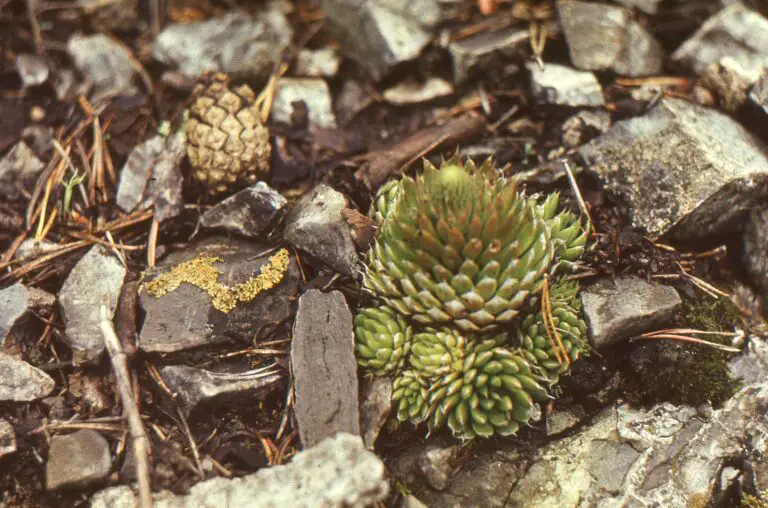
Armed with these insights, you’re equipped to tackle the nuanced art of propagating sempervivum. It’s truly a process of learning and adjusting, much like perfecting a recipe to your taste. With each propagation cycle, you’ll gain experience and soon enough, you’ll find your garden thriving with robust ‘Hens and Chicks’ ready to conquer the world, one pot at a time.
Sempervivum Propagation FAQs
Embarking on the journey of propagating your ‘Hens and Chicks’ plants can sprinkle a dash of excitement into your gardening routine. Let’s dive into the most commonly asked questions to ensure your Sempervivum propagation experience is both successful and pleasurable. We’ll tackle issues that rookies wonder about as well as the nitty-gritty details that seasoned hands might ponder.
Understanding the Basics: How Do ‘Hens and Chicks’ Multiply?
Think of ‘Hens and Chicks’ as the ultimate parenting plant: each ‘Hen’ (the mother plant) produces numerous ‘Chicks’ (pups or offsets) through a process quite similar to spawning clones of itself. These little bundles of joy are naturally engineered to root on their own and start a new colony. For gardeners, it’s like watching a living green wave, as the ‘Hens’ send out their ‘Chicks’ to conquer new terrains of your flower beds or planters.
When Is the Best Time to Propagate Sempervivum?
The ideal season for Sempervivum propagation is none other than the warmly embracing span of spring through early summer. This period of renewal gives your ‘Chicks’ the best shot at rooting successfully while the moderate temperatures and increasing daylight hours play cheerleaders.
Is Soil Type Important for Propagation?
Imagine you’re a ‘Chick’ looking for a new home. You definitely wouldn’t settle for anything less than prime real estate. The same holds true for these succulents; a well-draining soil mix that’s as light and airy as a spring breeze is crucial. It’s the perfect abode for those roots to expand without the fear of water-logged conditions.
Can You Propagate Sempervivum in Pots or Does It Have to Be the Ground?
‘Hens and Chicks’ aren’t fussy about where they lay roots. Whether it’s a quaint pot on your patio or a vast expanse of garden, they’re ready to flourish. For those with spatial limitations, pots are an exquisite alternative, turning your balcony into a miniature Eden of these hardy succulents.
Now, it’s time for some visual inspiration. Take a minute to watch this insightful video on propagating Sempervivum that captures the simplicity and satisfaction this gardening task has to offer.
Do ‘Chicks’ Need Special Care After Separation?
After the ‘Chicks’ have set off on their own, they are surprisingly self-sufficient. Think of them as young adults moving out—they’ll manage just fine with some occasional guidance, which in plant terms means a light sprinkle of water and a watchful eye for the first few weeks.
Quick Tips for Troubleshooting Common Propagation Mishaps
Even the best gardeners face propagation challenges—it’s the soil that brings us back to earth! If your ‘Chicks’ are looking a little lackluster, reassess the watering schedule. These succulents crave less rather than more H2O. And if root rot has snuck in, act swiftly by cutting away the decayed parts and repotting in fresh soil. Remember: a vigilant gardener can turn the tide on any propagation predicament.
In a nutshell, propagating Sempervivum is a delightful venture that pairs simplicity with the thrill of watching life unfold right in your garden. Roll up your sleeves and prepare for the rewarding experience as your ‘Hens and Chicks’ set out to conquer new frontiers, sprucing up your living space with their unique charm.

