Introducing Sedum: An Overview
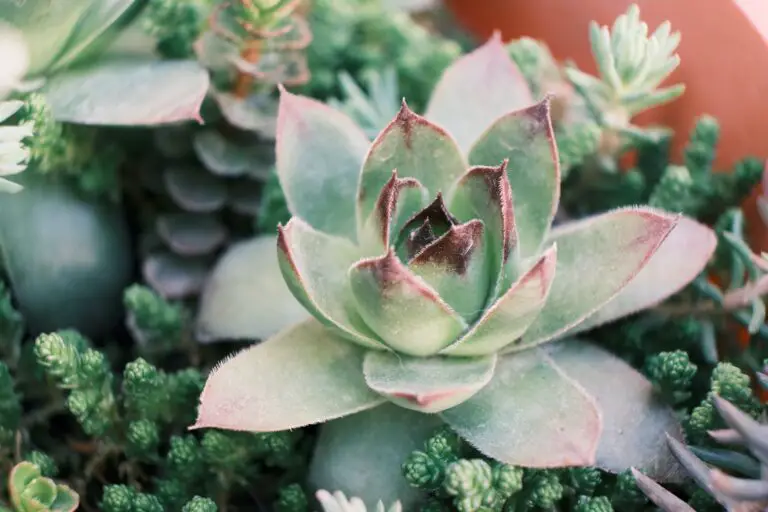
Meet Sedum, the vibrant star of drought-tolerant gardens and a wondrous addition to any succulent lover’s collection. Known for their ability to thrive in the most unforgiving conditions, Sedums, or stonecrops, are a mesmerizing group of plants with a repertoire as diverse as nature itself. The sedum family boasts a kaleidoscope of species, each with unique charms that capture the hearts of garden enthusiasts worldwide.
Imagine finding a green treasure in the rocky crevices of your garden path, a resilient Sedum applying its survivalist expertise. These rugged beauties hold a secret power, a talent for persevering where others would falter. But why simply admire their short-lived splendor? Embracing the art of dry sedum maintenance is like capturing the essence of summer, a way to sustain their allure long after their season has passed. So, how do we preserve these tenacious little warriors? Let’s dive into the seductive world of Sedums and unearth the secrets of drying these succulent gems.
The art of drying Sedum isn’t just a nod to their beauty, but a celebration of sustainability and an echo of the plant’s intrinsic hardiness. Sedums possess an admirable determination to endure, drawing from the deepest wells of resilience. Their plump leaves, a testament to their water-wise ways, remind us of the clever adaptations necessary for survival in arid domains. By drying Sedums, we not only admire but actively participate in a dance as old as time, harmonizing with the rhythms of nature’s cycles.
Did you know that some sedum species have been found clinging to rocky ledges, basking in the harsh embrace of the sun, while others secretively sprawl under the cool shelter of a forest canopy? Indeed, these plants are as versatile as they are varied. Engaging with the process of drying allows us to bring a slice of this ecological tapestry into our homes and hearts.

What about those who call urban jungles home, you ask? City dwellers and green thumbs rejoice, for cultivating Sedum indoors is as seamless as it is outdoors. Their low maintenance demeanor translates effortlessly to potted life, making them unparalleled companions for those seeking greenery without the acreage.
So, whether basking in the glory of your rock garden or nestled in your sunny living room, Sedum plants are an invitation to embrace the extraordinary. Through drying, we immortalize their splendor, transforming them into natural ornaments that defy the seasons. Stick around as we unveil the horticultural alchemy behind preserving these steadfast wonders, ensuring that your Sedums retain their charm well beyond their natural bloom.
Choosing the Best Sedum for Drying
Selection is crucial when it comes to creating dried sedum displays that captivate all year long. Imagine holding a burst of summer in your hands, long after the warm breezes have turned chilly. It all begins with understanding which sedum varietals can endure the drying process without losing their charm.
For your best chance at success, opt for sedum types with robust leaves that can retain their allure once desiccated. The thickness of their foliage isn’t just about survival; it’s the promise of a lively, enduring showpiece. A succulent with a generous amount of natural moisture content is your ally here, ensuring that when the water wanes, what’s left is still a feast for the eyes.
Ease of care post-drying should also steer your choice, with some sedums requiring only the slightest nudging to preserve their beauty. In a world that moves at breakneck speed, ease of care means enjoying your sedum’s indelible splendor without the upkeep headache. Take the perennial favorite, Sedum ‘Autumn Joy’, known for its chunky leaves and resilient nature – a true paragon of drying friendliness.
For those who seek guidance from the experts, this comprehensive sedum care guide is a treasure trove of need-to-know specifics. And for hands-on wisdom, nothing beats diving into this guide that slips you the keys to thriving succulent care.
Still, don’t just take our word for it; see the process in action. This insightful video showcases not just the beauty of Sedum Makinoi but also venerates the virtues of proper sedum selection and care.
With the right sedum variety snug in your palm, drying becomes not just a method but an art form. This isn’t about merely preserving plants; it’s about capturring the very essence of these succulents in their prime, so they may grace our homes with their undimmed vibrancy for seasons to come.
Harvesting Sedum: The Best Practices
Timing is everything when it comes to harvesting sedum, and for those in the know, it can be the difference between a lackluster shrub and a preserved masterpiece that lasts all year round. Picture the perfect moment: the sedum is mature, yet not overripe, proudly displaying its succulent glory. This is the ideal stage to snip those stems and ensure your sedum dries with perfection.
When is this elusive moment, you ask? Look for the late summer or early autumn months, when the blooms are in their full-color phase but before they brown. A sure sign is when the flowers are just on the cusp of opening fully. At this stage, the sedum’s internal moisture is at a balance, poised for drying without losing the stunning pigmentation that makes them so desirable.

Now for the cut—sharp, clean, and decisive. Use sterilized scissors or shears to eliminate the risk of transmitting diseases from plant to plant. The aim is to cut the stem at a length that’s neither too long, making drying unwieldy, nor too short, denying yourself the flexibility for future use. Consider the vase or display you may want to use, and cut accordingly. Leave some room for trimming later, if necessary.
Expertise in sedum harvesting hinges on the finesse of your cut and your timing, akin to a seasoned chef knowing precisely when to pluck the vegetables from the garden for the evening’s feast. For further enrichment, delve into expert gardening tips that can guide you on your sedum harvesting journey.
Are you looking to expand your knowledge on succulent care? Our Care Guide is a treasure trove of must-know details for any enthusiast, ready to elevate your green thumb status to new heights!
Armed with these practices, you’ll be harvesting and drying sedum like a pro, ensuring that your succulent arrangements are the toast of the season, no matter the time of year!
Prepping Your Sedum for Drying
Drying sedum isn’t just about patience; it’s about the right preparation. Before you transform your luscious succulents into dried beauties, let’s walk through the steps to ensure that your sedum retains its charm even when desiccated. First off, gather your sedum plants—whether they’re from your garden or a fresh bouquet—and let’s get to work!
Clean as a Whistle
Begin by giving your sedum a gentle, but thorough cleaning. Imagine you’re preparing them for a first date; you want them to be spotless! Remove any dirt or debris clung to the leaves by gently brushing them with a soft paintbrush. Be like an archaeologist, delicately uncovering the natural beauty without harming the specimen.
Bye-Bye, Excess Water
A succulent’s worst enemy can sometimes be what it craves the most: water! To properly dry your sedum, we need to strip away excess moisture. Imagine your plants sunbathing on a warm day. Gently shake off any droplets of water and leave them to bask in indirect sunlight for just a bit, letting Mother Nature do the pre-drying work for us, as if they’re getting a little tan before their long hibernation.
Stage Your Stems
Now that your sedums are squeaky clean and free from water’s clingy embrace, it’s showtime! Arrange your sedum stems in a way that they don’t overshadow each other. Think of it as setting them up on a stage, where each has a moment to shine. Adequate air circulation is key, so give them space—like guests at a garden party, mingling but not crowding.
The Art of Arranging
Once your stage is set, consider how you’ll secure your sedums. Some prefer bundling them with twine and hanging them upside down, creating a chandelier of soon-to-be dried elegance. Others lay them flat on a mesh screen, letting gravity gently coax the water out, much like a silent, slow-paced ballet of desiccation.
Drying sedum is almost meditative, requiring a light touch and a bit of grace. Ensuring each step is done with care will gift you with succulents that look almost as lively as they did in their prime. Ready to see how it’s done by a fellow plant enthusiast? Let’s dive into a visual representation to cement these steps into our gardening repertoire.
This hands-on approach to drying sedum is not just fulfilling but ensures your beloved plants get the respect and treatment they deserve. So, take the time, enjoy the process, and soon you’ll revel in the rustic charm that dried sedum adds to your space!
Sedum Drying Techniques to Try at Home
Unlock the secret to brilliantly preserving your succulents by delving into our guided exploration of various sedum drying methods. Each technique has its strengths and weaknesses, but by understanding the ins and outs, you can choose the perfect method to suit your succulent needs and keep them vibrant all year round.
Air Drying: The Classic Approach
The time-tested method of air drying sedum is as straightforward as it sounds. By allowing the natural flow of air around the plant, you let it dehydrate at its own pace. It’s a no-fuss process with no special equipment needed. However, this patience-requiring method may not be ideal if your local climate is damp or if you’re in a hurry. Picture this: a row of sedum sprigs lined on your windowsill, basking in the sun and turning into perfectly dried specimens ready for your decorating whims. The key here is moderation: too much sun can cause fading, while too little air can invite mold, so strike a harmonious balance for drying success.
Desiccant Drying: Fast and Uniform
Consider using desiccants, like silica gel, when precision is the name of the game. The desiccant method evenly pulls moisture from every crevice, leaving you with well-preserved succulents in a fraction of the time. A real-life example? A crafter’s delight, this method can keep the vibrant colors of your sedum for crafting projects or in bouquets. However, do keep in mind that initial costs and the ongoing purchases of desiccants can add up, making it a less economical choice in the long run.
Pressing: Flattened but Fascinating
The art of pressing plants is not lost on sedum enthusiasts. Transforming your 3D succulent into a 2D masterpiece allows intriguing décor opportunities and can be easily achieved with some parchment paper and heavy books. This pressing technique literally flattens the competition when it comes to creating bookmarks, framed art, or even personal stationery with a botanical touch. But, heed a word to the wise: the pressing process might be seen as sacrilege to those who relish the natural form of their succulents.
The Dehydrator: A Tech-Savvy Twist
In our ever-evolving world, the modern dehydrator stands as a tech-savvy solution to efficiently and quickly dry sedum. This method gives you complete control over temperature and time settings, tailoring the drying process to your specific needs. Imagine activating your dehydrator overnight and waking to perfectly dried sedum, ready for use in crafts, arrangements, or simply for the joy of extending the life of your beloved plant. Just remember, the investment in a dehydrator might not be worthwhile if you’re an occasional user, so assess your drying needs accordingly.
As you explore these techniques, keep in mind that patience and practice make perfect. And now, to help you visualize these techniques, take a peek at this insightful video:
Feel empowered to try these methods at home and remember, each method could yield a treasure trove of dried sedum pleasures. Happy drying!
Maintaining Color and Shape While Drying Sedum
If you want your sedum succulents to retain their vibrant colors and robust shapes even after drying, it’s all in the technique. It’s like crafting a piece of art; you need the right environment and brushstrokes—or in this case, treatments—so let’s talk specifics.
First off, you don’t want your precious sedum to end up like dried-out pasta forgotten on the counter. You want them to keep their lush hues and natural curves, as fresh as a dew-kissed morning. The secret lies in the environment. Think about where sedum thrives; they’re sun-worshipping, drought-resistant little champions. To mimic their happy place, you need a spot that’s warm, with plenty of air circulation but not direct sunlight that can bleach the color away.
Now, before you get to drying, consider giving your sedum a little spa treatment. A soak in a weak solution of plant-friendly dye or a gentle spray of clear lacquer can lock in the color and add a protective coat. Just imagine, a sedum that’s as vivid as it was the day you picked it, sitting prettily in your homemade potpourri or adding a flare to your wreath.
Consider the tale of Sarah from Vermont, the sedum enthusiast. She discovered that by drying her sedums in a shaded greenhouse and using a touch of hairspray (yes, you read that right), her autumn Joy sedums kept their rosy hues longer than any Hallmark Christmas movie could last. It’s all about experimenting and finding that perfect balance for your sedum to luxuriate in during the drying process.
Remember, drying sedum isn’t just about preserving a plant; it’s about capturing a moment in time, a sliver of natural beauty that will persist through the seasons. Keep these tips in mind, and you won’t just dry your sedum; you’ll immortalize them in all their glory. Now, go forth and make your sedum drying adventures as colorful and shapely as they were meant to be!
The Do’s and Don’ts of Sedum Drying
Imagine this: The growing season is over, and you’re looking at your beautiful sedum garden. You want to preserve that splendor for as long as possible, right? Well, you’re in luck! With some savvy know-how, you can keep your succulents looking sharp through the off-season. Let’s dive into the do’s and don’ts of sedum drying, so you can show off your botanical prowess all year round.
Do: Pick the Right Moment
Timing is everything when it comes to drying your sedum. The ideal moment is just after they bloom, when they’re looking their perkiest. That’s when the magic happens! They’re not too thirsty and not overly saturated from the morning dew. Think about Goldilocks – you want the conditions to be just right. Too early, and they won’t preserve well; too late, and you might as well wave goodbye to those vibrant colors.
Don’t: Neglect Airflow
A big no-no in drying sedum is ignoring the need for good airflow. Sticking them in a dark, humid corner is a recipe for disaster. You might as well send out invites for mold and decay to have a party. Instead, select a well-ventilated area – somewhere with natural light and a gentle breeze, like a room with an open window. This will ensure your sedums dry evenly and maintain their form.
Do: Practice Patience
Rushing the drying process is tantamount to rushing a fine wine – it’s just not done! Sedum drying is an art, and like any masterpiece, it takes time. Allow your plants to rest in peace, undisturbed. This could take a few days to a week, depending on the thickness of the stems and leaves. Remember, we’re crafting preserved beauty, not a fast-food meal!
Don’t: Overlook the Details
Little things make a big difference. Stripping the lower leaves from the stem, for example, can prevent unwanted moisture from getting trapped. Laying them out in a single layer, rather than piling them up, lets each piece get the attention it deserves. It’s like giving each of your succulents a first-class seat to perfect preservation.
When it’s done right, drying sedum can transform your plants from ephemeral garden dwellers into long-lasting, stunning displays. Just like the sedum enthusiast who crafts a beautiful rock garden by carefully placing each stone, pay attention to the details while drying, and your sedums will thank you with lasting beauty.

Keep in mind, these tips and tricks aren’t just hearsay; they’re the bread and butter of sedum enthusiasts everywhere. Stick to these guidelines like glue, and you’ll be the talk of the town—or at least the envy of your fellow gardeners. Go forth and dry with confidence, my green-thumbed friends!
Using Your Dried Sedum – Decoration and Craft Ideas
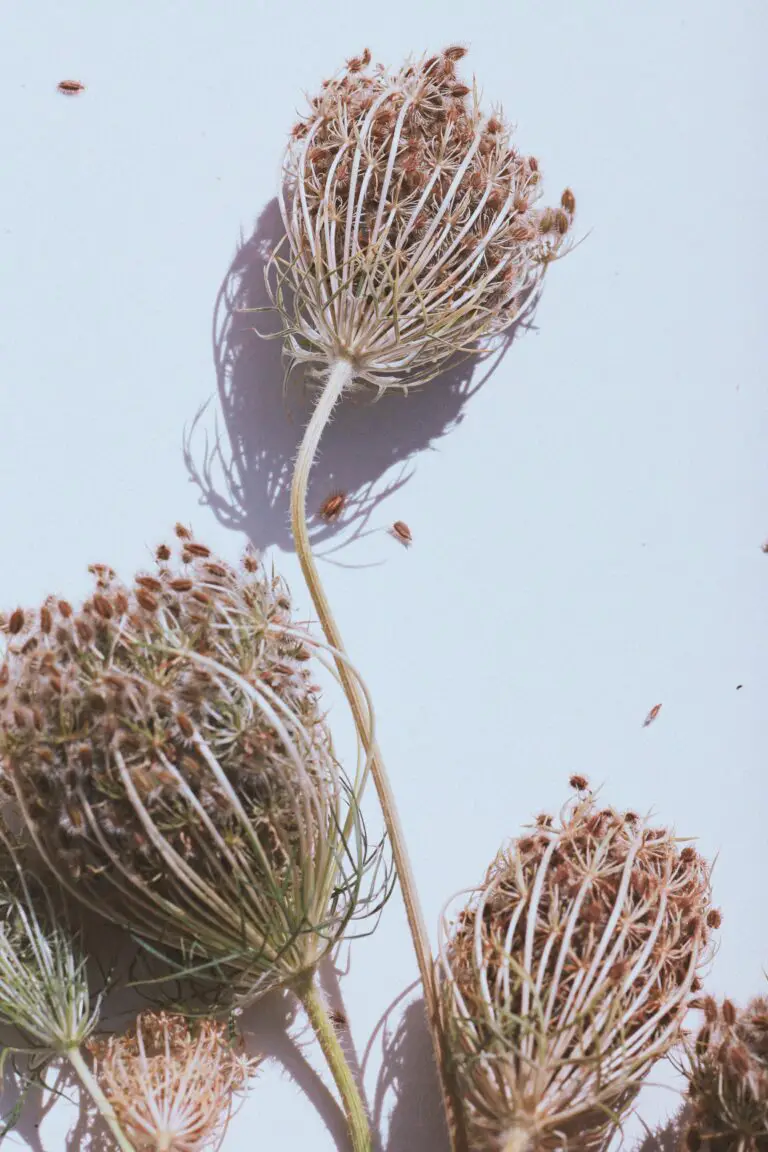
Imagine transforming the rustic charm of dried sedum into stunning home decor pieces that mesmerize and inspire. Whether you’re an avid DIYer or simply someone who appreciates the beauty of nature indoors, dried sedums are your go-to. Dried sedums, with their intricate rosettes and varied hues, are not only low-maintenance but also a versatile element for crafting and decoration. Let’s explore some crafty avenues for these perennial beauties.
Dried sedum wreaths welcome guests with a delightful nod to nature. They’re perfect above your mantle, on your front door, or even as a centerpiece for your dining table. Imagine intertwining sedum with complementary dried flowers, delicate fairy lights, or rustic twine to elevate any space. Real-life examples attest to the allure of these wreaths, especially during festive seasons, when their everlasting appeal outshines fleeting fresh blooms.

Transform the corner of any room with a charming sedum terrarium. Layer sands of different colors, place your dried sedum carefully and watch as your miniature landscape forms an enchanting display. A terrarium can become a conversational masterpiece, telling a story of a desert oasis or a mythical garden—without the upkeep of living plants.
Creative gifting takes a whole new level with dried sedum. Envision gifting a glass jar layered with natural elements like pebbles, soil, and sedum, perhaps topped with a twine-tied scroll for a personal touch. It’s not merely a gift; it’s a gesture of time, care, and connection.
Lastly, other decorative pieces beckon when dried sedum is at play. Pluck a few stems and arrange them in a sleek, modern vase for a minimalist vibe, or mix them into a boho-chic dreamcatcher, adding texture and depth. Their potential is as limitless as your imagination.
Let each petal and leaf of your dried sedum be a part of your craft journey—inspire creativity, add warmth to your decor, and evoke the timeless beauty of nature.
Storing Dried Sedum: Prolonging its Lifespan
After mastering the art of drying sedum, preserving its beauty becomes the next challenge. Sedums, with their fleshy leaves and elegant forms, make for stunning dried arrangements. However, keeping them in prime condition requires some savvy storage solutions. Let’s delve into a few practical tips that ensure your dried sedum continues to captivate all year round.

Light exposure is a significant factor in maintaining the vibrancy of your sedum’s colors. While these hardy plants enjoyed the sun’s warm embrace in their natural habitat, dried sedum prefers a gentler ambiance. Place them in an area where they can bask in indirect sunlight or under the soft glow of artificial lighting. This way, the subtle play of light and shadow will keep the spotlight on their sculptural beauty without causing any fading.
Humidity can be the arch-nemesis of your nicely dried sedum. These succulent plants, once adept at retaining moisture, are now at the mercy of the air around them. To combat the potential limpness brought on by moist environments, store your dried sedums in a dry, airy room. A setting like a quaint reading nook, free from the steamy affairs of kitchens or bathrooms, will serve as a perfect sanctuary.
Temperature control is also crucial for prolonging the life of your dried botanicals. Sedums are accustomed to warmth, but too much heat can leave them brittle. On the other hand, keep them away from the bone-chilling drafts that might whisper through the cracks on a cold winter’s day. Maintaining a consistent and moderate temperature will ensure your sedums remain as timeless as the memories they preserve.
While the perfect storage conditions are essential, a personal touch can make all the difference. Imagine a vintage glass cabinet, its shelves lined with an array of meticulously arranged dried sedums. As they sit, sheltered from the elements, they emulate a miniature desert landscape, eternally captured in a moment of rustic elegance. This is the true essence of preserving sedum – creating a piece of everlasting natural art.
Frequently Asked Questions
Got burning questions on drying sedums? You’re not alone! Sedum enthusiasts often wonder about the best ways to keep these succulent beauties looking good all year. Let’s get into some common curiosities, and, just like sedums, keep this light and full of life!
Can I Preserve the Aroma of My Sedum While Drying?
Absolutely! The key to locking in that earthy scent is a cool, dry spot away from direct sunlight. Think about when you snuggle into a cozy blanket that smells just like fresh air—it’s the same vibe. By choosing a well-ventilated area, you’re practically sealing that natural perfume in!
Handling Fragile Sedum – What’s the Trick?
Think about going on a first date—you want to make a great impression and handle with care. Same with sedums. Use a gentle touch when transferring them for drying. A pro tip? Pretend you’re handling a precious antique vase passed down from your great-grandmother, and you’ll be on the right track.
Is Rehydrating Dried Sedum a Thing?
Rehydrating sedum is like giving a wilted flower a fresh sip of water. If you’ve got dehydrated sedum, a little bit of moisture can breathe new life into them. Just don’t go overboard—a light misting is the sedum’s equivalent of a refreshing drink on a hot day.
And speaking of bringing things to life, here’s a video to show you exactly how it’s done. Watch and learn, fellow green-thumbs!
Still curious? No worries—that’s the sign of a true sedum savant. Carry that curiosity with you as you explore more about these fascinating succulents. Go ahead, make those sedum drying secrets your own and enjoy your succulents looking sharp all year round!


