Introduction to Sedum
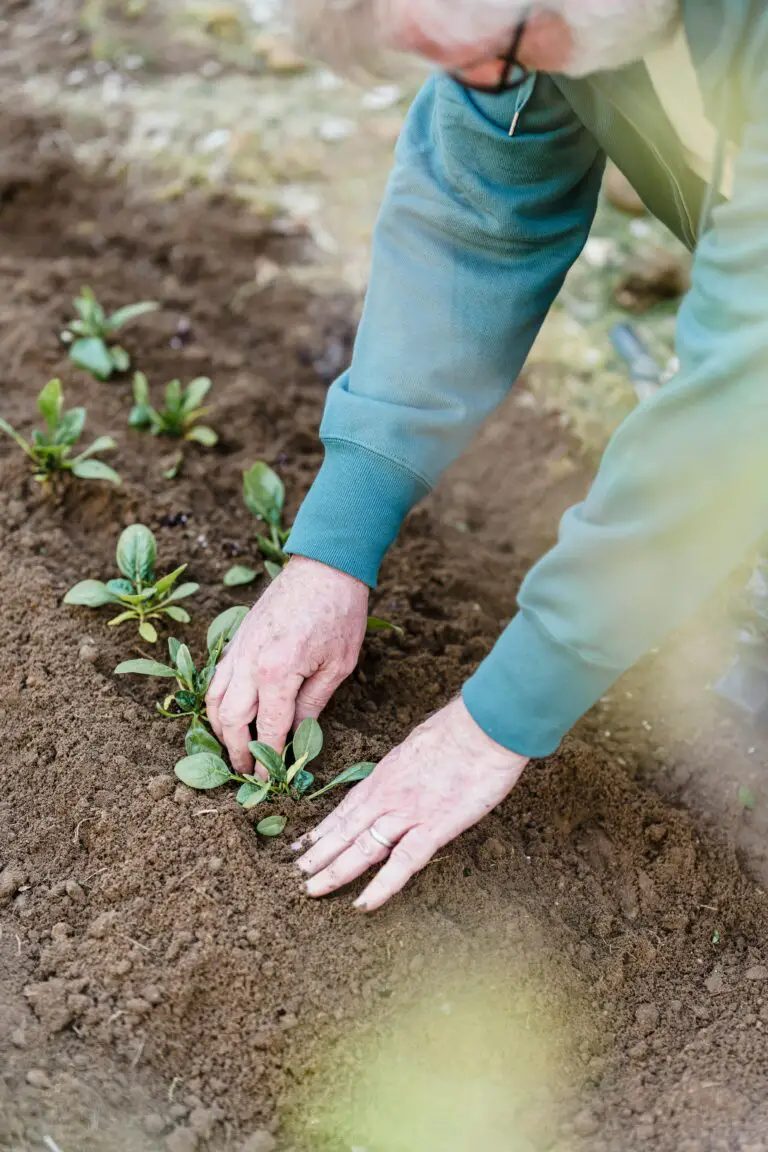
In the realm of gardening, sedum plants, better recognized as stonecrop, have surged in popularity. These succulent perennials offer a rich tapestry of colors and textures, turning heads in gardens and landscapes alike. What makes them so beloved among novices and experts is their robust nature and the minimal care they demand, making sedum planting a straightforward and satisfying affair.
Imagine a vibrant ground cover that thrives even in the rocky embrace of a stone wall or a lush rooftop garden thriving amidst the urban skyline. Sedums do just that — they are the quintessential “plug and play” of horticulture. With varieties suitable for almost any setting, it’s no wonder their use in garden design has taken root in the hearts of green-thumbed enthusiasts across the globe. For those seeking practical yet aesthetically pleasing vegetation, sedum delivers in spades.
They are the go-to recommendation for first-time gardeners feeling out their newfound green fingers, but also for seasoned horticulturists looking to impart wisdom on resilient plant choices. As a testament to their adaptability, sedums are often shared between neighbors, creating connections and adding to the local biodiversity. When it comes to sustainable and low-maintenance gardening, sedums stand at the forefront, proving that sometimes the best things in life are indeed easy to come by.
For those intrigued by the prospect of cultivating these hardy jewels, take a cue from the smorgasbord of vivid hues and varieties that adorn the spirited sedum family. From the ground-hugging ‘Dragon’s Blood’ to the statuesque ‘Autumn Joy’, each has its unique charm and role in the garden. And to get started, here’s an insightful read filled with tips on planting these versatile plants.
If you seek a demonstration, this video serves as a great visual guide for planting sedum:
Understanding Sedum Varieties
Are you looking to add a splash of low-maintenance vibrancy to your garden? Enter the world of sedum plants, a group that’s as diverse as it is easy to grow. But before delving into the how-tos of planting these succulent beauties, let’s get acquainted with the myriad of options at your fingertips. Each sedum variety presents gardeners with a unique set of charms that can transform your garden aesthetic.
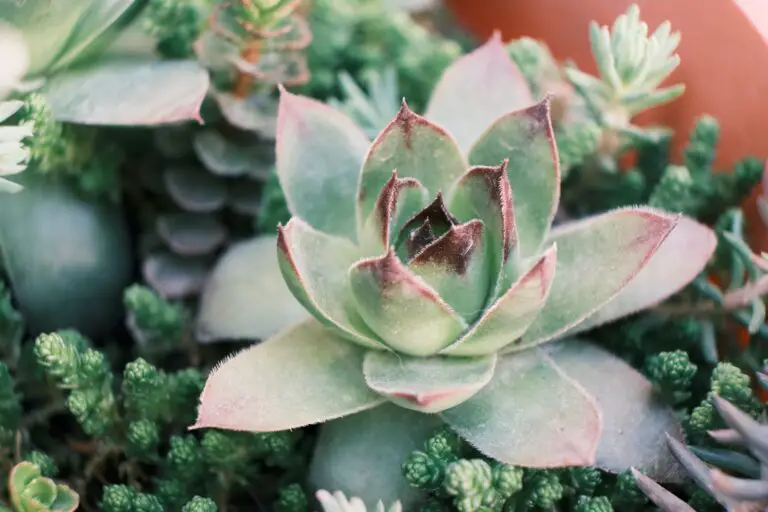
Imagine a carpet of greenery woven with pops of yellow, pink, or red – that could be ‘Angelina’ or ‘Autumn Joy’ sedum stealing the show. For those with a taste for the peculiar, the alien-like spirals of ‘Voodoo’ sedum are sure to catch the eye. These are just a teaser of the succulent extravaganza that awaits you. Sedums, affectionately known as ‘stonecrops,’ come in both creeping and upright forms, with some sporting smooth, glossy leaves, while others flaunt a fuzzy, textured appearance.
Fascinated by these ground-covering gems? The Great Groundcovers: Hardy Sedum video dives into the details of sedum varieties and their care, helping you pick the perfect match for your green space. Here’s a glimpse:
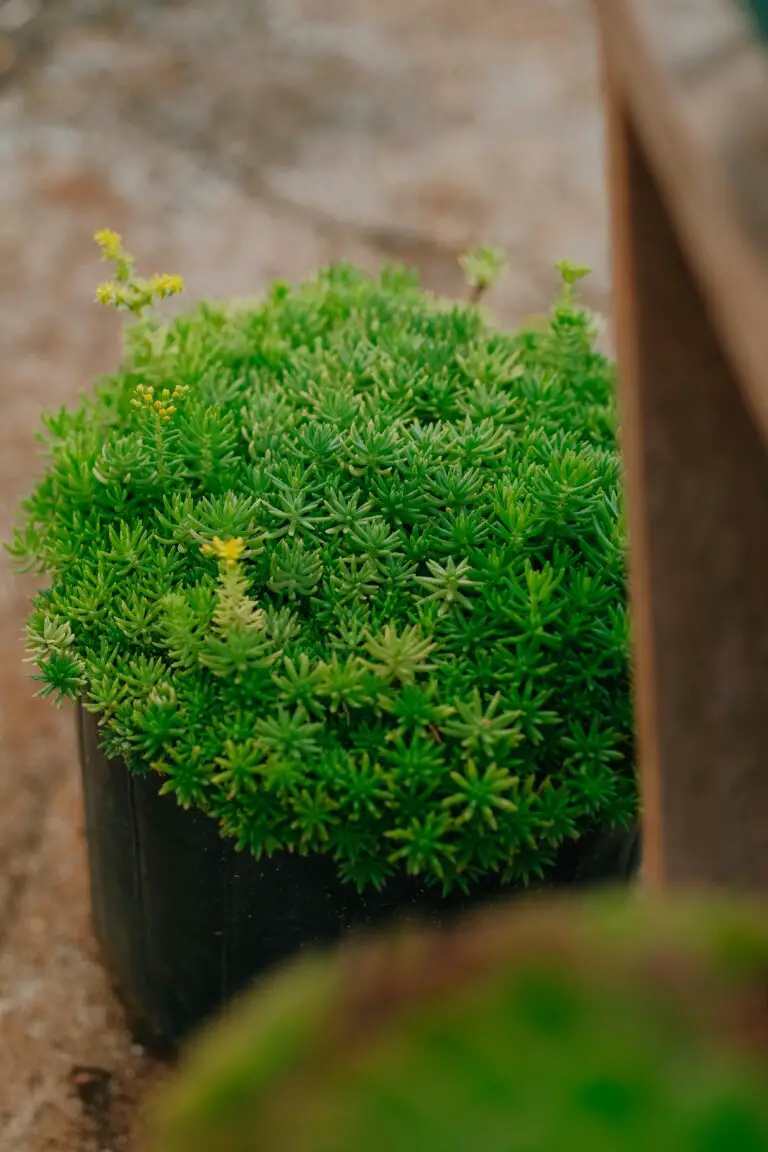
Gardeners, have you ever wondered, “Can I Grow Sedum in a Pot?” The answer is a resounding yes! Not only does sedum thrive in the open soil, but it also makes for a stunning potted plant. Adding a touch of sedum to your container garden or indoor setup can introduce an element of surprise and visual interest. If you need guidance on container gardening with sedums, our in-depth guide will get you started on the right foot. Click on over to learn more about making these versatile plants a part of your plant family.
Now, with a better understanding of the sedum spectrum, you’re well-equipped to choose the varieties that resonate with your garden goals. Picture this: The ruby red hues of ‘Dragon’s Blood’ sedum melding into the cool blues of ‘Cape Blanco’ – that’s the kind of drama that could unfold in your own backyard. And rest assured, sedums are not just a visual treat; they’re also incredibly forgiving, drought-resistant, and willing to put up with that not-so-perfect soil you’ve been fretting over. What’s not to love?
Selecting the Perfect Spot for Your Sedums
When it comes to adding that pop of year-round color to your garden, nothing beats the hardy yet vibrant sedum. These succulent beauties are not only easy on the eyes but also impressively resilient, making them a fantastic choice for both novice green thumbs and seasoned gardeners alike. To ensure your sedum plants not only survive but thrive, let’s dig into the nitty-gritty of finding their ideal home in your garden.
First and foremost, when scouting out a location, remember that sedums are like the sunbathers of the plant world; they adore basking in the sunshine. Most varieties of sedum require a good deal of direct sunlight—think at least six hours a day—to maintain their lush and vibrant appearance. This is not just about getting enough light for photosynthesis; their sun-worshipping nature contributes to the rich hues of their foliage and the brilliance of their blooms. For a more in-depth look at sunlight requirements, check out this guide.
Moreover, don’t overlook the importance of spacing when planting your sedums. These aren’t just solitary show-offs; they thrive in communities. Give them enough room to spread out and strut their stuff without overcrowding. Overcrowding can result in poor air circulation, which might invite unwanted pests or diseases. But when given enough space, sedums will reward you by matting together to create an enchanting, low-maintenance tapestry that deters weeds and blankets your garden with color and texture.
Considering soil conditions is equally important. Sedums have a knack for tolerating a wide range of soil types, yet they have one non-negotiable: good drainage. Compaction is a no-go for these drought-tolerant darlings. Ensure the spot you pick has soil that’s loose and friable, which will help prevent water from pooling around the roots. Still wondering whether certain soil types are suitable for sedums? Our garden experts share insights on the compatibility of clay soil with sedum growth.
And, while we’re sinking our hands into the soil, let’s not forget about real-life practicality. Imagine a day in the life of your garden and where you’d most enjoy seeing those succulent jewels shining. Whether it’s lining a path with their textural allure or dotting them among rocks for a natural yet sophisticated look, choose a spot where their charm won’t go unnoticed. After all, placing them where they can be admired is as crucial as ensuring their growing conditions are met!
So to sum up, your ultimate sedum spot should be a sunny stage with well-draining ground, ample space, and a view guaranteed to delight. With this prime piece of garden real estate, your sedums will quickly become the thriving, vibrant accents you’ve envisioned.
Soil Prep for Optimal Sedum Growth
Ready to give your sedum the luxury suite of soil environments? Transforming your garden into a sedum sanctuary begins beneath the surface. Sedum, a hardy and diverse genus of succulents, require just the right groundwork to thrive. Let’s dig into creating the ideal soil bed, shall we?
Imagine your garden’s soil as a bespoke mattress—comfort is key, and it all starts with the perfect mix. For sedum, well-draining soil is non-negotiable. Why, you ask? These little troopers are susceptible to root rot, and much like a sponge left in water, their roots can’t handle the sogginess. So, how about a crash course in creating the perfect drainage scenario?
It’s all in the amendments. Starting with the native soil, think of it as your base layer. To elevate it from ‘meh’ to ‘marvelous,’ incorporate a mix of sand, perlite, or even pumice. A rule of thumb: your sedum should feel like it’s planting its roots in a fluffy, airy mix, one that whispers ‘drainage’ with every granule.
Remember, sedums are not the divas of the plant world, they’re the down-to-earth types. They don’t ask for much—just a comfy spot where water can slip through without a lingering goodbye. A real-life pro tip? A gardener once transformed her clay-heavy garden bed into a sedum paradise by working in generous amounts of organic compost and gritty material. Months later, her sedum plants beamed back at her with vibrant colors and unyielding growth.
Now, let’s address the pH level—sedum’s preference is neutral to slightly acidic. A simple soil test can reveal your starting point. Adjustments can then be made with amendments to hit that sweet soil pH spot, anywhere between 6.0 and 7.5.
Imagine the beaming faces of your sedum as they nestle into their new soil home—a soil that you curated, turning barren land into a thriving sedum showcase. Keep that vision in mind, and let the soil prepping begin!
Planting Techniques for Sedum
When adding the versatile sedum to your garden palette, a dash of know-how goes a long way to ensure these succulent beauties thrive. Sedum, commonly known as Stonecrop, is a favorite for its hardiness and vibrant displays. Let’s dig into the practical steps to plant your sedum right, so they become a show-stopping garden feature!
Getting the Spacing Just Right
Imagine a sedum so crowded it can’t flourish, or so sparse your garden looks like a toothless smile. To avoid this, space them thoughtfully! Plant sedum starts about 6 to 18 inches apart, depending on the variety. The robust ‘Autumn Joy’ sedum requires more room to spread its joyous blooms, while diminutive species like ‘Cape Blanco’ are content with tighter quarters. The perfect spacing is a little garden secret, ensuring each plant has its moment in the sun.
The Perfect Planting Depth for Propagation Prowess
Proper planting depth is critical to sedum success. Lay the groundwork by creating a hole just as deep as the root ball, but double the width. Nestle your sedum into this cozy bed, so it sits at the same level it did in the pot. This simple act is like fitting a key into a lock — it unleashes the plant’s potential to establish and expand without the hindrance of an improper start.
The Watering Wisdom
While sedum loves the sun’s embrace, they’re not too fond of soggy shoes. After planting, water them generously to help them settle in. However, sedum’s succulent nature means they store water in their fleshy leaves. They prefer a good drink and then a chance to dry out, much like a desert wanderer finding an oasis. Irrigate when the soil feels dry to the touch — a little thirst can lead to lush growth.
Fostering Robust Roots
To secure a future of flourishing sedums, focus on the foundation — the roots. After planting, mulch the area lightly to keep the temperature around the roots stable and to prevent weeds. Avoid piling mulch against the stems, though; this isn’t a blanket but rather a gentle coverlet for the soil. With a solid rooting, your sedum will stand tall and strong, armored against the harshness of heat and the rigors of cold.
Armed with these planting insights, your sedums will be perfectly positioned to prosper. Whether you’re creating a rock garden realm or accenting your perennial borders, your sedum will settle in, stretch out, and showcase their succulent splendor. Now, let the soil tell its story as your sedums start their journey in your garden chronicle!
Watering and Feeding Your Sedum
When it comes to maintaining the vibrant appeal of your beloved sedum plants, understanding their watering and feeding needs is key. These hardy succulents are adored by gardeners for their drought tolerance, but they do require some moisture to thrive. In the real world, think of sedum as the camel of the plant kingdom: it can go for long stretches without water but appreciates a drink when the soil is completely dry.
Give your sedum a refresh by thoroughly watering the soil, then step back and allow it to dry out totally before the next watering session. This technique mimics the natural arid habitats sedum is accustomed to and promotes strong root development. Overwatering is a no-no—it can lead to rot and pest issues that are totally avoidable with the correct watering rhythm.

What’s on the menu for these succulents? Sedum isn’t a picky eater, but it flourishes fantastically with a light feeding schedule. You won’t need to fret over frequent fertilizing; an all-purpose, slow-release fertilizer applied in the spring as new growth appears is typically sufficient. This once-a-year snack keeps your sedum satisfied and supports its colorful show of blossoms, a true feast for the eyes in any garden space.
Fertilization is like the secret sauce to sedum success. Stick to a moderate approach—half-strength is perfect. It’s akin to a balanced diet for humans; give your plants the nutrients they need without going overboard. Over-fertilizing can lead to leggy, weak plants that lose their lush, compact form, which is certainly not something a sedum aficionado desires.
Remember, the recipe for a flourishing sedum is simple: provide a watering regimen that lets the soil fully dry out, coupled with a dash of fertilizer as a springtime treat. With these guidelines, your garden will be dotted with robust, eye-catching sedum plants that beckon onlookers with their effortless charm.
Maintaining and Mulching Sedum Plants
When it comes to keeping a vibrant sedum display, maintenance and mulching go hand in hand like bees on blooms. First, let’s talk about mulch—nature’s own blanket. Spreading a layer of mulch around your sedum plants not only boosts their aesthetic appeal but also acts as a protective barrier against the harsh elements. And in the world of sedums, the right mulch can make all the difference.
Imagine a cozy layer of organic mulch nestled around the base of your sedum. It’s not just about looking good; this layer plays a heroic role in retaining soil moisture for those hot summer days and in providing insulation during winter’s freeze. It’s like giving your plants a year-round comforter that regulates temperature and holds moisture—a real game-changer for gardeners aiming for minimal upkeep. The best part? You’ll often find that weeds struggle to break through this natural defense, meaning less work for you and more energy for your sedum to flourish.
But it’s not just about throwing down mulch and calling it a day. Ongoing maintenance is key to a thriving sedum sanctuary. Periodically checking for the dreaded signs of overwatering or pest invasions can save you from heartache later. Remember that sedum prefers tough love—too much attention and you might do more harm than good. If you’re looking for a comprehensive guide to sedum plant care, you’ll find that these hardy beauties are more about ‘set it and forget it’ than ‘fuss and muss’.
Mulching and maintaining your sedum plants doesn’t just protect them; it can transform your garden into a tapestry of textures and colors. With these tips and a little bit of love, your garden will become the envy of the neighborhood—brimming with life and color, no matter the season.
Propagating Sedum for More Garden Joy
Imagine your garden peppered with the stunning hues and diverse textures of sedum, but instead of just dreaming it, let’s make it a reality! Propagation is your wallet-friendly passport to expanding your sedum collection and it’s surprisingly simple.
Divide and Conquer: Multiplying Sedum
Division is the secret weapon in your sedum-spreading arsenal. Wait for early spring or autumn, when the plant’s energy is focused below ground, and the adventure begins. Gently unearth your chosen sedum, paying homage to its tangled web of roots, and divide the clump into smaller sections, each with a share of the roots and shoots. It’s like sharing a scrumptious cake with friends—everyone gets a piece!

A Cut Above: Sedum Cuttings
Got a sedum you adore? Let’s clone it! Snip off a stem, making sure it’s a healthy one with a few leaves on top. Dunk the bottom end in rooting hormone if it’s handy and then nudge it into moist soil. Keep the faith and moisture levels steady, and soon enough, roots will embrace the soil. Presto! A carbon copy of your prized plant ready to flourish in your green paradise.
Remember, whether you’re dividing or cutting, sedum asks for barely any pampering. Just give it some sun and a bit of patience, and watch as your garden becomes a tapestry of these resilient gems. A little effort goes a long way with these forgiving plants, and you’ll be the maestro of a sedum symphony in no time!
Common Pests and Problems with Sedum
Welcome to the not-so-glamorous but utterly essential side of gardening with sedum! Love the lush, plump foliage of your sedum? So do a whole host of uninvited guests. Let’s dive into the world of potential pesky problems that could be lurking in your sedum sanctuary and arm you with solutions to keep your garden accents thriving.
Unmasking the Culprits: Aphids, Mealybugs, and More
Imagine, you’re admiring your sedum’s vibrant hues when—gasp—you spot a cluster of tiny green marauders suckling on the sap: aphids. These juice bandits can cause your sedum to become distorted or wilted. And if that’s not enough, mealybugs can swoop in with their cotton-coated selves, spreading like a fluffy blanket of doom over your plants.
But fear not! These critters cower before the might of insecticidal soap and neem oil, your knights in shining armor. Give your plants a good spray-down, and you’ll send those pests packing. And remember to enlist nature’s little helpers—ladybugs and hoverflies—to join the battle against aphids.
Rooting Out Root Rot – A Silent Assassin
Let’s talk about the silent killer in the garden: root rot. Sedum loves well-drained soil, but if it ends up swimming in water, root rot will come knocking. Keep an eye on your watering habits, my fellow plant enthusiasts. The secret to avoiding the sludgy embrace of root rot is simple—when in doubt, don’t pour it out!
I’ve seen proud gardens fall to mush because of overenthusiastic watering. So, let’s learn from those squelchy missteps. Ensure your sedum has the well-draining soil it craves, and if your garden’s drainage rivals a rice paddy, consider raising your sedum up onto a mound or into a raised bed where water can’t linger.
The Fungus Among Us: Battling Blight and Mildew
The sedum may be hardy, but even the mighty can falter before powdery mildew and blight. It begins innocently enough with a few white or discolored spots, and before you know it, your sedum’s beauty is clouded by a powdery outbreak. Combat these fungal foes by maximizing air circulation: space your sedum out, prune properly, and try not to plant in the shadow of larger flora.
Still got the mildew blues? Don’t fret; fungicides can come to the rescue. Apply with care and your sedum will soon shake off that ghostly powder coat. And should blight attempt to blight your sedum’s existence, removal of affected parts and a strategic fungicide application will nip that problem in the bud, literally.
Remember, vigilant gardening is the key to keeping your sedum sensual rather than sorrowful. Armed with these tips, you’ll be on your way to a healthy, vibrant sedum display that’s the envy of the neighborhood!
Incorporating Sedum into Landscape Design
Envision a garden where the vibrant hues of sedum plants create a stunning visual symphony against the green tapestry of a well-manicured lawn. These versatile succulents offer an array of possibilities to infuse life and color into your outdoor space. Whether you’re aiming for a minimalist rock garden or an opulent border that stops passersby in their tracks, sedum can elevate your landscape design from ordinary to extraordinary.

Imagine rustic rockeries accented with clusters of sedum, their fleshy leaves wedged between stones, creating a natural, yet artfully designed element. These hardy succulents thrive in the nooks and crannies of rocks, demanding little but offering much in terms of aesthetic appeal. Rock gardens adorned with sedum varieties become living sculptures, changing with the seasons yet always captivating.
From Borders to Containers: Sedum as a Design Multi-Tool
Think beyond rock gardens. Sedum plants are the Swiss Army knives of the garden world, versatile enough to play any role you require. Border beds lined with sedum prime your garden’s edge with a low-maintenance, drought-resistant army that repels weeds and fascinates onlookers with their seasonal color shifts. These robust plants are not just a practical choice; they are a feast for the eyes when autumn comes and they turn into a flame-hued spectacle.
For the urban dweller with limited space, sedum takes on new life in containers. Balconies, patios, or even a small nook by your front door can become a tiny oasis with pots boasting an assortment of sedum. Mix and match colors, textures, and sizes to create a living mosaic that grabs attention and exudes tranquility.
Whether you’re a seasoned gardener or a green thumb in training, incorporating sedum into your garden design is a strategy that promises to pay off in spades. These resilient plants provide year-round interest with minimal effort, making them an ideal choice for creating a dynamic and engaging garden landscape.
Frequently Asked Questions
Stepping into the world of sedums is like discovering a treasure trove of garden delights. We understand you might have a pocketful of questions, so let’s dig into the gritty details of planting and nurturing these captivating succulents!
What’s the Best Time to Plant Sedum?
Imagine a calendar, green thumb ready! The prime time to plant sedum is either in the spring after the frost has said its goodbye, or during the early fall when the earth is still warm. Think of the cooler days of spring or the golden hues of autumn—that’s your planting window!
How Do I Choose the Right Spot for My Sedum?
Location, location, location! Sedums thrive on sunshine, just like that sunny spot on your patio where you love to bask. Go for a place that gets at least six hours of sunlight a day. But remember, they’re not too fond of wet feet; well-draining soil makes for happy sedum roots.

Can Sedum Survive in Poor Soil?
Hardiness is the sedum’s middle name. Poor soil? No worries! These tough beauties can plant their flags in less than ideal soil conditions. Though they appreciate good drainage and a bit of compost, they’re the pioneers of the plant world, conquering territories where others barely survive.
How Do I Propagate Sedum?
Propagation is like plant magic. Simply snip a stem, leave it be for a day or two until the end callouses over, and then push it into soil. It’s like giving a thumbs up to nature, watching new life spring from your green thumb feat. With sedums, it’s that simple—more plants, more pleasure!
Do Sedums Need Lots of Water?
Sedums are like the camels of the plant world—they store water in their leaves, making them drought-hardy. Give them a good drink and then wait for the soil to dry out completely before you offer another. Overwatering? That’s a sedum’s kryptonite, so best to err on the side of too little than too much.
What Should I Do If My Sedum Is Not Thriving?
Not all that glitters is gold, and sometimes, sedums may hit a rough patch. If your sedum isn’t thriving, check if it’s getting too much love (ahem, water) or if it’s craving more sunshine. Adjust its living conditions, and you’ll likely see a dramatic comeback—sedums are resilient and often bounce back with fervor!