Introduction to Sedum Propagation
Kickstart your gardening journey by learning the simple yet rewarding process of propagating sedum, a versatile and hardy succulent perfect for green thumbs of all levels.
Imagine multiplying your favorite sedum plants without ever stepping into a garden center. That’s the magic of propagation—a thrilling adventure that turns a single plant into a lush, expanding collection. Whether you’re aiming to fill in the bare spaces of your rock garden, create charming ground covers, or simply share with friends, sedum propagation is your gateway to botanical abundance.
For anyone new to the world of succulents, sedum stands out as a particularly forgiving candidate for propagation. Among the diverse family of these fleshy and fabulous plants, sedum, with its plump leaves and resilient character, truly excels.
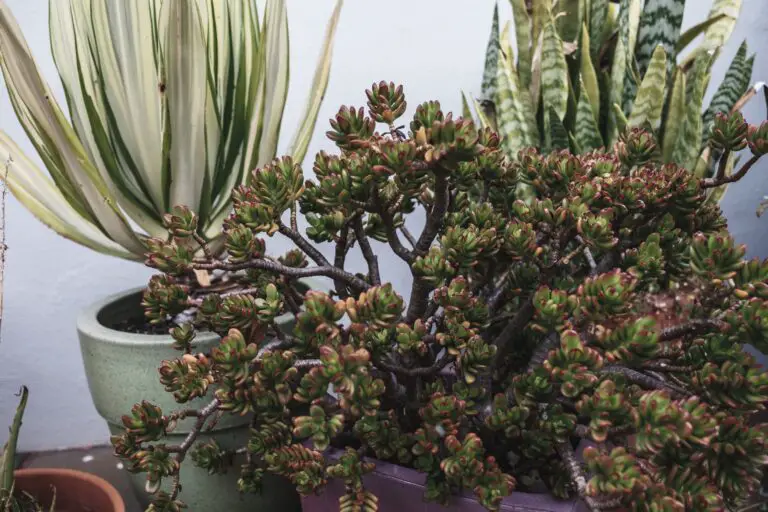
Think about it—the spellbinding moment when a single leaf, fallen from a mother plant, begins to sprout its own roots, weaving a new narrative in the soil. It’s a story that unfolds in backyards and balconies, transforming even the tiniest greenspace into a verdant paradise.
For expert insights and a plethora of resources on succulent care, be sure to explore our in-depth guide. It’s brimming with actionable advice that transcends the usual gardening chatter, offering a fresh perspective to nurture your green companions.
Embracing the art of sedum propagation means engaging with your plants on a personal level, tuning into their silent cues, and celebrating each victorious new growth. Ready to dive in? Let’s lift the curtain on a world where every snippet of sedum holds the potential for endless, flourishing greenery.
Understanding Sedum and Its Varieties
Welcome to the enigmatic realm of sedums, where diversity reigns supreme! Imagine a spectrum of succulents, ranging from the plush, emerald carpets that hug the ground, to the statuesque stands of upright varieties reaching skywards. These hardy beauties not only add texture and color to your garden but each possesses distinct traits that sway the odds in favor of a successful propagation.
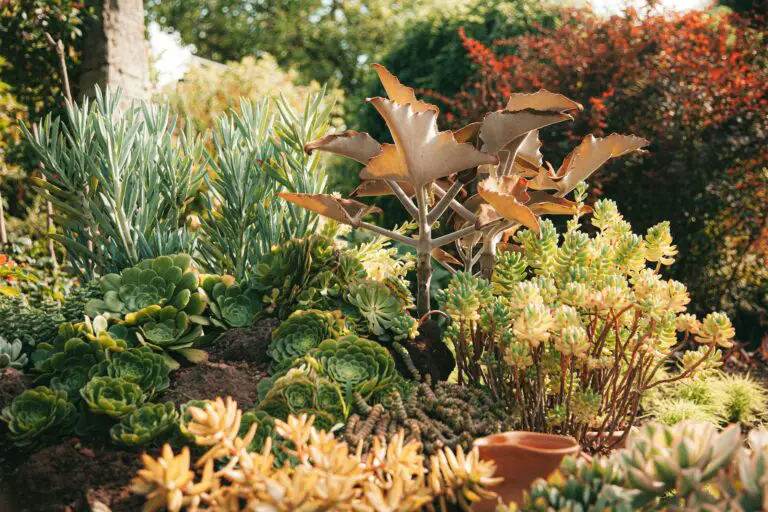
Take, for example, the charming ‘Sedum Spurium’, also known as ‘Dragon’s Blood’, with its crimson-hued tips that blush intensely when kissed by the sun. This low-grower doesn’t just seduce with color; it’s one of the champions of resilience, swiftly taking root in even the most challenging spots. It’s just begging to be snipped and spread, imparting its vigor to new environments with seamless ease.
On the other hand, we have the likes of ‘Sedum Telephium’, the towering brethren of sedum varieties. Known for their stout stems and broccoli-like florets, they provide an entirely different aesthetic and propagation experience. They’re the aristocrats of the sedum world—requiring a tad more patience and a keen eye to coax new life from their cuttings.
The allure of sedums lies not only in their physical diversity but also in their adaptability. From the sun-drenched rockeries to the partial shade of a woodland edge, sedums are the quintessential ‘plug and play’ plants for gardeners looking to propagate with purpose. A snippet here, a cutting there, and voilà—the garden transforms into a tapestry of succulent sedum success.”
Propagating Sedum from Cuttings
Learn the step-by-step process to successfully propagate sedum using stem cuttings, including timing, cutting selection, and the dos and don’ts to ensure healthy growth.
Imagine you’re a gardener looking out at your flourishing sedum, thinking, “If only I could multiply these beauties.” Guess what? You absolutely can, and it’s easier than you think!
When it comes to propagating sedum, timing is everything. Choose early summer when the plants are in their active growing phase. This ensures that the cuttings have the best chance of taking root quickly and vigorously.
Start by selecting a healthy sedum stem that’s not flowering. Look for stems with robust, fleshy leaves – they’re full of the energy needed for root development. Snip off a 3-4 inch piece just below a leaf node, where the concentration of growth hormones is high.

Preparing your cuttings is next on the agenda. Gently remove the leaves from the lower part of the stem to expose a bare section. This is where you’ll see root magic happen. But don’t toss those leaves! They too can become new sedum plants—more on that in another chapter about leaf propagation methods.
Now comes the crucial part—planting your cuttings. Choose a well-drained soil mix, perfect for succulents. Stick the bare stem into the soil, making sure it stays upright and secure. Then? Just wait. Patience is key, as the little cuttings begin their journey to becoming full-fledged sedum plants.
Remember, while sedum is a hardy character, these infant plants are not. Ensure that they’re in a warm spot with plenty of indirect sunlight—think of it as a plant nursery, their first step toward a lush garden life.
Don’t overwater—a sedum’s worst nightmare. Provide a gentle mist or a light watering just enough to keep the soil slightly moist. Before you know it, you’ll notice new growth, a telltale sign of success in your sedum propagation adventure.
Leaf Cuttings: An Alternative Approach
Ready to venture into a new realm of propagation with your beloved sedum? Leaf cuttings are your gateway into a world of gardening wonders. Unlike the more common stem cuttings, this method is like the secret handshake among succulent enthusiasts—especially for those plump, juicy-leaved sedum varieties that practically invite you to pluck a leaf.
Picture this: A single, fleshy sedum leaf, detached with a gentle twist, laying on a bed of moist soil. It’s a minimalist’s approach to propagation, but don’t let its simplicity fool you. With patience and the right touch, that modest leaf will unfurl roots and sprout new life as assuredly as a sunburst at dawn.

Leaf cuttings are the unsung heroes of propagation. They’re low-waste, highly efficient, and an excellent example of how nature can do so much with very little. In optimal conditions, a single leaf can give rise to multiple new plants, each one a genetic mirror of the mother sedum—a testament to the resilience and regenerative powers of these hardy succulents.
While it might sound like magic, it’s all grounded in the marvels of botany. Unlike stem cuttings, which require a segment of the plant’s stem, leaf cuttings rely purely on the leaf’s inherent ability to regenerate. It’s a technique that’s both accessible to gardening greenhorns and deeply satisfying to seasoned green thumbs.
Understanding the Leaf Cutting Technique
Embrace the leaf cutting technique as your go-to method for sedum propagation and watch your succulent garden flourish. It’s not about complex equipment or esoteric knowledge—it’s about observing, understanding, and working hand-in-hand with the life force of these exceptional plants. Your sedums have a story to tell, and each new leaf cutting is a chapter waiting to be written.
Soil Conditions and Preparation
When diving into the world of growing sedum in pots or in your garden, getting your soil conditions just right can feel like a high-stakes game of cookie baking—too much flour, your cookie is dry; too little, and you’ve got a gooey mess! Similarly, the ideal soil environment for sedum propagation requires that ‘just right’ mix, balancing drainage with nutrient retention.
If you’ve ever marveled at a sedum plant flourishing in a crevice between rocks, it’s because these resilient succulents adore well-draining soil that mimics their natural rocky habitats. Imagine creating a cozy bed for your sedum cuttings; you’d want it to be light and aerated, so they can breathe easy and stretch out their roots without drowning in moisture.
Your mission, should you choose to accept it, involves mixing porous material like perlite, coarse sand, or crushed lava rocks into your soil. Think of it as the ‘fluff’ in your comforter—without it, you’re left with a flat, stuffy quilt. A succulent-specific potting mix from your local garden store can be a good starting point, but don’t hesitate to jazz it up with some extra ‘fluff’ for those sedum babies.
Now, it’s not just about the mix; where you plant matters hugely. Go on, put that detective hat on and scope out your garden. High and dry or lower ground that accumulates moisture? Sedum propagates with gusto in spots that avoid standing water, so a slope or raised bed might just be your ticket to success. And when it comes to containers, ensure there are drainage holes at the bottom. No one likes wet feet, not even your leafy-green companions!
Check out this video for some visual guidance on preparing the perfect sedum sanctuary:
Seeing is believing, and once you’ve watched your propitious propogules take root and thrive in their tailor-made soil beds, you’ll understand why every gardener worth their trowel prattles on about ‘soil prep.’ So, don your gardening gloves, and let’s get that soil mix just right. Your sedums are counting on you!
Caring for Your New Sedum Plants
It’s one thing to propagate your sedum, but the real journey begins once they start sprouting new life. Whether you’ve just witnessed your first little rosette or you’re already admiring a cluster of miniature sedums, it’s time to ensure they mature into vibrant, flourishing succulents. Let’s dive into the essentials: watering, sunlight exposure, and the grand moment of transplanting into your garden!
Mastering the Watering Technique
Imagine this: You’re about to pour a glass of water, but instead of chugging it down, your sedum sips it slowly. Overwatering is the nemesis of these hardy plants! Begin with a modest approach, allowing the soil to dry out between watering sessions. The trick is to water deeply but infrequently. Your goal is to mimic the infrequent rains of their natural, rocky habitats. Touch the soil; if it’s dry a couple of inches down, it’s time to quench your sedum’s thirst.
Basking in the Perfect Light
Sedum plants are like sunbathing beauties—they adore sunlight! Place them where they can soak up at least six hours of the day’s caress but shield them from the harsh afternoon blaze if you notice any sunburn. Morning rays are gentler and oh-so-perfect for these sun-lovers. Think of a bright, east-facing window or a spot in your garden that catches the warm, early light. Watch as they stretch contentedly towards the sun, their colors deepening and spirits lifting with each radiant day.
When to Uproot and Move Out
The moment has arrived: it’s time for your new sedum plants to spread their roots. But when is the ideal time to transplant them into your garden’s embrace? Patience, young green thumb—the answer is when they’ve established a robust root system and are literally outgrowing their current home. Spring or early fall is the transplanting season, avoiding the extremes of summer heat and winter cold. Gently nestle them into the soil, providing enough space for growth, and watch as they settle into their new neighborhood.
Troubleshooting Common Propagation Issues
Embarking on the journey of propagating sedum can sometimes feel like navigating through a maze – a path filled with twists and turns, and the occasional unexpected setback. However, equipped with the right knowledge, you can transform those setbacks into stepping stones for success. Let’s venture through some common hurdles in the sedum propagation process and discuss how to leap over them.
Combating Rot in Your Sedum Cuttings
Rot is a silent marauder that can sneak up on your sedum cuttings, turning your propagation dreams into a mushy mess. This issue often stems from excessive moisture, whether it’s overzealous watering or a too-humid environment. The secret to dodging this pitfall is balance – keep your soil moist but not drenched, and ensure your cuttings have ample air circulation. Visualize the desert where many of these resilient succulents originate; a little dryness is part of their DNA.
Tackling Pesky Pests During Propagation
Imagine you’re a tiny insect, and you stumble upon a buffet of fresh, juicy sedum cuttings. Irresistible! To safeguard your succulents, stay vigilant. Keep a watchful eye for signs of aphids, mealybugs, or spider mites. If you spot these uninvited guests, reach for natural solutions like neem oil or insecticidal soap. Regular inspections and preventative care will keep your sedum propagation project a pest-free zone.
Encouraging Successful Root Development
Sometimes, despite your best efforts, sedum cuttings just won’t take root. It’s like trying to ignite a campfire in the rain. To spark successful root growth, consider the cutting’s environment. Are they too cold, too wet, or maybe they’re lacking the encouragement of a rooting hormone? Experiment with different substrates, such as a sand and perlite mix, to provide a well-draining cradle for growth. Think about the warmth and light they’re getting – a touch of the sun’s rays can be just the motivation they need.
As you apply these insights to your sedum propagation endeavors, remember that every challenge is an opportunity to grow – both for you and your succulents. With patience and persistence, you’ll foster a thriving garden that stands as a testament to your dedication and care.
Maximizing Propagation Success with Seasonal Tips
Propagating sedums isn’t just a skill—it’s an art that dances with the rhythm of the seasons. The secret to flourishing sedum babies is knowing how to harmonize your propagation techniques with the ever-changing weather. And here, right in this section, we’ll unveil the insights that will take your sedum propagation to new heights, no matter the time of year.
Understanding the Seasonal Dance
Spring’s touch awakens sedum’s zest for growth. This is when life bursts forth, and your succulents are eager to sprout new roots. Propagation during this period is akin to riding a wave of natural momentum. Trim some healthy top growth, make a clean cut, and let the soil’s warmth encourage rooting. It’s like the plants are cheering each other on, rooting faster than at any other time.
Summer is a trickier affair. The scorching sun can sometimes fry our best intentions. If propagating sedum in these hotter months, seek out a dappled shade to shelter your delicate cuttings. Early mornings or cooler evenings are prime propagating times when the sun’s rays are forgiving, and the soil’s embrace is still warm.
As autumn paints its colors on the canvas of nature, sedum propagation can continue with gusto. By adjusting your methods to accommodate cooler nights, you can help your cuttings acclimate. Ensure proper drainage and provide a cloak of mulch to shield against the chill, fostering a snug environment for root establishment.
Winter might seem like a time to rest, but for those in milder climates, sedum propagation still whispers possibilities. The key is to employ a layer of protection—such as a cold frame or a sunny windowsill. This microclimate within a cold outside world offers the sedum a gentle nudge to continue growing, albeit at a slower pace.

Remember, each season’s trickery is but a puzzle to be solved. By tuning into these slight seasonal shifts, we can coax the sedum to continue its propagation marathon. Real-life examples pepper gardens worldwide, where sedum enthusiasts observe and adjust, turning the once-static act of propagation into an engaging, dynamic pursuit.
With each season’s passage, one becomes more attuned to the sedum’s needs, perfecting the art of growing these resilient beauties into thriving, verdant clusters. By embracing the challenges and learning from the natural world, your propagation journey becomes a tale of triumph, each sedum cutting a testament to your growing prowess.
Frequently Asked Questions
Embarking on the journey of sedum propagation can often ignite a flurry of questions, and rightly so! This miraculous process of transforming a single leaf into a full-fledged succulent is nothing short of botanical wizardry. Let’s dive into the world of sedum propagation with real-life examples that will help you become a green thumb guru!
What’s the ideal time to propagate sedum?
Timing is everything! Just like a well-timed joke, the success of your sedum propagation can hinge on when you decide to start. Springtime is the golden hour for sedums, as the warmer weather and longer days provide the perfect conditions for new growth. Imagine little sedum babies sprouting up just in time to soak up the summer sun!
Can I propagate sedum from any piece of the plant?
While it might be tempting to snip off any part of your sedum and hope for the best, not all cuttings are created equal. Go for the healthy, green stems or plump leaves, as they’re the prime real estate for regrowth. It’s like choosing a ripe avocado over a bruised one—your taste buds (and in this case, your succulents) will thank you!
Do sedum cuttings need rooting hormone to thrive?
Rooting hormone can be the gentle nudge your sedum cuttings need to burst into growth. Picture a personal trainer for plants, egging them on to develop those strong roots. But it’s not a strict requirement; many sedums are naturally inclined to root with just water and soil. They’re like the self-starters of the plant world!
How do I know my sedum cuttings are ready to plant?
You’ll notice little white roots waving at you from the cut end of your sedum, signaling they’re ready to plant. It’s the plant-equivalent of a baby’s first steps—exciting and a sure sign that it’s time to transition to their own pot. Like a young bird leaving the nest, these roots are ready to explore the soil on their own.
What soil should I use for my newly propagated sedums?
The perfect soil for your sedum is like a cozy bed—well-draining and airy. A mix of potting soil, coarse sand, and perlite is the dream team for these succulent superstars. It’s like setting up a five-star hotel for your plants, ensuring they have a luxurious stay as they grow.
Now let’s take a visual break and see sedum propagation in action. Watch as this green-thumb guide shows you the ins and outs of multiplying your succulent collection!
My sedum cuttings are wilting—what am I doing wrong?
Don’t panic! Wilting can happen for a few reasons, such as too much sun or not enough water. It’s like getting a sunburn or feeling parched—a gentle reminder that your sedums have needs too. A little shade and regular watering can bring these babies back to their perky selves.
How often should I water my propagated sedum?
Overwatering is the arch-nemesis of sedum. Imagine wearing wet socks all day—your feet wouldn’t be too happy, right? Sedums prefer a light drink now and then, akin to sipping a refreshing cocktail on a hot day. Allow the soil to dry out between watering to keep those roots healthy and strong.
With these expert insights and a sprinkle of patience, you’ll watch your sedums flourish. Propagating these hardy succulents is a rewarding experience, adding a splash of green to your life and empowering your inner plant parent!


