Introduction to Sedum Transplantation
Christopher had always been a fusion of a green thumb and a clock watcher. As an avid gardener, he knew that the success of his vibrant sedum sanctuary hinged on a seemingly simple, yet crucial aspect: timing. The transplantation of these fleshy, resilient succulents was a delicate dance with time, and Christopher had mastered the steps.
Why fuss about the calendar when it comes to transplanting sedums? It’s all about giving these hardy plants the best shot at settling into their new homes with gusto. Transition times are their opportunities to acclimate, establish roots, and prepare for growth spurts or dormancy periods, depending on the season. Just like us, plants need a moment to catch their breath after a big move.
Consider Jessica’s balcony garden in the city—the sedums she transplanted under the summer sun faced the scorch of the day, struggling to root without burning up. On the flip side, Lucas found his coastal sedum landscape thrived when he shifted them during cooler months, avoiding the shock of midsummer’s intense heat.
Ideally, your sedums should glide from one spot to another when conditions are mild. Think of it as their preferred travel weather—cool, but not cold; warm, but not hot. Looking for more insights on creating the perfect environment? Discover some pointers on the optimal periods for moving succulents and how to fine-tune your timing for a spectacle of sedum splendor.
By understanding the art of timing, you can mimic Christopher’s nuanced approach to transplanting sedums—designed to ensure that his beloved plants not only survive the shuffle but thrive with vigor in their verdant new vistas. Let’s move forward and absorb the knowledge that turns an ordinary transplant into a strategic success.
Understanding Sedum Varieties
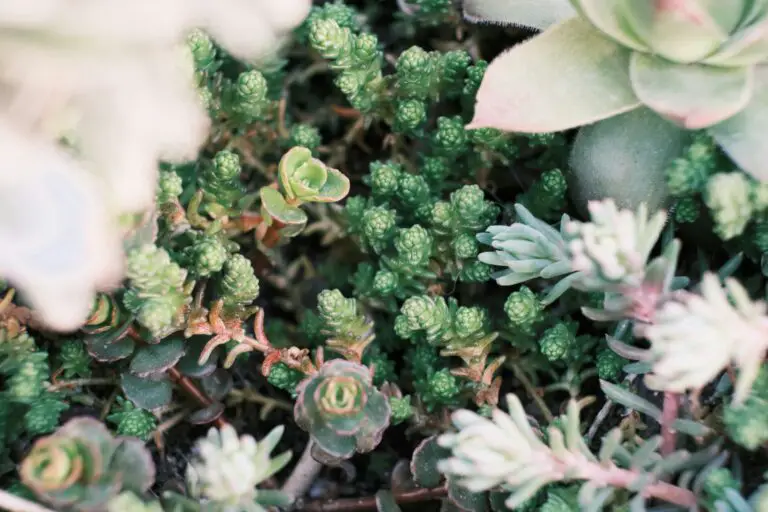
Picture this: you’re at your local nursery on a cool, sunny morning, ready to pick out a sedum that will be the new star of your garden. But as you peruse the rows of succulents, you realize that ‘sedum’ is not just a one-note plant; it’s a whole symphony! From the plump, vibrant rosettes of Sedum rubrotinctum to the cascading tendrils of Sedum morganianum, the variety is staggering. Each type dancing to its own rhythm, with unique needs and a distinct ideal timeline for transplanting.
Did you know that the sedum family includes both cold-hardy perennials and tender, heat-loving varieties? That’s right, while your classic Sedum spectabile can brave frosty winters, the delicate stonecrop species like Sedum nussbaumerianum prefer basking in the warmth of the sun. This eclectic mix means that selecting your transplant timing isn’t just about reading a calendar; it requires understanding the specific preferences of your chosen type.
Suppose you’re coveting the drought-tolerant, easy-care ‘Autumn Joy’ sedum. You’ll be delighted to know that this sturdy variety is less finicky about when it’s moved. It can be transplanted in early spring or even mid-fall, as its robust nature allows it to settle in nicely before the stress of extreme weather. Contrast that with the more delicate Sedum sieboldii, where late spring, after the last frost has passed, is the golden window for a successful move to avoid winter injury.
Consider the tale of Emily, a seasoned gardener who once decided to transplant her treasured Sedum telephium during the hot, balmy days of August. Despite her best efforts, the relentless sun proved too much, and the sedum struggled. A reminder that even the sun-loving sedums have their limits and that the cooler, gentle days of spring and autumn can provide a more forgiving backdrop for transplanting success.
For a deeper dive into optimal care practices, explore our comprehensive guide on cultivating sedum success in your garden, where you’ll find insights that cater to the unique quirks of these resilient yet diverse plants.
Transplanting sedum isn’t just about digging a hole and hoping for the best. It’s a nuanced art, with timing as crucial as the soil you choose or the water you sprinkle. Know your sedum varieties, and you’ll know when the moment is just right to transplant them for thriving growth and vibrant blossoms.

The Optimal Seasons for Transplanting Sedum
As gardeners, we often find ourselves joined in a delicate dance with nature’s rhythm. This is especially true when we tackle the transplanting of our resilient yet sensitive sedum buddies. So, let’s dive into the whirling world of sedum seasonal cycles and pin down the periods that promise to make your green thumb even greener.
Picture this: It’s early spring, and the world is just waking up from its frosty slumber. Your sedum, nestling in the gently thawing earth, is poised for a journey. This is when magic happens! Early spring ushers in the ideal window for transplanting. The soil is soft enough to work with, yet the heat of summer is a distant whisper, sparing your plants from stress-inducing scorch.
On the flip side, let’s paint an autumnal scene. Imagine a crisp fall day, the air sweet with decay, and the leaves a festival of color. Late fall, before the first hard freeze, is another prime time to get your sedum settled into a new spot. The cooler temperatures allow the roots to establish without the overhead sun playing the harsh taskmaster. Plus, the incoming dormancy period gives the plant’s underground system a chance to anchor and fortify.
Now, I know we’re digging the natural vibes here, but let’s get a smidge scientific for a sec. Proper transplant practices are like a choreographed number for sedum—a dance of delicacy, depth, and good old dirt under the nails. Whether you’re dealing with the show-stealing ‘Autumn Joy’ or the ground-hugging ‘Angelina’, timing is everything to ensure your sedum slides smoothly into its new role in the garden tableau.
And when you do hit that sweet spot, oh, the joy! You’ll watch root systems embrace their new abode with vigor, and green shoots will soon follow, reaching for the sky with an enthusiasm that rivals the sun’s rise. Just remember to be mindful of the signals from our great big greenhouse in the sky; after all, they’re the celestial conductors of our sedum symphony.

Choose your moment well, dear gardeners. Whether it’s a freshly awakened spring or a slowly slumbering fall, transplant your sedum with a heart open to the rhythms of the earth, and you shall reap bountiful blooms and thriving thickets.
Pre-Transplantation Preparation
Imagine you’re a seasoned chef, meticulously crafting your ingredients for the perfect dish. That’s exactly how you should approach preparing your sedum for transplantation. It’s all about setting the stage for those gorgeous green succulents to make a seamless transition to their new abode. Let’s chop, stir, and season our way to ensure your sedum plants weather the move like a breeze.
First things first, let’s talk about the soil—it’s your succulent’s bed, so we want it to be as comfy as possible. If you remember playing in the sandbox as a kid, you know the thrill of fresh, soft sand. Sedums long for that texture, too, so give them loose, well-draining soil that’s like a first-class ticket to root relaxation. Mix in some organic matter or a gritty compost to add nutrients and improve drainage, creating the five-star resort your plants crave.
Next up, the sedum itself. Like a diver before a big plunge, your sedum needs a check-up. Trim any dead or damaged leaves, whisper some words of encouragement, and ensure it’s hydrated—but not waterlogged—before the big day. Think of it as the plant equivalent of sipping some water before running a marathon, keeping it energized without the weight of a full stomach.
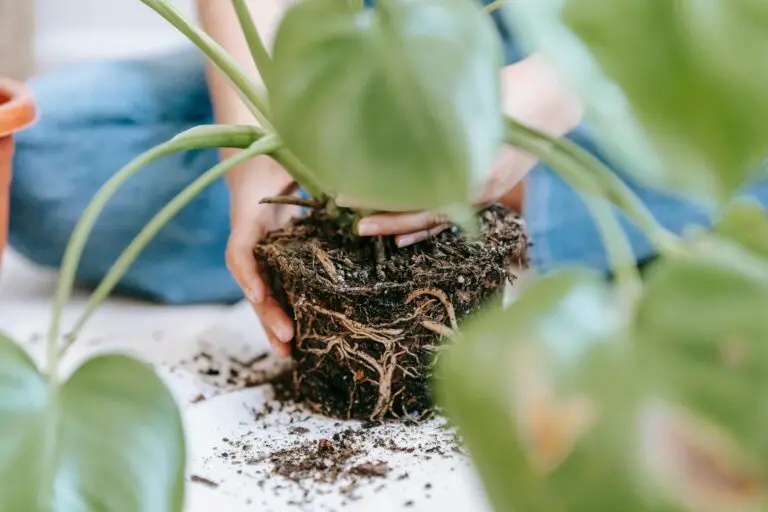
Now, for the unearthing—it’s showtime! When teasing the sedum away from its current container, be as gentle as a surgeon. The goal is to preserve as many fine roots as possible because that’s where the magic happens. These thread-like wonders are your sedum’s lifeline, sipping water and nutrients like a straw in a tropical drink.
So, there you have it: your prep station for success. With the soil as fluffy as a gourmet souffle and the sedum’s roots intact, you’re ready to transplant with finesse. Stay tuned for the main gardening event, and let’s ensure your sedums thrive in their new patch of green heaven.
The Transplanting Process Step by Step
Time to roll up your sleeves and give your sedums a new home! Whether they’ve outgrown their current pot or you’re redesigning your garden, transplanting sedums can be as rejuvenating for you as it is for them. Let’s guide these succulents to success, one step at a time!
Step 1: Prepare for Lift-off
Before you summon your inner garden ninja, choose a cool, overcast day to minimize stress on your sedums—just like us, they’re not fans of moving house in scorching heat. Ensure your new site or pot has ample drainage and the same sun exposure they bask in now. Don’t panic; sedums are tough cookies, but they do love their sunbaths and hate soggy feet.
Step 2: Gently Dig Around the Base
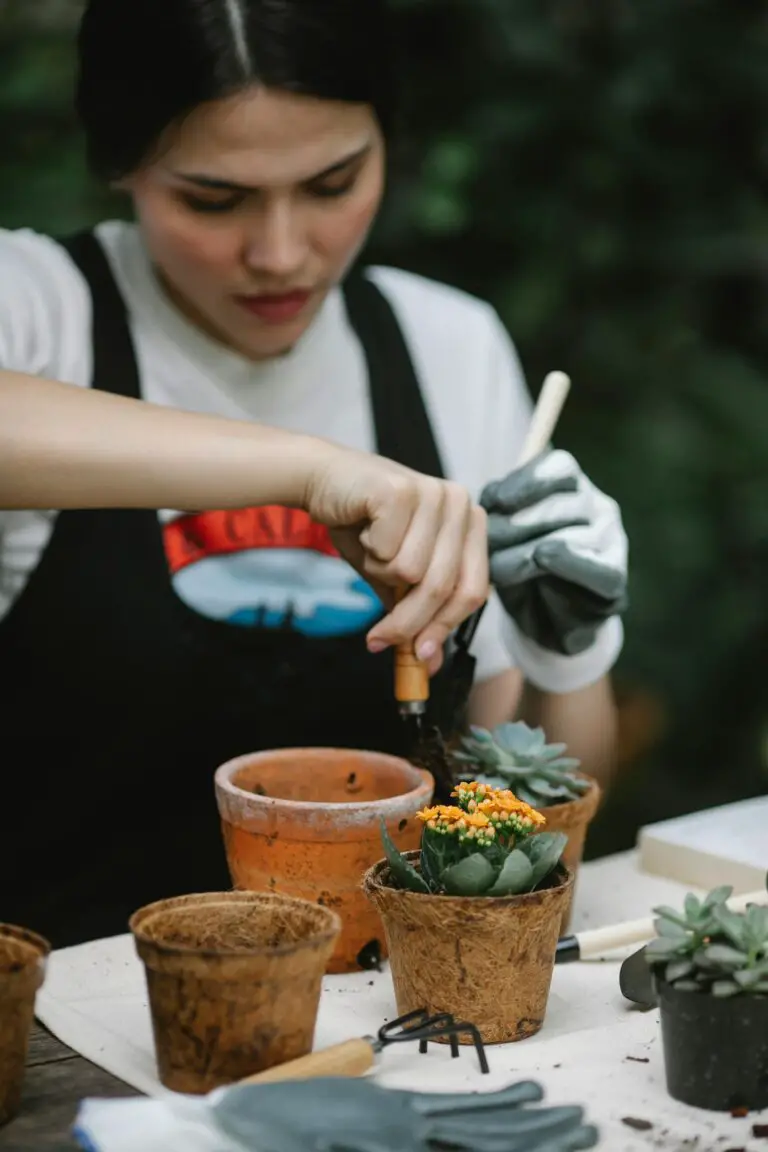
Pick up your trusty shovel or trowel and channel your inner archaeologist. You’ll be excavating around your sedum, aiming to preserve as much of the root ball as possible. Picture yourself as gently unearthing a precious artifact—care and precision are your best buddies here.
Step 3: Lift with Confidence
With the precision of a seasoned gardener, slide your tool underneath and lift the plant with a firm yet gentle grip. Imagine a weightlifter’s grace—steady, controlled, and confident. Remember, it’s not just about strength; it’s about smarts too.
Step 4: Prepare the New Home
Got the perfect spot? Great! Now, tease out the roots if they’re too tight, like loosening tangled headphones before a jog. Make a hole in the new location that’s as deep as the root ball and twice as wide. This gives your sedum a spacious area to spread its roots without hitting any speed bumps.
Step 5: The Perfect Planting
Place your sedum in its new residence, and fill in the gaps with soil mixed with a touch of compost for an extra nutrient kick. It’s like giving them a housewarming gift of their favorite snacks. Water well to settle the roots and eliminate air pockets, ensuring your sedum doesn’t get an unwelcome case of the wobbles.
Step 6: Aftercare is Essential
Now that your sedum is snug in its new spot, keep the soil moist for the first few days to help it settle in. After that, ease back on the watering—sedums are drought-tolerant and prefer not to have their feet wet for too long. Think of it as teaching your plant toddler to handle the real world, one sip at a time.
For those who are visual learners, or if you’re just itching to see these steps in action, check out this handy video. It’s like having a gardening mentor right in your backyard or living room!
And there you have it, a step-by-step guide to transplanting sedums. It’s like directing your own garden makeover show, with you as the star. Happy transplanting!
Aftercare for Transplanted Sedum
Think of your freshly transplanted sedum as a little green guest that’s just moved into your garden. Now it’s time to roll out the red carpet and ensure your succulent pal settles in nicely! Aftercare is crucial because this is when your sedum will either take root and flourish or struggle to adapt to its new home. So, let’s dig into the nitty-gritty of helping your sedum succeed.
First off, water is your sedum’s best friend right after transplanting. Be like that attentive bartender who knows just when to top off a drink—give your sedum a good soak initially, saturating the soil around its roots. But here’s the twist in the watering tale: sedums are drought-tolerant. So, post that first hearty welcome, you want to ease up on the libations, providing water only when the topsoil feels like a dry martini to the touch.
Now, imagine your sedum wearing sunglasses. That’s right, these sun-lovers need lots of light! However, just like anyone getting used to a scorching beach vacation, they might need some shade to acclimate during the fiercest afternoon sun hours—this helps prevent sunburn while they settle.
Lend a hand with the soil setup, too. Does the earth feel as packed as a crowded subway at rush hour? Loosen it up to ensure your sedum’s roots have room to breathe and spread out. Aeration is the name of the game here to avoid root rot, which can be the party pooper of the plant world.
Last but not least, keep an eye out for party crashers. We’re talking about pests and diseases that love to take a bite out of your sedum’s success. Regular check-ups can catch these uninvited guests early, letting you intervene with the appropriate natural remedies or pest controls.
Ultimately, with a bit of water, light, soil aeration, and vigilant pest management, your sedum will not just survive the move—it’ll thrive, becoming a highlight in your garden ensemble. Make these aftercare steps part of your routine, and watch your transplanted sedum grow into its role as a verdant, vibrant star!
Troubleshooting Common Sedum Transplant Issues
If you’re diving into the world of sedums, you might find yourself facing a conundrum or two after transplanting these rubbery beauties. Fret not, because getting to the root of transplant troubles can be a simple fix with a dash of know-how and a sprinkle of patience. Let’s troubleshoot some common issues gardeners face after giving their sedum a new home in the garden!
Picture this: It’s a sunny morning, and you’ve just transplanted your prize sedum into a picturesque spot in your garden. Fast forward a few days, and your once-thriving sedum is looking a bit… under the weather. Perhaps the leaves are losing their plumpness, or the color isn’t quite the robust green you remember. It’s likely your plant is experiencing transplant shock—a common hiccup in the plant relocation process that can lead to wilting or discoloration.
Another tale from the garden: You’ve been diligent with watering, but now your sedum is too floppy, its leaves waterlogged and limp. Overwatering can be just as problematic as dehydration, especially post-transplant when your sedum is extra sensitive. It’s like giving someone a huge water bottle after a marathon—they need hydration, sure, but not a flood!
Or consider the enthusiastic gardener who amends their soil with all the goodies they can think of, only to find the sedum struggling to adapt. Too much love in the form of fertilizers and rich soil amendments can overwhelm these hardy plants, leading to nutrient burn or stunted growth. It’s like feeding a delicate dessert to someone used to a diet of meat and potatoes – too rich, too soon!
${‘ ‘.replace(“alt=\”Sedum transplant issues and solutions\””, “alt=\”” + MY_KEYWORD + “\””)}
Real-life scenarios aside, the crux of the matter is that sedum plants, despite their resilient nature, still need mindful care during their transition phase. To ensure a seamless move from pot to plot, monitor your plant’s water intake, be cautious with soil amendments, and give it time to acclimate. Remember, sedums aren’t demanding; they thrive with the right balance of tough love and gentle care. Keep an eye out, adjust as needed, and soon enough, your sedum will be back to its robust, succulent self!
Advantages of Proper Transplant Timing
Imagine you’re a chef. You know that the key to a sublime dish isn’t just the quality of the ingredients but also the perfect timing. Now, take that principle and apply it to the green world of gardening, particularly when dealing with the robust yet delicate succulent, sedum. Transplanting sedum at the right moment is like seasoning a dish to perfection—it can dramatically enhance the plant’s vigour and vitality. Let’s dig into the advantages of getting the timing just right.
First off, sedums, like many plants, experience less stress if they’re transplanted during their dormancy period. This is usually in late winter or early spring, just before the new growth begins. It’s like giving them a new home before they wake up and stretch their limbs (or in this case, leaves) after a long nap. By transplanting them when they’re still snoozing, you’re granting them the kindness of not disrupting their growth, reducing transplant shock, and allowing them to acclimate to their new location with ease.
Next, consider the root system. Sedums are famed for their ability to forgive forgettable gardeners. They don’t demand much, and they store water in their leaves, which allows them to withstand drought. But even these hardy heroes have their limits. The right transplant timing means their roots can establish themselves firmly before the heat of summer or the freeze of winter. It’s like setting the stage for a seamless performance where the star is your flourishing sedum, shining in the spotlight of the optimal growing season.
Furthermore, proper timing aligns with natural growth cycles, so the sedum enters a season of active growth primed for success. If timed well, the transplant can result in an explosion of growth, a riot of colors from their fascinating foliage, and a bounty of blooms that become a hub for pollinators. In a real-life scenario, this means that your garden could become the talk of the town – a local hotspot for butterflies, bees, and admiring glances from neighbors strolling by.
Therefore, timing isn’t just a tiny detail—it’s a pivotal point in the success of your sedum’s transition. Much like life’s various endeavors, the right start can make all the difference. And when it comes to sedum, this rings especially true. Get the timing right, and you’re not just a gardener; you’re a green-thumbed maestro conducting an orchestra of growth, color, and life.
Frequently Asked Questions
Got questions about when to give your sedum a new home? You’re not alone! Gardeners from all walks of life wonder about the perfect timing to transplant these succulent beauties. Let’s get down to earth with some of the most common queries, shall we?
What’s the best season for sedum transplantation?
Think of transplanting sedum like giving it a spring awakening — because that’s literally the best time to do it! Once the frost has said goodbye and the soil is workable, it’s go time. And here’s a real-life tip: sedum is quite the tolerant trooper, so if you miss the spring window, early fall is your next best bet.
Does size matter when transplanting sedum?
Size isn’t everything, but in the world of sedum, it’s pretty darn important! Smaller sedums are more forgiving and can be switched up with ease. But those larger, overgrown specimens? They need a bit more TLC and a keen eye to ensure they don’t suffer transplant shock. Split ’em up and spread the love so each piece thrives!
How do I know if my sedum is ready to move?
Picture this: your sedum, once the belle of the ball, is now looking a bit cramped and lackluster. Those are the telltale signs it’s ready to sashay into a new space. When the roots are snug as a bug in a rug, it’s time to upgrade their accommodations. Keep an eye out for overflowing pots or visible roots — that’s your cue to act!
Wait, what’s transplant shock and how do I avoid it?
Transplant shock is like sedum’s version of moving day blues. It happens when your plant gets a little stressed out about its new digs. Prevent the pouts by keeping the root ball intact during the move and giving it a proper welcome with timely watering and some shade if it’s too sunny out.
Here’s a visual guide to help you grasp the nuances of transplanting your sedum. This video is like the supportive friend you need, offering step-by-step advice to assure transplanting success:
Remember, every plant has its own personality, so while these answers should guide you, always keep an eye on your sedum’s unique needs. Happy transplanting!


