Introduction to Sedum Varieties and Their Growth Patterns
When it comes to versatility and resilience in the plant kingdom, sedums take center stage. Showing up in an array of forms – from ground-hugging carpets to stout, upright beauties – they present a masterclass in diversity. Picture this: low-growing types sneak between rocks in a rockery, while others burst upright with blooms that would make any bouquet blush. Their foliage? A kaleidoscope of greens, purples, and even oranges that can rival any painter’s palette.

Yet it’s not just about good looks with these tough plants. The growth patterns of sedum varieties reflect an adaptability shaped by their environments. Whether sprawling beneath the open sky of a field or tucked in a snug garden corner, they stretch, spread, and thrive with minimal fuss. A visit to a sedum plant care guide would reveal just how undemanding these succulents are, asking little more than a sunny spot to call home.
Sedums don’t play by the strict rules of structured growth; instead, they flit around them. In a suburban garden, they might form a dense mat, providing a perfect contrast to more vertical neighbors. Meanwhile, in a more natural setting, they could surprise you by becoming a backdrop for delicate wildflowers, proving that they’re not just sidekicks in the flora world.
What’s more, the impact of care practices and the environment on their development is humbling. Excessive watering? They’ll politely decline. Too much fertilizer? They’d rather not. Care for them like the resilient wonders they are and watch as they return the favor by flourishing. To say that these plants are cooperative companions in the garden would be an understatement; they are the epitome of low-maintenance muses.
Importance of Trimming Sedum
Have you ever seen a sedum that looks like it’s trying to stretch its limbs after a long nap? That spread-out, languid form can be quite charming, but it’s not always what we gardeners are aiming for. This is where giving your sedum a little snip-snip can work wonders! Trimming sedum isn’t just about keeping appearances—it’s like a wellness retreat for your plants, promoting healthy growth and ensuring they remain the belles of the garden ball.
Imagine a sedum plant as a tiny, leafy artist, crafting a vibrant sculpture of blooms each season. Without a proper trim, this artist gets a bit overwhelmed. The center of the plant can become congested, leading to poor air circulation and a hide-and-seek playfield for pests. A well-timed trim keeps the core of the plant airy and healthy, helping it to avoid an unexpected rendezvous with diseases.
Now, picture a sculpted bonsai or a pristinely shaped topiary. We trim these plants to maintain a certain aesthetic, and your sedum seeks the same attention to detail. Regular trimming helps preserve the appealing shape of your sedum, preventing it from becoming too tall and leggy, as if it’s desperately reaching for the neighbor’s garden snacks. Instead, it maintains a compact, robust form, perfect for enhancing your garden’s visuals.
Ever noticed how a haircut can make you feel lighter and perhaps a bit bouncier? Sedum plants relish that feeling too—trimming controls their size, making sure they fit neatly in their designated garden space. No one wants a sedum so large it suffocates the nearby delicate pansies or bullies the shy violets out of their sunbeam.
And when it comes to their star-studded bloom show, trimmed sedums steal the spotlight. Pruning at the right time encourages plants to produce more flower buds. Just imagine, more of those dazzling star-shaped blossoms to captivate your senses and add a splash of color to the green canvas of your garden! More blooms mean more invitations sent out to butterflies, bees, and other pollinators for an exclusive garden party hosted by—you guessed it—your spectacularly trimmed sedum.

But where can you learn more about taking care of your succulent companions, you might ask? Dive into our comprehensive guide on unveiling feline risks and care tips to become a full-fledged sedum whisperer. Because much like a cherished pet, your sedum thrives with proper care and love that extends beyond the shears.
When Should You Trim Your Sedum?
Sedum, with its lush foliage and vibrant flowers, has a surprising secret: it loves a good haircut! But just as you wouldn’t chop your locks without a mirror, trimming sedum requires knowing just the right time. Strike the scissors when the season is ripe, and you’ll witness a botanical renaissance that would make even the most seasoned gardeners green with envy.
The untold tale begins in early to late spring. As winter’s chill makes its exit, your sedum will start to stir from its seasonal slumber, itching to vibe in the vivacious sun. This is often the prime moment for a light trim, giving those early shoots the “go-ahead” to mature into a lush, summer spectacle. Avoid the rookie mistake of winter pruning, though—you might just nip away potential growth and leave your plant sulking in the soil.
Ah, but what if summer has slipped by and your sedum stands like a neglected masterpiece? Fear not! The end of summer or the onset of fall presents another opportune window to get your botanical stylist hat on. Ready your shears, because trimming now can prevent your beloved sedum from sprawling and encourage a denser, less floppy posture. Just imagine a stand of sedums so poised and polished, passersby can’t help but stop and stare!
It’s not just the when, but the how. An excellent trim encourages your sedums to grow fuller and sturdier. But beware the urge to overdo it; a tad too enthusiastic with the trimmers, and you might stunt the next season’s bloom. A gentle pinch here, a thoughtful snip there, and you’ll have a sedum display that’s the toast of the neighborhood.
You don’t have to take my word for it, though. Dive into this handy video titled “How to Pinch Your Autumn Joy Sedum to have a Fuller Plant” which beautifully demonstrates the results of proper pruning techniques.
And while we’re doling out top-notch advice, consider peeking at our complete guide to growing sedum, whether you’re cultivating your own secret garden indoors or persuasion of petals outdoors. It’s a treasure trove of botanical wisdom you won’t want to miss.
Ultimately, the best season and conditions for trimming sedum rely on a blend of astute timing and deft technique. It’s about fostering growth while tailoring aesthetics, ensuring your sedum remains the crown jewel of your garden year after year. So, armed with shears and newfound knowledge, step out into the greenery and trim with confidence—your sedum is counting on you!
How to Properly Trim Sedum Plants
Perhaps you’ve seen a lush carpet of sedum in your neighbor’s garden and wondered how they manage to keep it looking so full and vibrant. Or maybe you’ve inherited a sedum patch in your new home, and it’s looking a little worse for wear. The secret might just lie in a good trim—but not just any trim. Let’s roll up our sleeves and find out how to prune your sedum to perfection!
Step 1: Gather Your Tools
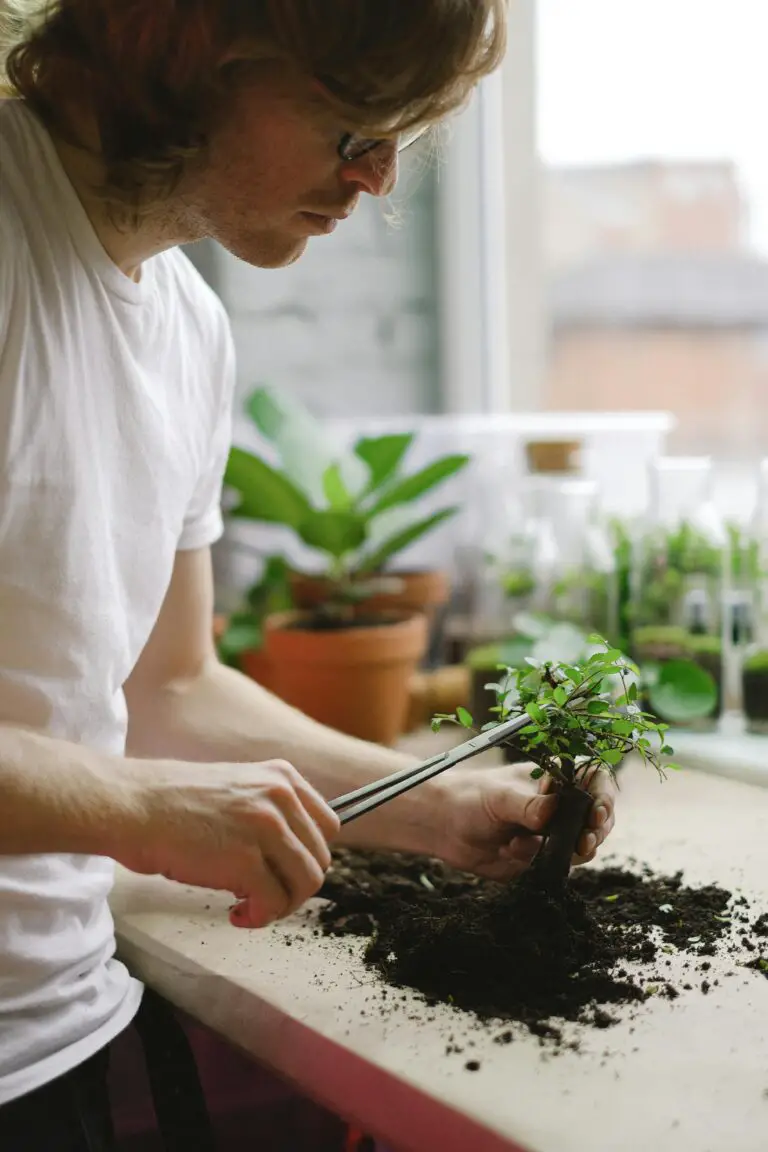
First things first, you’ll need the right tools for the job. A pair of clean, sharp garden shears will do wonders and ensure a clean cut. For larger varieties of sedum, a pair of loppers might be necessary. You’ll also need gloves to protect your hands—sedum sap can be irritating to some skin types.

Step 2: Timing is Key
Most sedums peak after the summer’s heat, so the best time to give them a trim is in early spring. Pruning them back at this time encourages bushier growth and can help prevent legginess. Imagine it like giving your plant a motivational pep-talk after a long winter’s nap.
Step 3: Cutting Techniques
For the low-growing varieties, you’ll want to use a technique called ‘pinching’. Just above a leaf node, pinch or snip off the growing tip of each stem. This encourages the plant to branch out and become fuller. It’s like training a young athlete, guiding them to perform their best.
On the other hand, tall sedum varieties might need a more robust approach. These grow upwards and look fabulous in autumn with their starburst-like flowers. To keep them from getting top-heavy and falling over, you’ll need to cut back about one-third of the growth. This is known as the ‘Chelsea chop’, named after the famed British flower show where this technique is often showcased.
Step 4: Disposal and Utilization of Cuttings
What should you do with the trimmed bits and pieces? Composting is an eco-friendly option. Alternatively, consider propagation—many sedum species can be easily propagated from cuttings, giving life to new plants. Here’s a great resource on how to give your sedum cuttings a second chance at life.
Remember that while sedums are hardy, the principle of ‘less is more’ generally applies to their care. Regularly trimming your sedum not only keeps it looking tidy but can also enhance its health and vitality. The next time you’re in your garden, give your sedum the attention it deserves, and you’ll be rewarded with a plant that looks ‘cut’ above the rest!
Common Mistakes to Avoid When Trimming Sedum
If you’re asking yourself “Should I trim sedum?” you’re not alone. Novices and seasoned gardeners alike sometimes approach sedum with pruners in hand and uncertainty in mind. But as with any good story, the devil is in the details—or in this case, the misconceptions. In the world of gardening, even the hardy sedum isn’t immune to the tale of missteps and mishaps. Let’s delve into the do’s and don’ts, ensuring your sedum stays as perky as a protagonist in a feel-good novel.
Mistake #1: Overzealous Trimming
Imagine an artist so enthralled with their brush they forget the canvas can only hold so much paint. It’s the same with trimming sedum; cutting too much can stress the plants and stunt their growth. A good rule of thumb is to never remove more than one-third of the foliage. Remember, moderation is key—just like in Grandma’s secret cookie recipe.
Mistake #2: The Wrong Time Trap
Trimming sedum at the wrong time is akin to wearing sandals in a snowstorm—neither works well. To avoid this gaffe, prune your sedum in early spring when new growth begins or just after blooming to encourage a fresh flush of flowers. Timing isn’t just everything in comedy; it’s crucial in plant care too.
Mistake #3: Dull Tool Drama
Cue the horror music as the gardener approaches with dull blades, causing more harm than a clean cut ever would. Frayed and damaged stems can be an open invitation to disease and pests. So sharpen those tools—it might just be as satisfying as slicing through a crisp apple.
Mistake #4: Ignoring Plant Personality
Each sedum has its own ‘personality’—a set of conditions it thrives in. Treating all sedum varieties the same is like giving a fish a bicycle; it’s pointless. Some may prefer a light trim, while others demand a hard cutback. Understanding your sedum’s specific needs is like recognizing your pet’s favorite treat—they’ll love you for it.
Keeping these common trimming blunders in mind will set you on the path to a garden narrative filled with less folly and more flourish. Picture your sedum, vibrant and vivacious, because you knew to trim the errors before the stems.

Aftercare: Ensuring Sedum Recovery and Growth Post-Trim
So, you’ve just given your sedum a much-needed trim, and it’s looking a bit like a fresher, lighter version of itself. But the journey doesn’t end here! To guarantee your sedum bounces back fuller and more vibrant, you’ve got to step into the role of the plant’s post-trim guardian. Ensuring the sedum sails through its recovery phase smoothly is like helping a friend after a workout; they’re going to need hydration, the right nutrition, and some proper rest under the sun (or shade).

First things first, let’s talk water. Sedum plants are like those mythical creatures that don’t need much to thrive. But just after a trim, they appreciate a gentle drink to help heal those fresh cuts. The keyword here, my friends, is ‘gentle’. Overwatering a post-trim sedum is like giving a drowning fish a glass of water – counterproductive. You want to aim for soil that’s just moist, where your sedum can sip the water at its leisure.
Next up, sun exposure. More is not always better; it’s a classic case of sun-guilt. Just like you wouldn’t take a midday jog after donating blood, don’t let your sedum sit out in the scorching sun post-trim. Find a nice spot with bright, indirect light where your leafy buddy can photosynthesize without the worry of a sunburn. Think of it as a comfortable lounge chair away from the intense rays.
Last but not least, let’s sprinkle in some talk about feeding your green friend. Fertilizing a just-trimmed sedum should be done with the finesse of a chef seasoning a gourmet meal. The right amount of post-trim fertilization works wonders. It’s the spa treatment for your plants, encouraging new growth and rejuvenating those tired stems. But remember, too much of a good thing can lead to fertilizer burn, which is the botanical equivalent of a food coma.
Remember, caring for your sedum post-trim is not just about doing the right things, but doing them at the right pace. If you treat it too aggressively, it’s going to feel like it went from a relaxing trim at the salon to a boot camp. Take it slow, be attentive, and watch as your sedum comes back to life, stronger and more splendid than before. Like a phoenix rising from the clippings—it’s a story of resilience, growth, and, most importantly, fabulous foliage!
Frequently Asked Questions
As sedum lovers, we all want our plants to be the neighborhood showstoppers. But sometimes, we stand in our gardens, shears in hand, wondering if we’re making the right cut. Well, fret not! Let’s nip those questions in the bud.
Can you trim sedum in the fall?
Short answer: Absolutely! In fact, it’s a fantastic time to give your sedum a light haircut. Picture this: it’s a crisp autumn day, and your sedum stands tall, but a bit disheveled after the summer. A trim now can encourage a bushier growth come spring, much like pruning back those trees that now have a kaleidoscope of leaves. Just remember, don’t go too crazy – think of it as neatening up rather than a full-on buzz cut.
Should sedum be cut back before winter?
Envision your sedum as a hibernating bear, cozy and dormant. Cutting it back before the first frost is like giving the bear a nice blanket. It helps prevent rot and sets the stage for reinvigorated growth. But if you prefer the natural winter interest of frost-kissed sedum heads, leaving them be is totally fine. They’re like nature’s own ice sculptures!
How do you propagate trimmed sedum cuttings?
Here’s where the magic happens. Your trimmed cuttings aren’t just green waste—they’re potential new plants! Stick those cuttings in a pot, and with the same care you’d give a fledgling bird, watch as they root and grow into new sedum babies. Just keep them warm, lightly watered, and they’ll be ready to spread their leaves and take on the world—or at least your garden.
What if my sedum is overgrown?
Overgrown sedum can feel like a backyard jungle. But with your trusty shears, take on the role of a jungle explorer. Trim back the excess, carve out some order, and behold the transformation. Not only will this give your sedum a fresh start, but it also makes room for surrounding plants to breathe and thrive. It’s like crowd control for your garden so that every plant gets its moment in the sun.
So, keep these tips in your gardening toolkit, and your sedum will not just grow, but flourish. Remember, every snip and trim is a step towards a thriving garden symphony!


