Introduction to Sedum Care
Imagine a plant that not only adds a splash of color to your garden year-round but also thrives with minimal fuss. Welcome to the world of sedum plants, the hardy succulents that have captured the hearts of gardeners worldwide! Whether you’re a seasoned green thumb or a budding plant enthusiast, sedum offers a spectacular variety of species, each with its distinctive charm and care requirements.
Sedum species range from ground-hugging wonders to upright sentinels guarding your garden pathways. If you’re wondering about caring for these versatile plants, be assured it’s not rocket science. These robust beauties are esteemed for their drought resistance and capacity to thrive in diverse conditions, from the full glare of the sun to those partially shaded nooks in your backyard.
For a deeper dive into the varied tapestry of sedum species, consider exploring our detailed guide on the heights and types of stonecrop plants. It’s a treasure trove of information that will help ensure your sedum not only survives but thrives.
Understanding Sedum Growth Cycles
Imagine your sedum plants like loyal companions, adapting to the ebb and flow of the seasons, each phase a step in their life journey. Just as we swap out our wardrobes with the changing weather, sedum plants transition through growth stages, guiding us on when to wield our pruning shears for their best interest.
Spring emerges, and your sedum bursts to life, tiny green rosettes poking through the earth. This is merely a peek into the energy stored during winter’s slumber, now ready to showcase a fresh array of foliage. As temperatures rise and days lengthen, the plant kicks into high gear, maximizing growth and swiftly progressing toward its summer peak.
The summer sun brings forth a crescendo of sedum’s efforts, dressing it in vibrant blooms that bees buzz tirelessly around. But it’s not just about admiring the floral display; these months signal a critical time for maintenance. For a deep dive into sedum plant care, consider the importance of hydration and monitoring for any leggy growth that may require a timely trim.
Autumn casts its golden hues, and while many plants prepare for dormancy, sedum stands resilient. Those flourishing summer tops now evolve into a rich tapestry of fall colors, an enduring spectacle. However, this doesn’t mean it’s time to ignore them; controlled pruning can safeguard their sturdiness against winter’s pending frosts.
Winter is a time of rest but not negligence. Your sedum’s remains, if left uncut in fall, provide a stark silhouette against the bleak landscape, and more importantly, sanctuary for beneficial insects. Yet, as winter wanes, the promise of regeneration lingers and preparing for the next cycle of cutting back becomes paramount.
Throughout each stage, it’s essential to stay informed on the right techniques and times for pruning. For further guidance, explore our article on best practices for gardeners, a treasure trove of tips to keep your green companions in top form.
The Ideal Time to Trim Sedum Plants
As a gardener, you know that timing is everything, and that’s especially true when it comes to trimming your beloved sedum plants. So, let’s get down to the nitty-gritty: when should sedum be cut down? It’s a bit like asking when to host the perfect garden party—there’s a prime time to do it, and it mostly depends on the guests, or in this case, the variety of sedum and your local climate.
For the ever-popular ‘Autumn Joy’ sedum, think of it as a party animal that’s okay with a little hangover. You’ll want to wait until early spring to give it a trim. This way, it keeps its glorious seed heads throughout winter, providing an architectural interest in your frost-kissed garden and a buffet for local birds. But for other types, such as the ‘Summer Glory’, the clue is in the name—they party all summer and prefer a tidy-up just as the cooler weather rolls in. And if you’re growing your sedum in more unpredictable climates, where winter comes knocking earlier than expected, then give them a snip in late fall. It’s all about adjusting to the local party schedule!
Let’s not forget, different sedum varieties are like different guests; some are a bit more high maintenance than others. If you’re unsure about your sedum’s preferences, a quick check on their variety can save you from committing a gardening faux pas. But don’t worry, it’s nothing a little bit of research or a friendly chat with your local gardening community can’t fix. For additional information on the best practices for seasonal garden care tips, check out our in-depth guide to keep your sedum and other succulents thriving.
Remember, cutting down sedum isn’t just about following a calendar; it’s about observing your plants and responding to their needs. A sedum that’s been under the weather might benefit from an earlier trim to boost its recovery time before the cold sets in. Just like us, plants need a little extra TLC when they’re not feeling their best.
Perfect timing ensures your plants will bounce back with vigour, ready to show off their fresh green growth and eventually, their vibrant blooms. To get a visual on how it’s done, take a peek at this informative video:
In conclusion, while there’s a general guideline for when to cut down sedum, it ultimately comes down to the specific needs of your plant varieties and the whims of your local weather patterns. Treat your sedum like the individual it is, and you’ll be rewarded with a garden show that’s the talk of the town—or at the very least, the envy of your green-thumbed neighbors.
How to Properly Cut Back Sedum
Okay, green thumbs and gardening enthusiasts, let’s get down to the nitty-gritty of pruning sedum. This isn’t just a snip-snip here and there—it’s a strategic move that can boost the vivacity of your sedum and ultimately elevate your garden’s aesthetics. So, roll up your sleeves, and let’s dig into the details of giving your sedum plants a proper trim!
First off, understand that timing is key. The best time to cut back your sedum is in the spring. Now, you might ask, “Why spring?” Well, it’s when new growth is peeking through the soil and the threat of frost has bid farewell. This sets the stage for a year of robust growth and dazzling displays.
While our flowering friends are resilient, they’re not invincible. Using the appropriate tools is crucial to prevent damage. Bypass pruners are your go-to gadget—they make clean cuts that heal quickly, reducing the risk of disease. Always ensure they’re sharp and disinfected to keep your sedum safe and healthy.
Step-by-Step Guide for Cutting Back Sedum
Here’s a quick guide to get you started:
- Spot the new growth emerging near the base of the plant. This is your signal that the plant is ready for a trim.
- Position your pruners 2 to 3 inches above the new growth, being sure to avoid snipping the fresh, green shoots.
- With your pruners at the ready, make angled cuts. This angle allows water to run off the cut surface, discouraging rot and disease.
- Work your way around the plant, removing dead stems from the previous year. It’s like giving your sedum a fresh start.
- Take a step back and admire your work! Your sedum is now poised for a season of vigorous growth and spectacular blooms.
Remember, less is often more. Be patient with your plants—overpruning can stress them and hamper their performance. Envision each cut shaping the forthcoming blooms, like an artist with a canvas, painting a future filled with radiant colors and lush foliage.
As an added tip, wear gloves to keep your hands safe from any unexpected prickles. Despite sedum’s friendly facade, some varieties can be quite spikey. Safety first, garden glory second!
Check out this helpful video that captures the spirit of the Chelsea Chop (pinching and propagating Sedum), demonstrating just how rewarding it can be when you cut back sedum the right way:
Armed with these instructions, you’re ready to give your sedum the cut it deserves. Approach the task like a symphony, each movement with purpose and in harmony with the next. Happy pruning!
Reasons for Cutting Back Sedum
Understanding when should sedum be cut down is crucial for keeping your sedum vibrant and healthy year after year. It’s not just about following a rigid calendar, it’s about observing the plants and responding to their needs. Let’s delve into the main reasons for cutting back sedum, uncovering how precise timing can make all the difference.
Promoting New Growth
One might think that cutting down a plant could be detrimental, but for sedum, it’s like a refreshing spa treatment! By cutting back the dead or overgrown parts of the plant at the right time, usually in late winter or early spring, you encourage the emergence of fresh, vigorous growth. This helps the plant maintain its zest and keeps it from getting lazy. Just imagine lopping off those tired old stems to make way for youth and vitality—it’s a garden rejuvenation!
Preventing Disease
The tight, lush clumps of sedum leaves can sometimes be a little too cozy, creating a haven for moisture and disease. By judiciously trimming the plants, we increase air flow and reduce humidity within the foliage. This can be particularly critical in late fall or early winter when damp conditions prevail. Think of it as giving your sedum a bit of breathing room, warding off the potential for fungal diseases and ensuring that the only thing spreading through your garden is your sedum, not a plague.
Maintaining Plant Shape
Without a periodic trim, sedum can become the unruly teenager of your garden—sprawling everywhere and refusing to fit in. A timely cut helps maintain a neat, compact shape and prevents it from flopping over, ensuring your sedum remains an upstanding citizen in the community of your garden. The best time for reshaping is just as the new buds begin to show, a strategic snip here or there guiding your sedum to its best form.
For a more visual understanding, let’s take a look at this insightful video which demonstrates some sedum care techniques:
In the end, knowing when and why to cut down sedum is akin to caring for any living thing. It requires attention, a bit of knowledge, and timely action. But get it right, and your sedum will thank you with a bounty of lush, healthy growth that’s as robust as it is beautiful.
Post-Pruning Sedum Care and Maintenance
Tidying up your sedum and snipping away the old, tired foliage is just the first act in the play of perennial care. Once the curtain falls on the pruning performance, it’s time for the encore: maintaining your plant’s health and vigor. Think of it as the behind-the-scenes magic that keeps your sedum spotlight-worthy.
First off, let’s talk hydration. Watering needs shift just a smidge after you’ve given your sedum a trim. You’ll want to keep the soil consistently moist but not soggy, allowing your plant to sip, not swim. This is akin to the careful balance a barista achieves when brewing a perfect espresso—too little water and the flavors won’t flow, too much and your drink is diluted.
What about reinforcements for growth? Fertilization post-pruning should be akin to a nutrient-rich snack rather than a full feast. Employ a balanced, slow-release fertilizer to encourage your sedum’s rebound without overwhelming it. It’s like giving an athlete a protein bar after a race—not a five-course meal.
Keep a keen eye out for uninvited guests as your sedum recovers. Pests and diseases seem to have a knack for finding plants at their most vulnerable, just as opportunists find tourists in a new city. Periodic checks are your best defense, acting as the vigilant security against these botanical burglars.
These ongoing care nuances require a slightly more tender touch post-pruning. By following this regime of watering, feeding, and patrolling for pests, your sedum won’t just live; it’ll thrive. Remember, consistent care is the difference between a plant that merely survives and one that radiates vitality, much like the difference between a well-maintained vintage car and one that merely rusts in a garage.
Troubleshooting Common Sedum Pruning Issues
Pruning your sedum can sometimes feel like you’re walking a tightrope, teetering between underwhelming and overzealous snips. But don’t worry, everyone faces a pruning pickle now and then. Let’s tackle how to avoid these common garden goofs together.
Snipping Mishaps: Taking Too Much Off
Remember Greg from next door? Last spring he took his pruners to his ‘Autumn Joy’ sedum with the enthusiasm of a kid in a candy shop. Come summer, his furious chopping left him with a plant that looked more like a buzz cut than a blooming beauty. Sedum is robust, sure, but it’s not invincible. If you cut back too far, you risk diminishing the plant’s energy reserves, which are crucial for its growth and flowering.
Here’s the lowdown: when pruning, aim to remove only the spent flowers and the top third of the growth. Picture giving your sedum a trim rather than a full-on shave. It’s about maintaining shape and health, not setting a new trend in minimalist garden design.
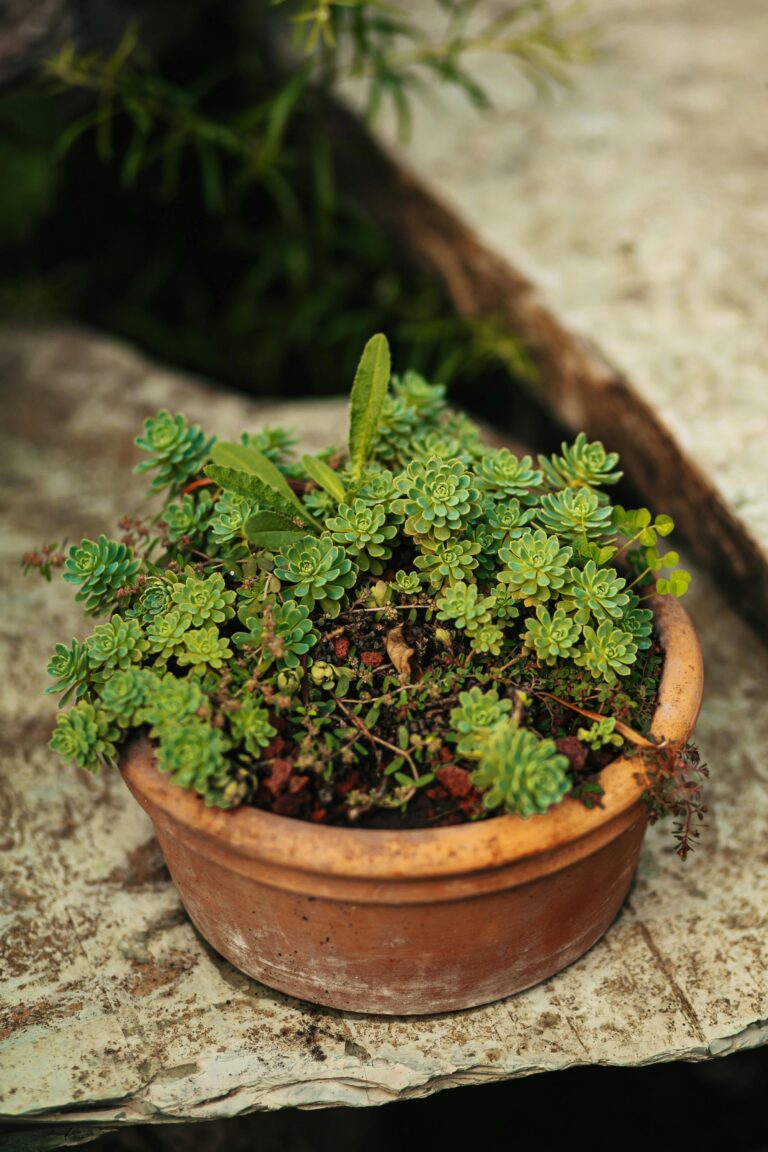
Timely Trims: Knowing the Perfect Time
Think back to Jenny’s garden party last summer. Her sedum was as tall and wide as her dining table, all because she pruned at just the right time. Sedum should be cut down in late winter or early spring before new growth starts—you’re aiming for that sweet spot when the plant is awakening from its winter slumber but hasn’t yet sprinted out of bed. During this time, you can also divide sedum clumps to encourage more growth.
If you prune too early, you may expose the plant to frost damage, and a late pruning can delay the flowering. Set a reminder to check your sedum’s growth in early spring, and you’ll be all set. Just like setting your clocks forward, it’s a simple step that pays off abundantly.
Corrective Measures: Bouncing Back from Pruning Blunders
Encountered a pruning mishap? It happens to the best of us. If you’ve been a little overzealous with the shears, provide your sedum with some TLC. Extra mulch can protect the roots, while a dose of balanced fertilizer helps it regain strength. And if you’ve pruned too late, be patient. The sedum’s resilience will surprise you, as it did for Tom’s garden after that infamous late haircut—it bounced back with gusto, just in time to catch the summer’s final act.
Learn to listen to your plant’s needs, watch for growth patterns, and always use clean, sharp tools to promote healthy cuts. With these tips, you’ll navigate sedum pruning like a pro, ensuring your garden is the envy of the neighborhood—without any quizzical looks or head-scratching moments!
Frequently Asked Questions
Are you finding yourself wondering about the best time to trim your lush sedum or scratching your head about whether to deadhead or not? You’re not alone! Sedum, with its star-shaped blooms and succulent leaves, has quite a fan club, and questions about their care are as common as daisies in a meadow. But don’t fret; we’ve got the dirt on all things sedum, so let’s dig right in!
Can sedum be cut down in spring?
Springtime is a period of rebirth in the garden, and for sedum, it’s no different. Imagine you’re giving your plants a haircut to encourage healthy new growth. Cutting down sedum in spring is like telling it, “Wake up, beauty; it’s time to grow!” Just wait until the threat of frost has passed, then grab your shears and prune away the old, woody stems. Your sedum will thank you with a burst of fresh foliage faster than you can say “spring bloomers.”
Is it necessary to deadhead sedum species?
Picturing butterflies flitting from flower to flower on your sedum? That’s the scene you want! Deadheading, or the removal of spent flowers, can invite more of these winged beauties to your garden party. You don’t have to deadhead sedum, but doing so can promote a second round of blooms and keep your plants looking tidy. If you do decide to deadhead, you’re effortlessly paving the way for more vibrant colors and extended interest in your garden tapestry.
When in doubt, remember that sedum is like that low-maintenance friend we all love—it doesn’t demand much, but a little TLC can go a long way. Keep these tips in mind, and you’ll have a throng of thriving sedums, painting your green space with their lively brushstrokes.
